Post 704117 by JamesT5 on 2014-04-17 19:40:00
Now, before I go on any further I'd just like to say a few things about this job, because this is one of those subjects that some people feel very strongly about. I did debate whether or not to post this up on here so please, don't be too hard on me ok. ;) :B_thumb:
[LIST]
[*]First of all this is the first time I have ever tried to do any kind of repainting on an alloy wheel.
[/LIST]
[LIST]
[*]Secondly, this job is a stop-gap measure only until I can get myself some new wheels, I don't intend this repair to last forever.
[/LIST]
[LIST]
[*]Thirdly, the wheel looks no worse than when I started, yes it's not the original shade of silver but I really don't care because all things considered the overall appearance of the wheel face has improved (as you will see). I didn't respray the back because I'm not bothered too much by that at the moment, the front is more important.
[/LIST]
[LIST]
[*]Fourthly, I fully acknowledge that the method of repair is completely and utterly cowboy in nature, and I apologise to those who are spitting out their cups of coffee in astonishment.
[/LIST]
Ok.....
As some of you know, I probably have the scruffiest wheels on VPC, the paint is flaking off them, they're full of stone chips and really do make the car look a complete and utter mess. With this, the other day I decided that enough was enough and I just had to do something, anything I could, and on a tight budget just to make them look a little less of a wreck.
Some before pictures, just to reiterate how shabby the wheels really are and why I am so keen to smarten then up even just a bit (they look worse in the flesh)........


 Looking better already - part way through the paint strip stage (no I don't have access to a sand blaster, just very sore fingers)...
 After striping the paint I used a professional grade tack cloth to clean the surface, several layers of primer, a few coats of silver base coat (the lightest colour I could find), rubbing down between stages of course and then several layers of clear coat. The finish is ok, there are still some uneven areas but I'm satisfied that the end result is better than how it looked before and for a temporary repair it'll do......

 1 down 3 to go, the other 3 should come out a little better (I hope), I learned a few lessons during this first attempt. I'll probably do about 1 wheel per week so the next one will have to wait until next week now when I have some more time off.
Post 704124 by abdul on 2014-04-17 19:53:06
Looks bette r than when u started
Post 704125 by V70 Graham on 2014-04-17 19:53:08
To be totally honest James I think you've done a good job there, a hundred times better and should last a while even as a 'temporary repair' well done.
Post 704129 by stephenevans99 on 2014-04-17 19:54:33
Makes it look 100% better mate....good job.
Post 704131 by T5frankie on 2014-04-17 19:55:20
good job mate, plenty of alloy laquer on there mate
Post 704137 by BIG G on 2014-04-17 20:03:04
Not bad for a first time quick job.
Post 704139 by stephenevans99 on 2014-04-17 20:03:58
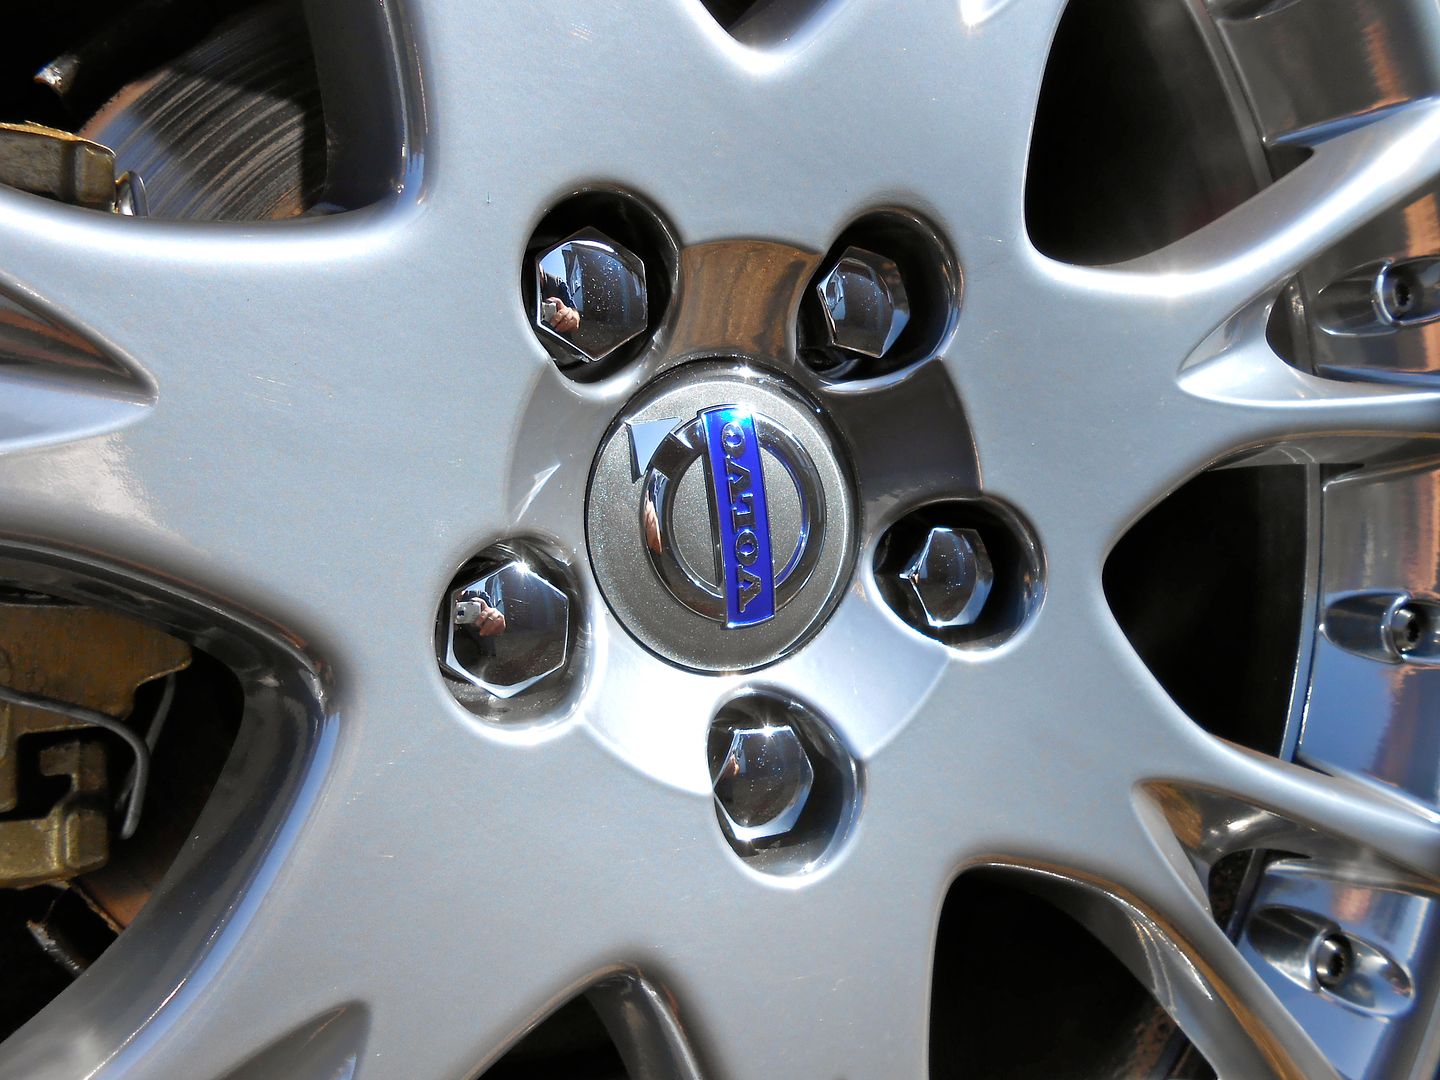
I reckon they're now screaming for a new set of centre caps....make them look really fresh:
Post 704141 by claymore on 2014-04-17 20:19:11
You know how I hate to give James any praise for anything ;), but that looks like a pretty good job to me.
Post 704146 by stribo on 2014-04-17 20:30:17
Looking good mate. :B_thumb: Just don't take an angle grinder to them. ;)
Post 704148 by Harvey on 2014-04-17 20:33:42
Nice job done ,and the best bit is what it didn't cost you to get it looking so much better.
Post 704149 by JamesT5 on 2014-04-17 20:36:02
Thanks for all the positive comments, I wasn't sure how well it would go down. I admit there's a few 'nobbly' bits on it and a few dips I missed but all things considered it's an improvement over the peeling paint, pits and mess that it was before. I'll just be glad to get the other 3 done but I won't rush them, this one wheel has taken me 2 days of intensive work just to get it up like that.
Anyone coming to the Swedish day will hopefully see them in the flesh. I hope the others come out to the same sort of standard, at least they'll look even then.
Post 704151 by JamesT5 on 2014-04-17 20:37:27
[QUOTE=Harvey;704148]Nice job done ,and the best bit is what it didn't cost you to get it looking so much better.[/QUOTE]
Went to Mon and Border in Cwmbran as my colleague at work goes there for all his car refurb stuff, spent about £60 but I'll probably need to top up on some stuff as I got through a little more primer and wet and dry than I expected.
Edit: That's £60 for all 4 wheels, not just the one wheel.
Post 704267 by martybelfastt5 on 2014-04-18 00:40:33
top job looks a great deal better!
Post 704280 by JUDGENINJA on 2014-04-18 09:36:20
James I don't know why you doubted all the praise. Job done properly within the limitations of home DIY is going to be praised by most. Any negative comments are purely to help you and others who may attempt the same.
Looks fine to me... Maybe I should post up a how not to do it as I'm plastidipping a set of wheels at the moment with no preparation. So far they look like some primary school kid has been at them!
Post 704283 by M-R-P on 2014-04-18 09:53:53
Taking into account the fact that you've not had a go at refurbs before, you've done a fantastic job there mate.
I would however, suggest having a can of filler primer to hand as a middle coat. It helps hide dings and imperfections and costs no more than normal primer.
Looking forward to seeing the other 3 wheels finished mate.
Post 704288 by AndysR on 2014-04-18 10:55:32
Have to say looks like a good job, if I was starting out and that was the result of my first attempt I'd be more than happy with the outcome, can only get better with experience :)
Post 704299 by Jimmie on 2014-04-18 11:34:05
Looks a hundred times better than when you first started.
Did you tape up the tyres or use soap to stop making them silver as well or just used black paint ?
Post 704303 by graemewelch on 2014-04-18 11:48:48
this is my prefered primmer for when refurbing alloys. etch primmer is a must for the first coat. this primmer is also a filler primmer so you get the best of both worlds
http://www.ebay.co.uk/itm/MIPA-Etch-Build-Primer-aerosol-beige-or-grey-400ml-/331177455251?pt=UK_Body_Shop_Supplies_Paint&hash=item4d1bb6ee93
Post 704307 by JamesT5 on 2014-04-18 12:55:31
[QUOTE=M-R-P;704283]Taking into account the fact that you've not had a go at refurbs before, you've done a fantastic job there mate.
I would however, suggest having a can of filler primer to hand as a middle coat. It helps hide dings and imperfections and costs no more than normal primer.
Looking forward to seeing the other 3 wheels finished mate.[/QUOTE]
I did actually use a filler primer mate, I should have mentioned it. I used some Car Plan "Hi Build Primer", I think that's basically what you're on about, right?
Post 704308 by JamesT5 on 2014-04-18 12:56:29
[QUOTE=Jimmie;704299]Looks a hundred times better than when you first started.
Did you tape up the tyres or use soap to stop making them silver as well or just used black paint ?[/QUOTE]
I taped them up but I re-masked between each stage.
Post 704309 by graemewelch on 2014-04-18 13:00:24
A good tip would be to use a high quality filler etch primmer. Itll make a huge difference and save a lot of work. 1 tin will do 4 wheels
Post 704310 by M-R-P on 2014-04-18 13:00:49
[QUOTE=JamesT5;704307]I did actually use a filler primer mate, I should have mentioned it. I used some Car Plan "Hi Build Primer", I think that's basically what you're on about, right?[/QUOTE]
Not quite mate, filler primer is almost a putty until it hardens. Hi build is good for hiding fine scratches but filler can hide dents and deep scratches.
Post 704311 by JamesT5 on 2014-04-18 13:02:44
Wheel is now back on the car, some shots......

 :beer:
Post 704339 by T5frankie on 2014-04-18 15:34:19
[QUOTE=JamesT5;704311]Wheel is now back on the car, some shots......
:beer:[/QUOTE]
nice, should've went anthracite lol
Post 704348 by V70 Graham on 2014-04-18 15:43:27
Look graet back on the car.....I expect to see the other 3 done by 'Swedish Day'
Post 704358 by Jimmie on 2014-04-18 16:42:45
[QUOTE=JamesT5;704308]I taped them up but I re-masked between each stage.[/QUOTE]
Next time try brushing on a mix of squeezy on your tyre.
That's what a guy I know does and you wouldn't know when he's finished also it saves a lot of time.You just wash the tyre job done.
When your getting paid for doing the job time is money.lol
Post 704536 by JamesT5 on 2014-04-19 07:11:24
[QUOTE=V70 Graham;704348]Look graet back on the car.....I expect to see the other 3 done by 'Swedish Day'[/QUOTE]
I'll do my best, I don't see why they shouldn't be sprayed up by then Graham. :D
Post 704543 by MIKESC70T5 on 2014-04-19 08:02:02
We'll done James, looks wheely good. :B_thumb:
Post 704548 by stribo on 2014-04-19 08:18:00
[QUOTE=T5frankie;704339]nice, should've went anthracite lol[/QUOTE]
That's sooooo last year, like gay gold. ;)


 Looking better already - part way through the paint strip stage (no I don't have access to a sand blaster, just very sore fingers)...
 After striping the paint I used a professional grade tack cloth to clean the surface, several layers of primer, a few coats of silver base coat (the lightest colour I could find), rubbing down between stages of course and then several layers of clear coat. The finish is ok, there are still some uneven areas but I'm satisfied that the end result is better than how it looked before and for a temporary repair it'll do......

 1 down 3 to go, the other 3 should come out a little better (I hope), I learned a few lessons during this first attempt. I'll probably do about 1 wheel per week so the next one will have to wait until next week now when I have some more time off.


