


 2005 Volvo S60r
 2005 Volvo V70R
I think you should ask Volvo how much a new cover is just for a laugh.Originally Posted by JamesT5

then

Results 21 to 40 of 54
Thread: stripping s60 seat
-
Friday 7th March 2014, 13:12 #21Senior Member
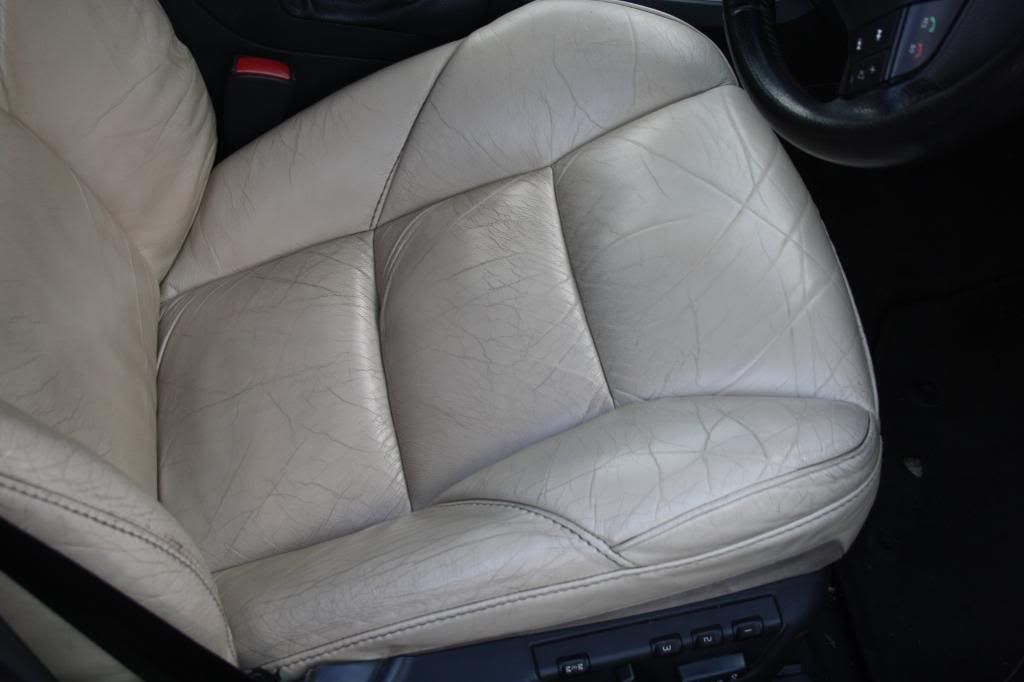
 Keeping it looking stock
- Join Date
- Mar 2012
- Location
- Newton abbot, Devon
- Posts
- 5,567
- Thanks
- 920
Thanked 1,581 Times in 1,296 Posts
-
Friday 7th March 2014, 13:13 #22Senior Member
Still more fettling needed,
will it never end?
- Join Date
- Jan 2012
- Location
- Tadley
- Posts
- 13,326
- Thanks
- 2,620
Thanked 4,587 Times in 3,404 PostsDo yourself a favour Graeme, and source an Atacama interior.

-
Friday 7th March 2014, 13:17 #23Trader
This user has no status
- Join Date
- Nov 2010
- Location
- chester le street
- Posts
- 6,128
- Thanks
- 969
Thanked 1,398 Times in 1,121 Posts Originally Posted by stribo
why would i do sumit as gay as that . need to decied to a good dressing for the plastics. havnt decieded what i use. ive got stp but might try one of the posh ones to see if i can get a longer lasting satin finish
new windscreen coming soon but i havnt told the mrs yet. might keep that one quiets60 2.4 t5 eibach springs,up rated rear anti roll bar, poly bushed wishbones, poly lower engine mount, fmic, bmc air filter, 3" decat, 2.5" stainless exhaust,hlm remap 328bhp,
-
Friday 7th March 2014, 13:21 #24Senior Member
This user has no status
- Join Date
- Jul 2008
- Posts
- 1,820
- Thanks
- 154
Thanked 313 Times in 273 PostsThat used to cost a £1000 to redo the complete interior properly. Originally Posted by stribo
Check Volvokids posts for cleaning infoLast edited by Jimmie; Friday 7th March 2014 at 13:29.
-
The Following User Says Thank You to Jimmie For This Useful Post:
graemewelch (Friday 7th March 2014)
-
Friday 7th March 2014, 14:17 #25Member
This user has no status
- Join Date
- Oct 2013
- Location
- Blackpool
- Posts
- 81
- Thanks
- 1
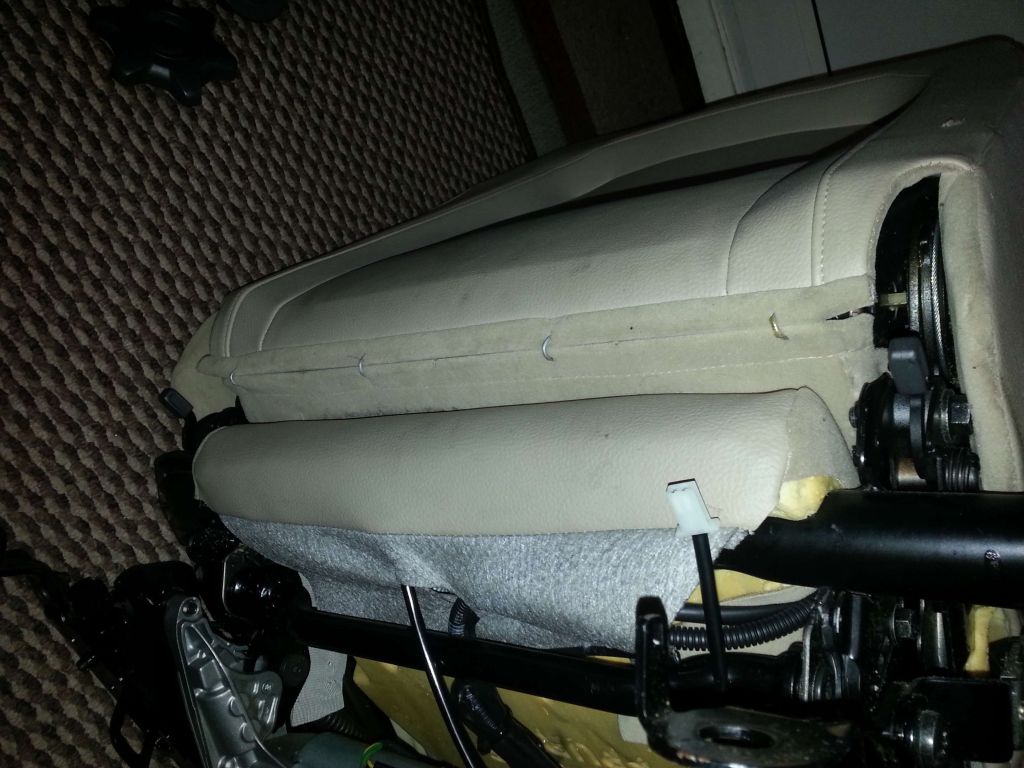
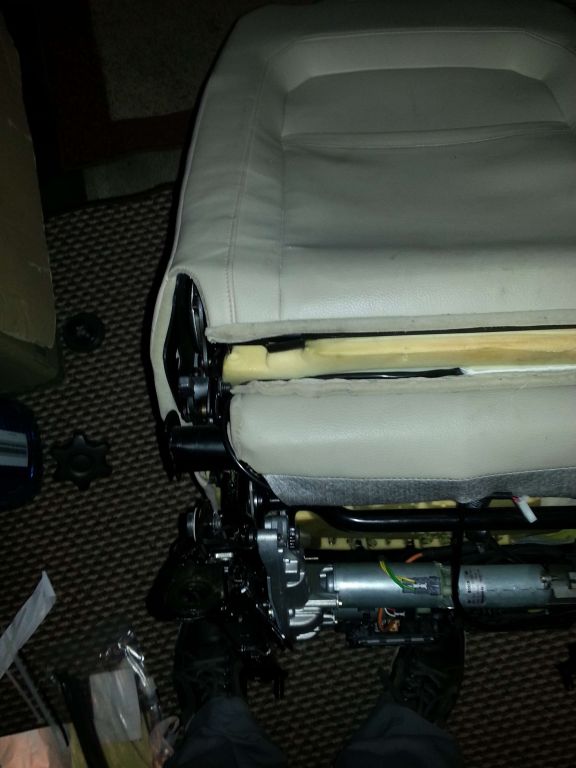
Thanked 58 Times in 42 PostsThis is one of my posts from elsewhere, it shows how to take the S60 seats to bits and recover them
Have you got an S60 with leather seats but no seat heaters fitted as they can be quite cold in the winter mornings, this little lot shows what can be done to add heater pads to both parts of the front seats, not a difficult job but does take a few hours to get it right:
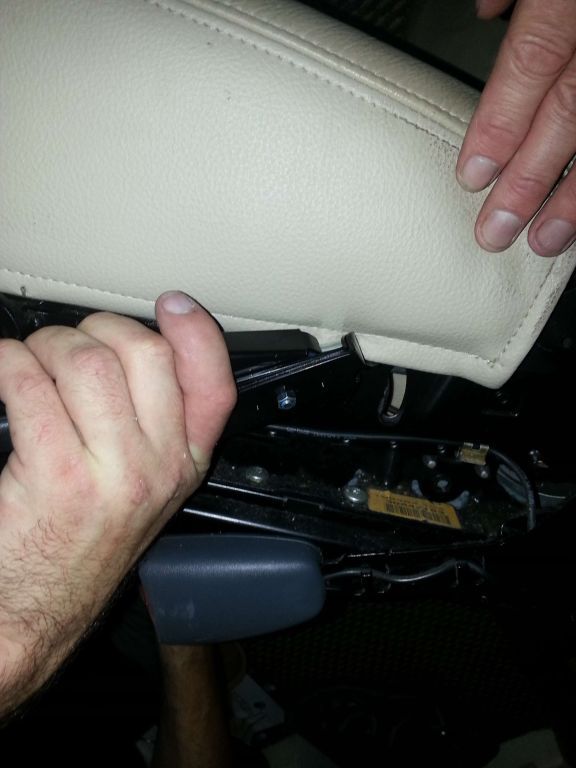
This write up assumes you know how to remove the front seats and the necessary precautions when messing around with front seats that contain airbags. In short you need to remove the four bolts that hold the seat to the chassis before disconnecting the cars battery only then can you disconnect the seats electrical connector(s) to remove the seat from the car.
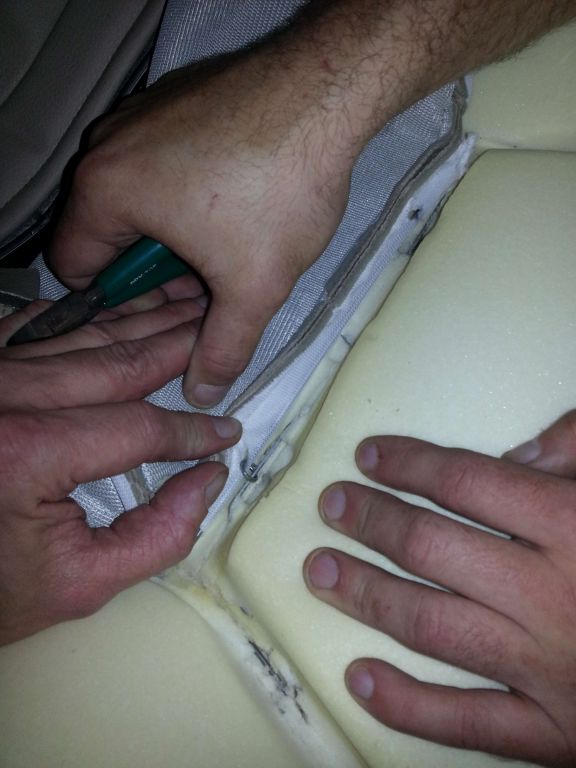
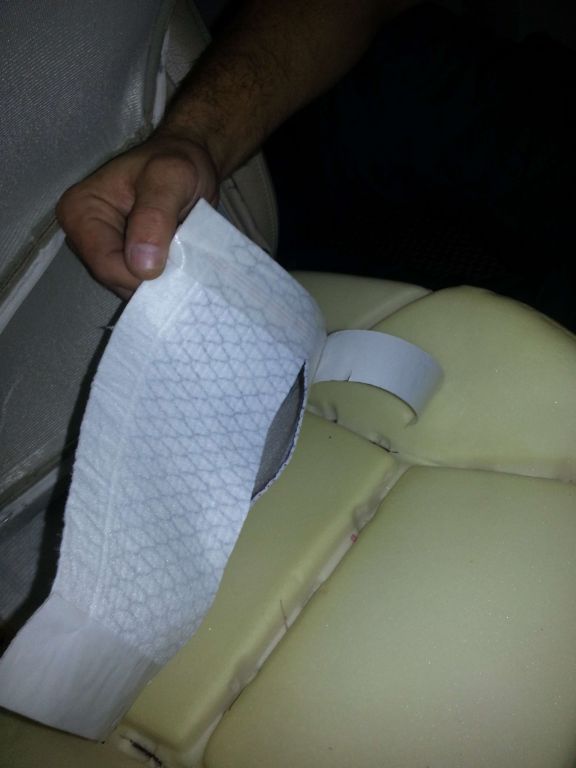
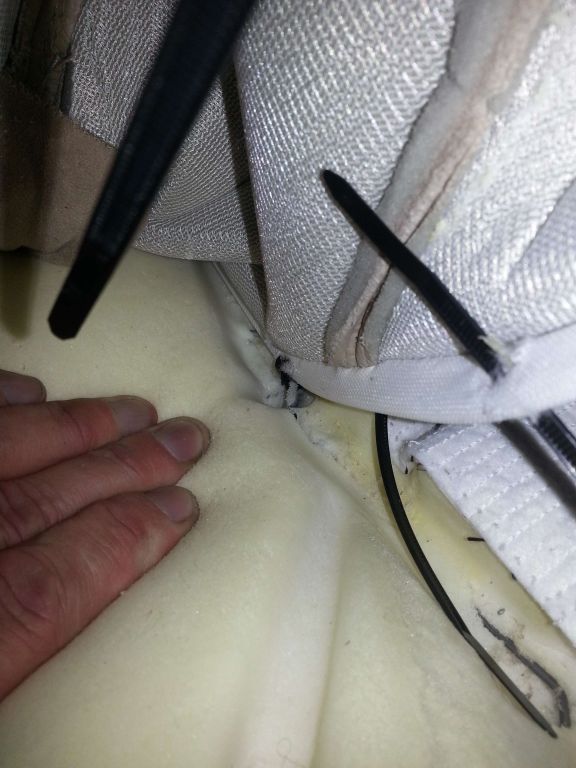
Firstly you need to remove all the hog rings securing the bottom of the leather cover to the base of the seat, best removed using wire cutters by twisting the ring to undo it before threading it out of the seat material:
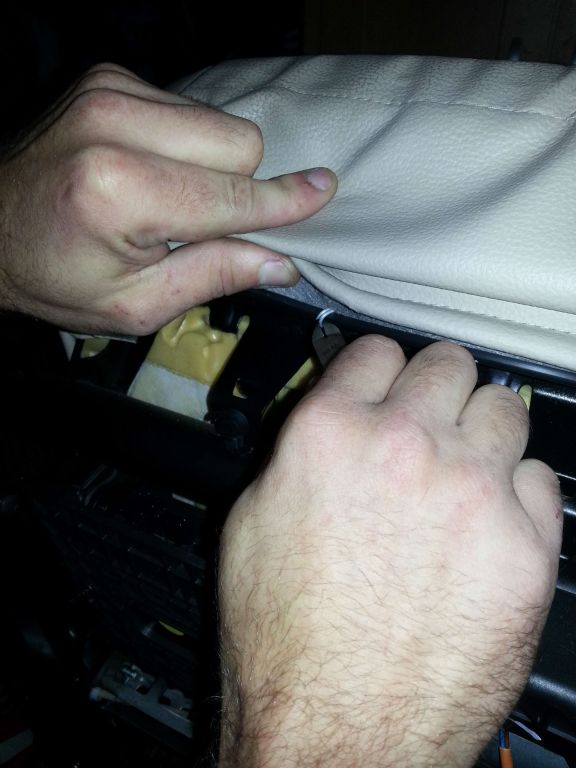
Underneath the seat at the rear of the base are a few more hog rings attaching the leather cover to the seat springs, again remove the rings to release the cover
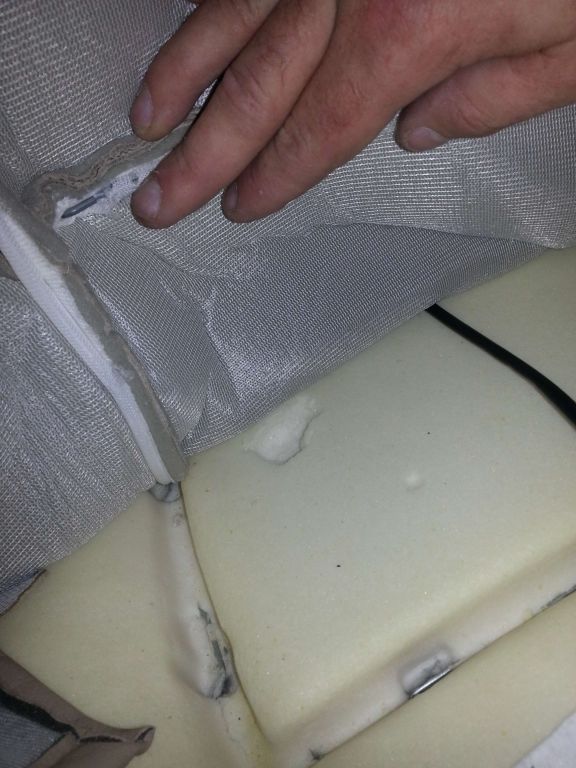
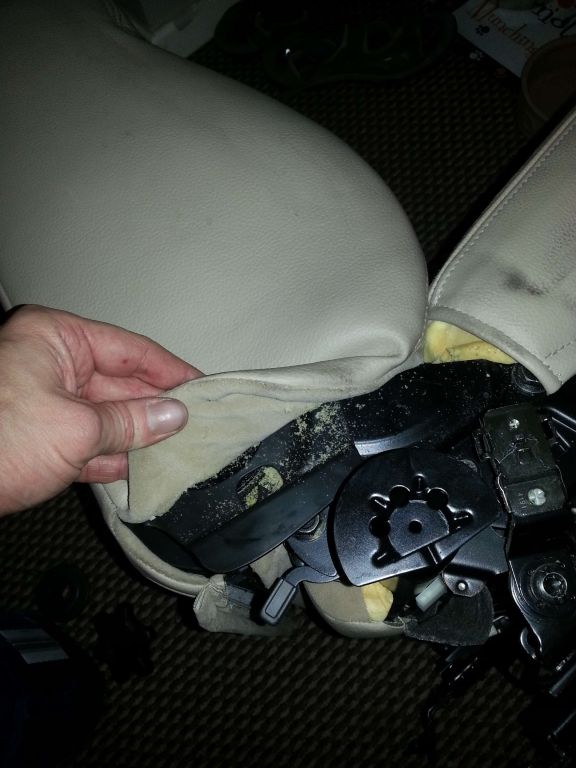
With all the hog rings removed from around the base the sides should pull up over the base foam insert:
Carefully lift the leather cover up to expose the first hog ring connecting the cover to the foam base then remove it, take care not to apply too much vertical force though as you don't want to pull the metal rod out of the foam base
Continue removing hog rings from both sides of the base until you get to the first set of rings running across the base of the seat, remove the hog rings
Then continue working further rearwards to get to the next set of rings running across the seat, remove these rings
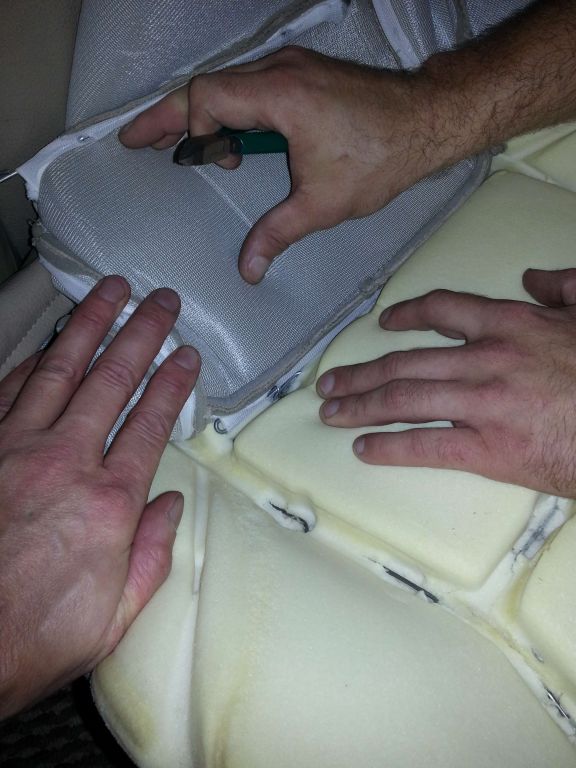
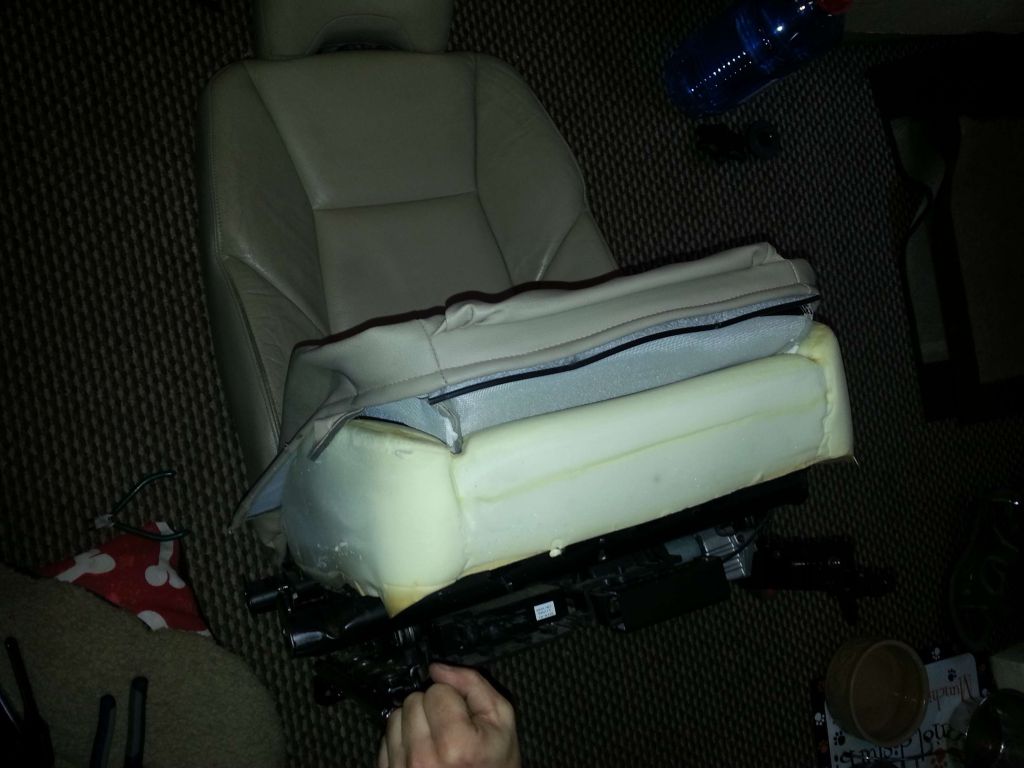
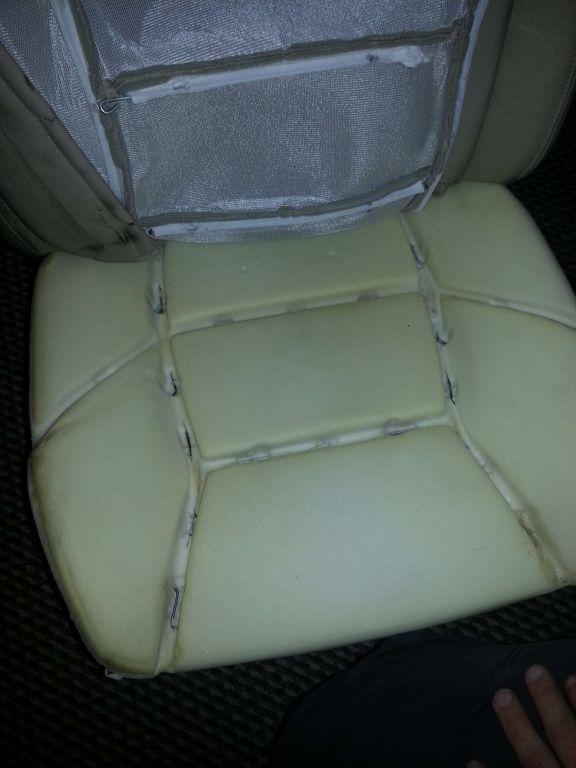
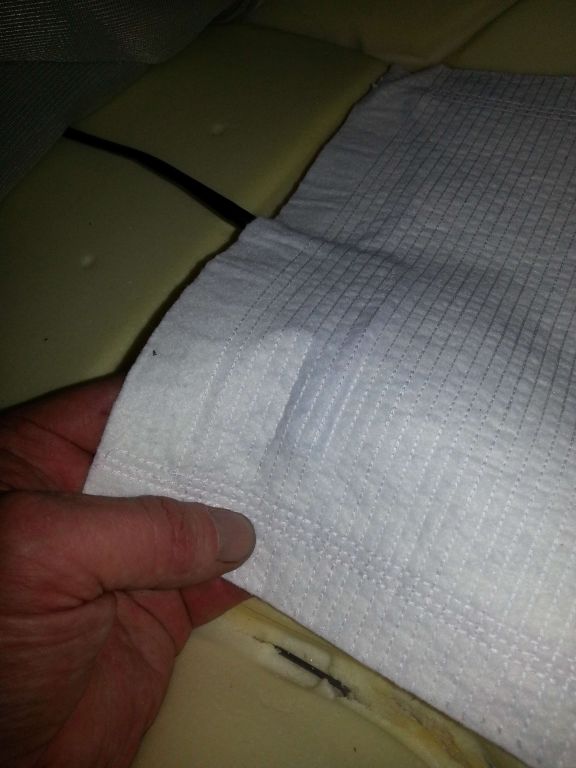
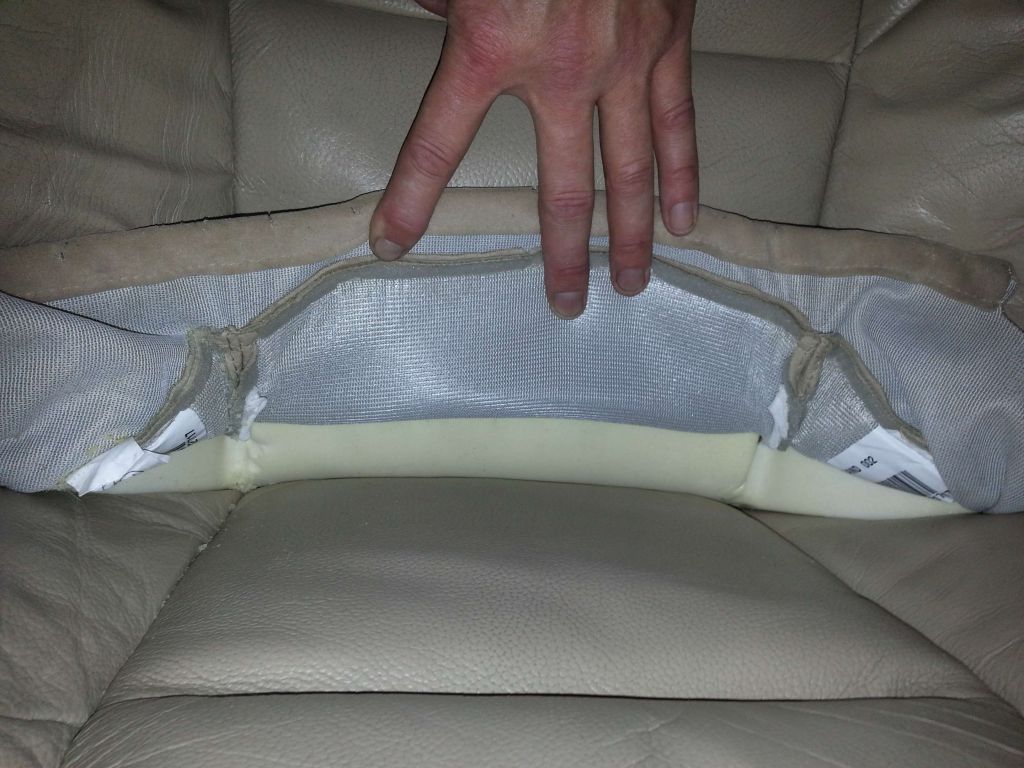
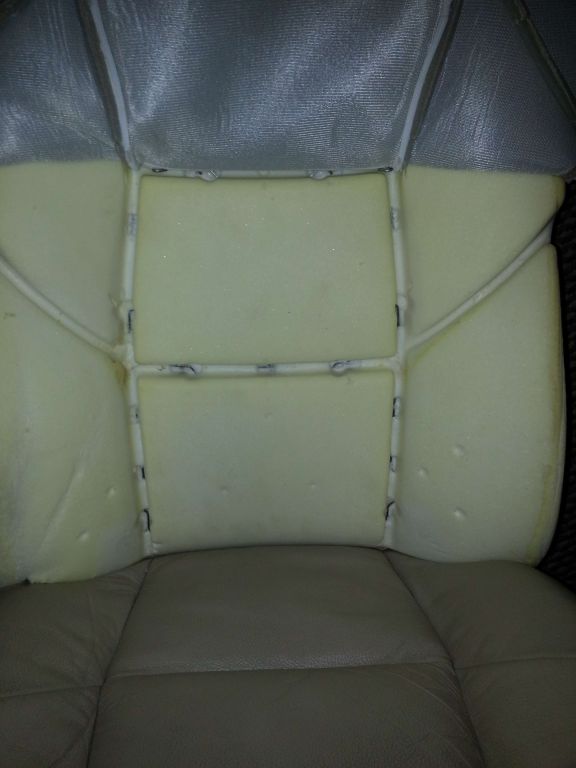
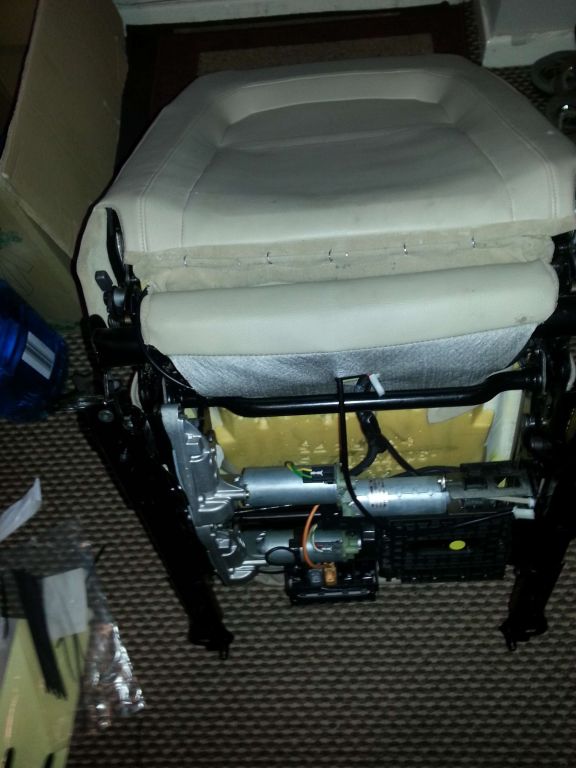
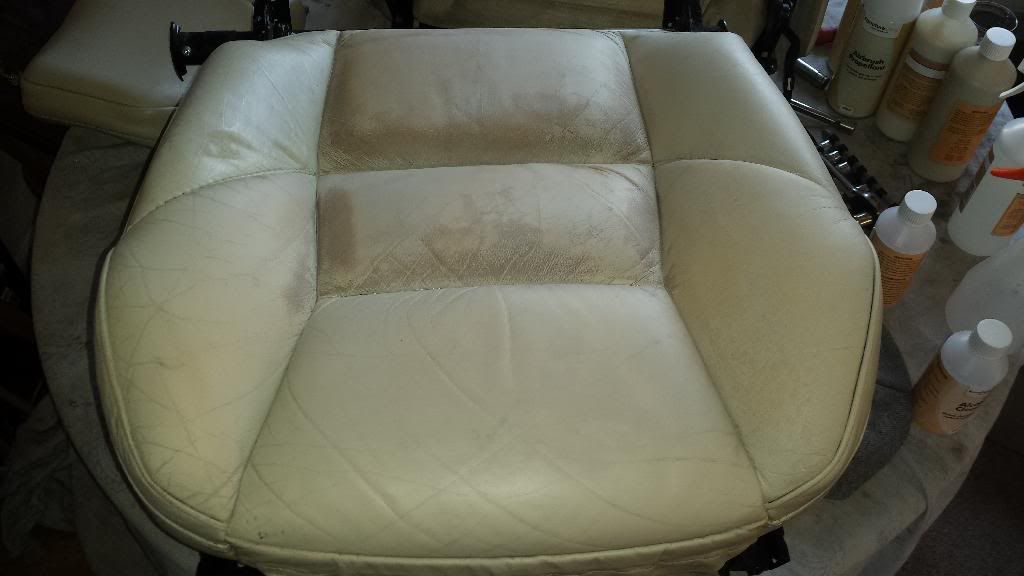
Eventually you will have the leather base cover removed although we left the rear most hog rings in place as we could work around them but you should end up with the seat base looking something like this:
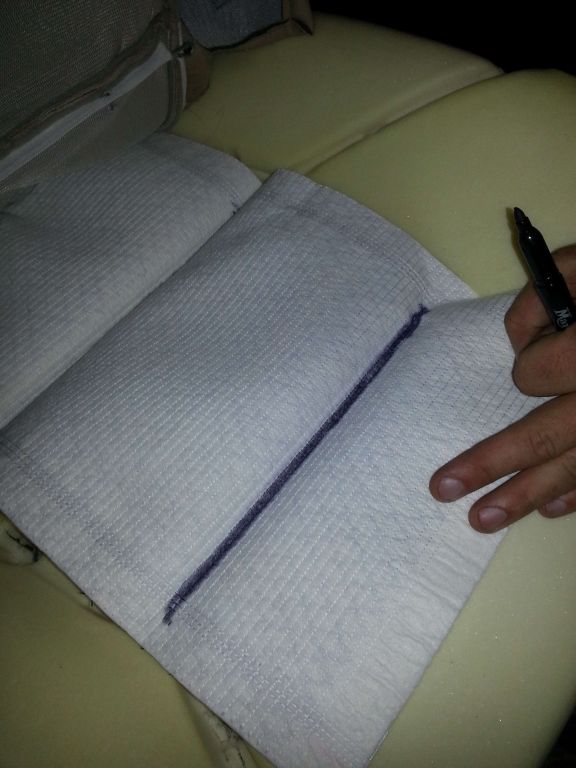
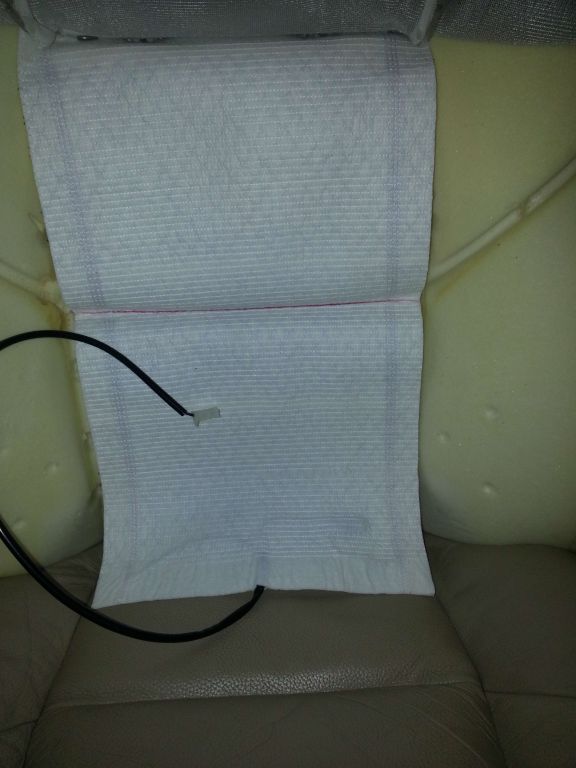
Place the heater mat on to the foam base and push the electrical wires through to the rear of the seat, push the seat heater down in to the channel where the hog rings need to go running side to side and mark the area with a felt tip pen:
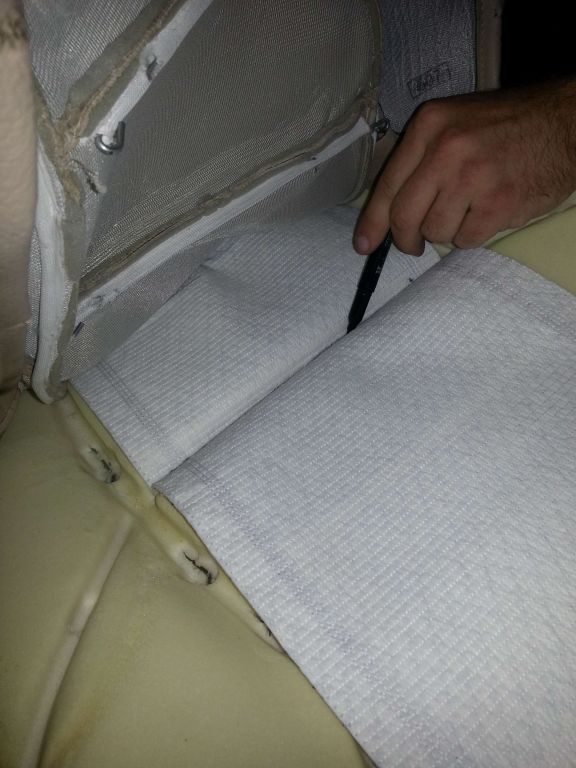
Working further forwards again push the heater mat in to the next channel in the foam base running side to side and mark the location with a felt tip pen:
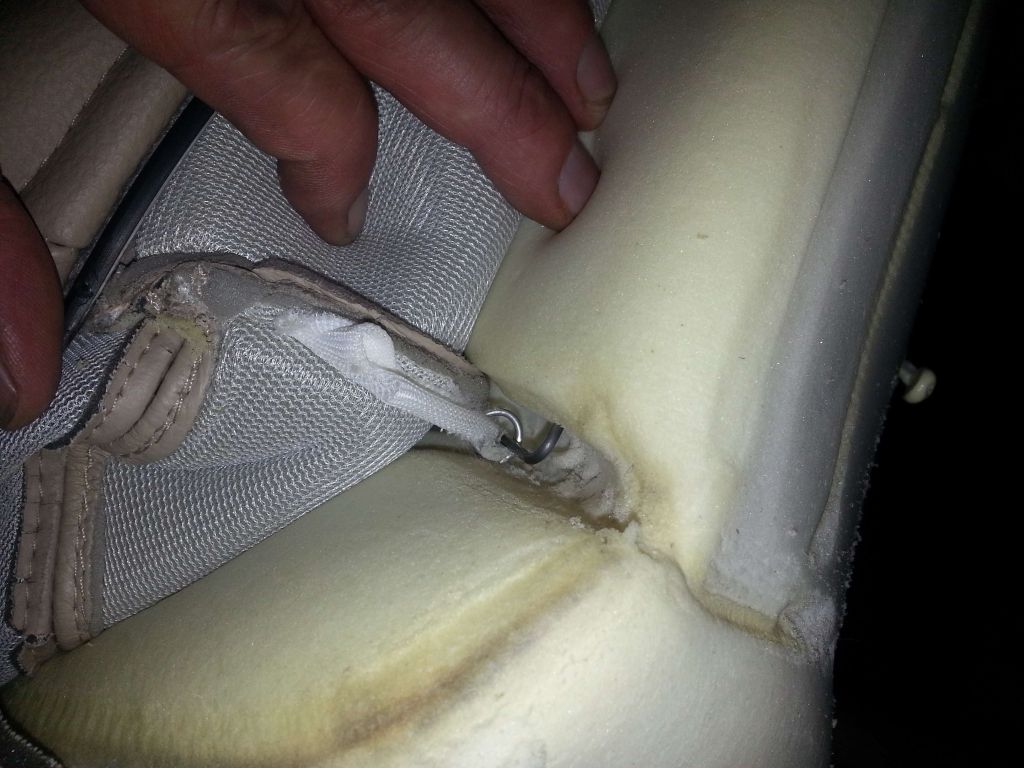
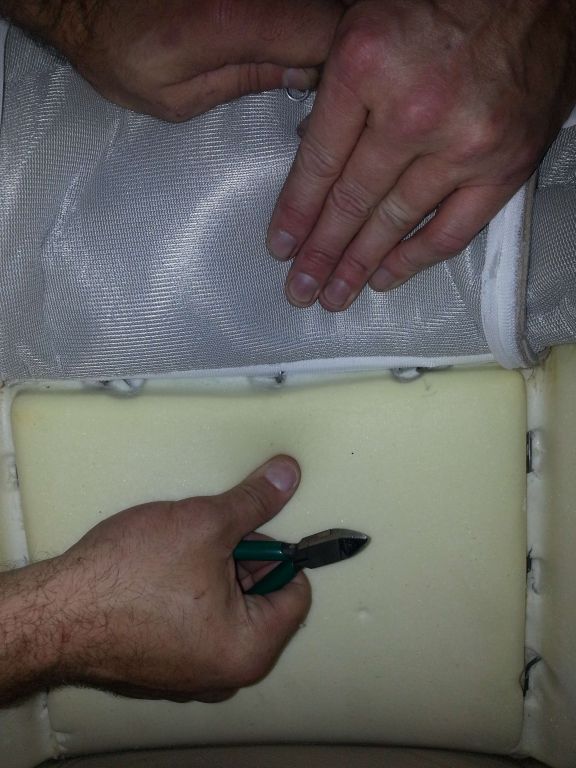
Towards the rear of the heater mat is a temperature switch, this needs to sit in to a small recess in the foam otherwise you will feel it when sitting in the seat, simply tear out a small chuck of foam from the base to accommodate the temp sensor:
The location of the seat temperature sensor although it is difficult to see from the picture, it is very easy to locate by feel:
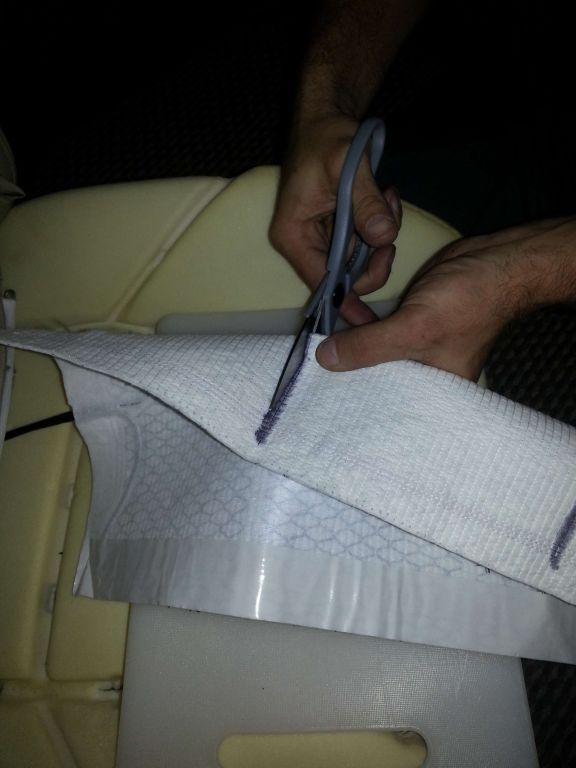
Cut the heater mat where marked up but don't cut the outer 1" strips as these run the power forwards to the rest of the seat heater mat, the slots are required to re-secure the seat cover later on:
The lower side of the heater mat is covered with self-adhesive strips, remove the backing paper and secure the mat in to position making sure that at the two channels running side to side you push the may in to the groove to seat it fully:
Finally put a length of adhesive tape over the leading edge of the heater mat to secure it to the foam base:

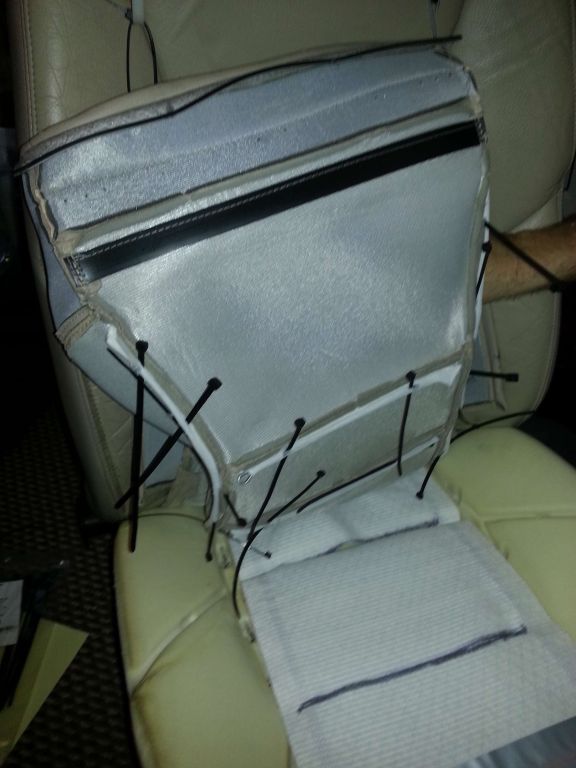
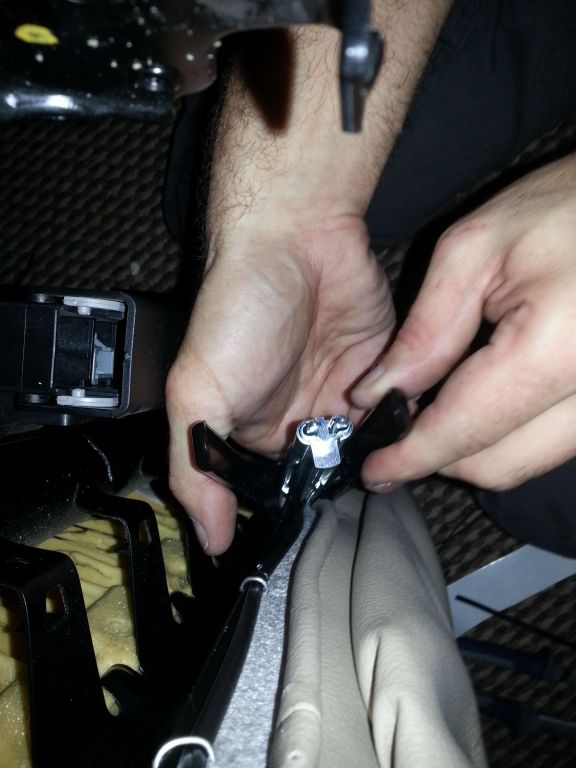
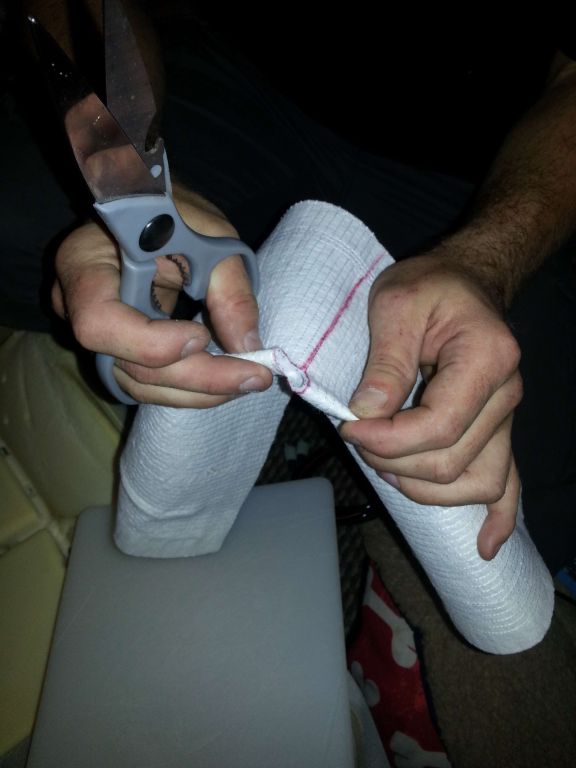
Here we decided to cheat using more modern kit than the hog rings removed earlier as getting new hog rings in place was nigh on impossible due to the restricted access, firstly tywraps were fitted to the leather seat cover:
-
Friday 7th March 2014, 14:18 #26Member
This user has no status
- Join Date
- Oct 2013
- Location
- Blackpool
- Posts
- 81
- Thanks
- 1
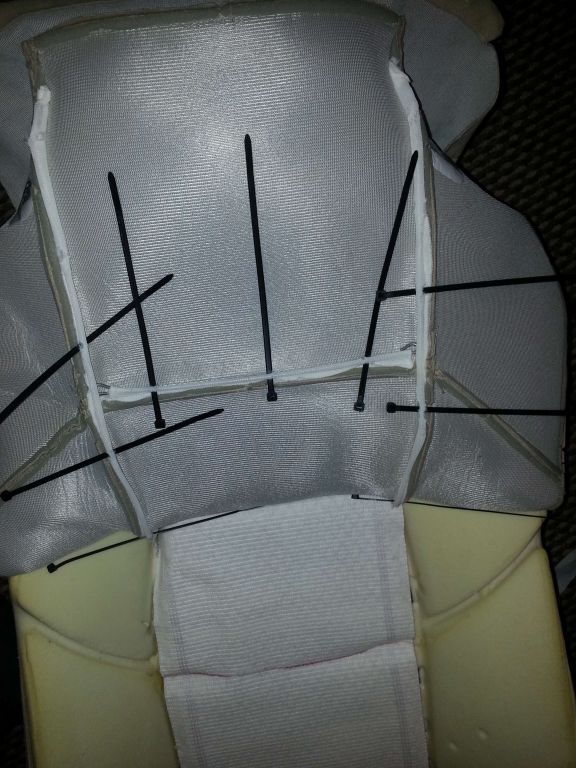
Thanked 58 Times in 42 PostsThe tywraps were then pushed under the metal rod in the foam base and tensioned:
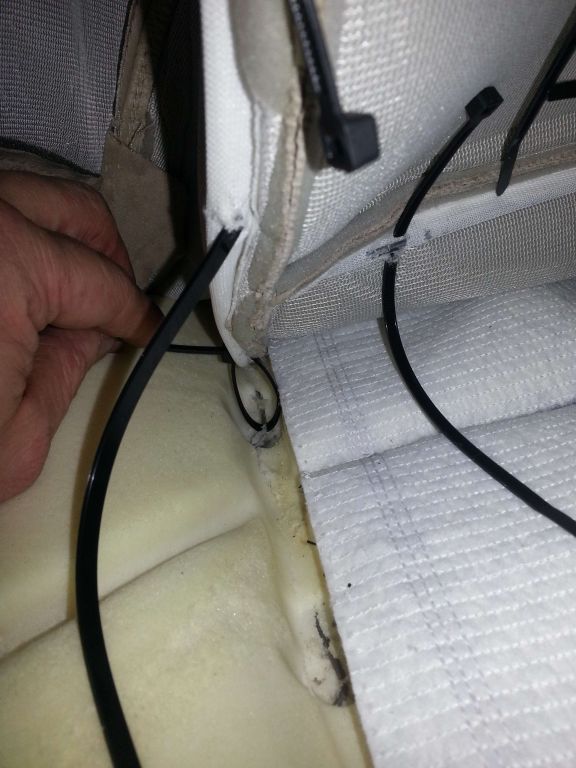
Pushing the leather cover down in to the gap allows the tywrap to be fully tightened up:
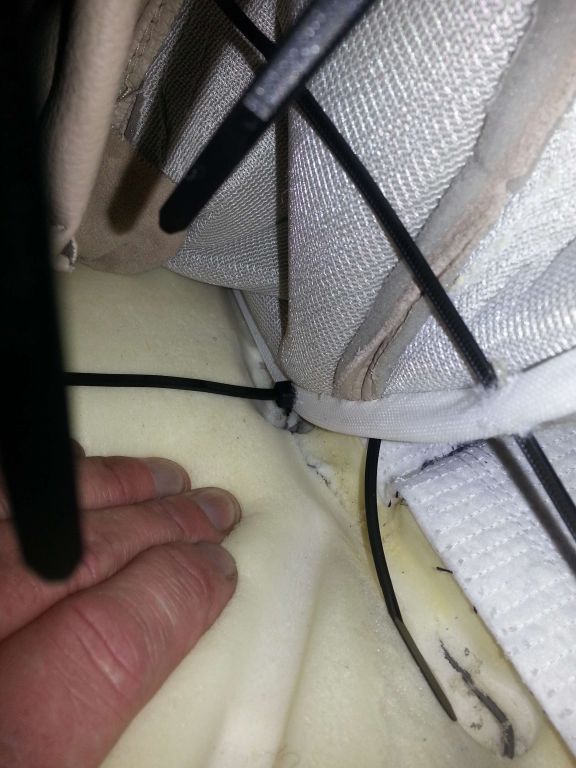
Finally cut the tail off the tywrap then rotate the tywrap so the head of it is sat under the wire in the foam base (this way you won't feel it when you are sat on the seat, continue to add and secure the tywraps until all the leather cover attachments are in place and secured:
The sides can then be secured using hog ring pliers as the access is somewhat easier:
New hog rings securing the sides in place:
Applying more new hog rings to secure the front of the leather seat cover to the metal seat frame:
That's the first half back together, next up is the seat back:

Four hog rings secure the front of the seat back to the front at the lower rear edge of the seat:
Remove the rings and the seat back cover starts to release:

The side flaps simply stretch over the plastic side parts of the seat:
Guess what is stopping the seat back cover from coming off, yes more hog rings, again much in the same way as the base came to bits these rings have to be removed one by one without exerting too much pressure on the rods that are part of the foam as you don't want the rod to pull out:
Work methodically from the base of the seat removing the rings from the vertical channels then once exposed remove the rings from the horizontal channels:
We stopped at the second horizontal channel for the hog rings as the seat heater mat was only long enough to get this far up the seat (no point making even more work):
Pop the heater mat in to position and mark out the location of the horizontal channel with a felt tip pen:
Cut through the heater mat avoiding cutting the outer 1" section then secure the mat down to the foam using the self adhesive strips:
-
Friday 7th March 2014, 14:19 #27Member
This user has no status
- Join Date
- Oct 2013
- Location
- Blackpool
- Posts
- 81
- Thanks
- 1
Thanked 58 Times in 42 PostsAgain more tywraps applied in the same way as we did the work on the base:
Finally you get to the rear opening of the seat which needs clipping together:
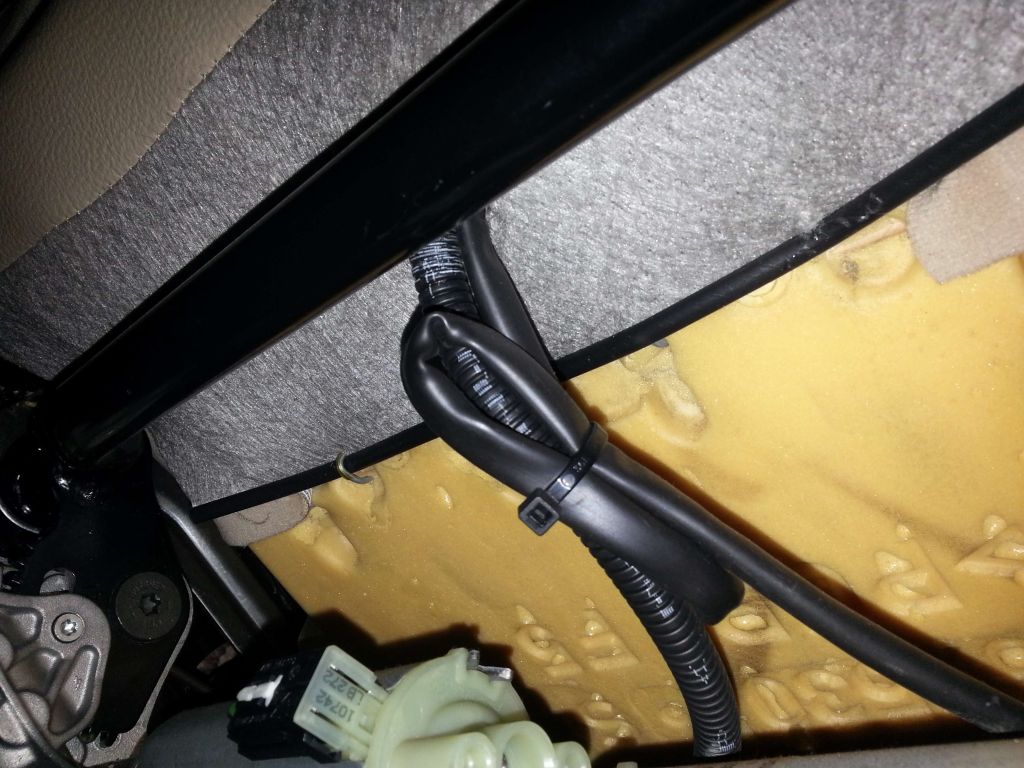
More hog rings and that is the seat upholstery work completed, the wiring and control relay was clipped up under the seat and it was time to pop the seat back in to the car:
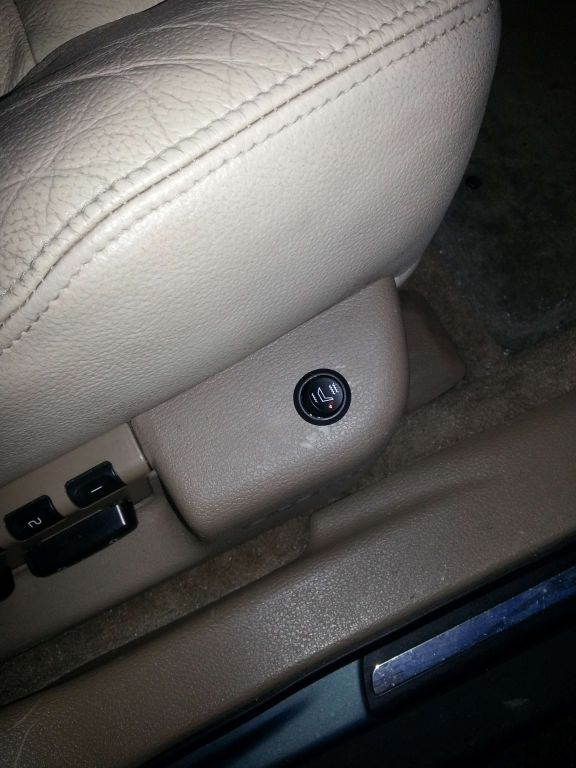
Passenger seat two stage heat control switch:
Drivers side two stage heat control switch:

Green denotes stage one heat:
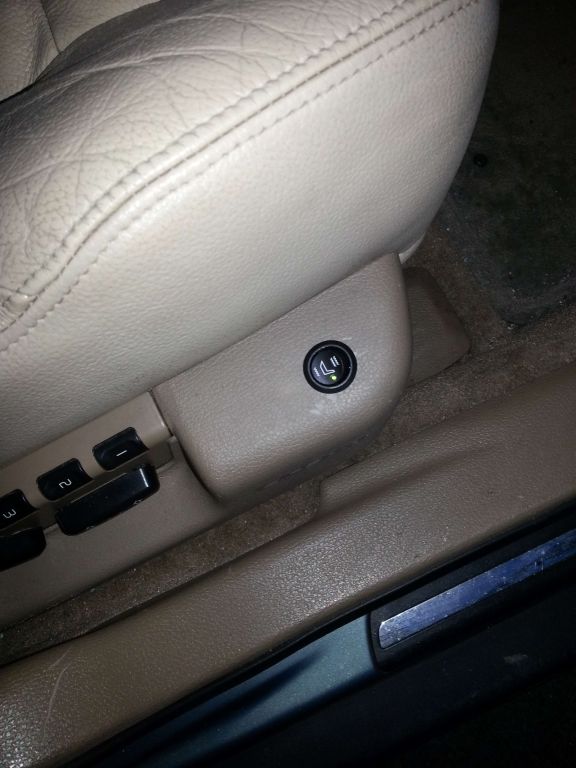
Red denotes stage two heat:
For the power to supply the seat heaters we used the Volvo fitted seat heater supply lines which is a Blue wire with red stipe (+12) in pin one of the seat connector and the Black wore in pin 3 of the seat connector is 0V (-) - The 15A fuses were already fitted which was an added bonus - All four seat heater pads are now working, total time spent was between 5 and 6 hours to complete both front seats - Mike
-
The Following 2 Users Say Thank You to mikealder For This Useful Post:
LeeT5 (Friday 7th March 2014),Wobbly Dave (Tuesday 11th March 2014)
-
Friday 7th March 2014, 14:21 #28Trader
This user has no status
- Join Date
- Nov 2010
- Location
- chester le street
- Posts
- 6,128
- Thanks
- 969
Thanked 1,398 Times in 1,121 Postslooks like you done a good job. ill be spliting my seats into two halfs later today. just waiting on a phone call to say my dye is mixed
s60 2.4 t5 eibach springs,up rated rear anti roll bar, poly bushed wishbones, poly lower engine mount, fmic, bmc air filter, 3" decat, 2.5" stainless exhaust,hlm remap 328bhp,
-
Friday 7th March 2014, 14:22 #29Banned
Power of a Sports Car, Turning
Circle of a Bus.
- Join Date
- May 2012
- Location
- Mid Wales
- Posts
- 4,813
- Thanks
- 1,529
Thanked 806 Times in 636 PostsYou're the first man I've ever seen that has 3 hands....

-
Friday 7th March 2014, 20:15 #30Senior Member
...here we go again...
- Join Date
- Oct 2004
- Location
- Kent
- Posts
- 5,337
- Thanks
- 1,075
Thanked 1,393 Times in 1,068 PostsThats an outstanding write up! Many thanks. Glad I don't have to do it!
2014 V60 Polestar 6spd Auto :: Polestar map peak boost 17.4psi :: IPD 3" DP + 150cel :: Polestar 2.5" exhaust :: Paddle Shift Geartronic :: Black glass :: Maxton Splitter :: K+N Filter :: IPD Aluminium Top engine mount :: Brembo 6 pots :: 20" Polestar rims :: Brembo 371mm floating discs :: Sensus RTi + DAB + BT + WIFi :: D3S XENARC 6000k Active bending headlights
-
Friday 7th March 2014, 20:19 #31Senior Member
...here we go again...
- Join Date
- Oct 2004
- Location
- Kent
- Posts
- 5,337
- Thanks
- 1,075
Thanked 1,393 Times in 1,068 PostsI did, before Christmas. Basically, each cover is £500. So that's... Originally Posted by Harvey
 £2000 just for the front seats. + 2 days work to install.
2014 V60 Polestar 6spd Auto :: Polestar map peak boost 17.4psi :: IPD 3" DP + 150cel :: Polestar 2.5" exhaust :: Paddle Shift Geartronic :: Black glass :: Maxton Splitter :: K+N Filter :: IPD Aluminium Top engine mount :: Brembo 6 pots :: 20" Polestar rims :: Brembo 371mm floating discs :: Sensus RTi + DAB + BT + WIFi :: D3S XENARC 6000k Active bending headlights
£2000 just for the front seats. + 2 days work to install.
2014 V60 Polestar 6spd Auto :: Polestar map peak boost 17.4psi :: IPD 3" DP + 150cel :: Polestar 2.5" exhaust :: Paddle Shift Geartronic :: Black glass :: Maxton Splitter :: K+N Filter :: IPD Aluminium Top engine mount :: Brembo 6 pots :: 20" Polestar rims :: Brembo 371mm floating discs :: Sensus RTi + DAB + BT + WIFi :: D3S XENARC 6000k Active bending headlights
-
The Following 2 Users Say Thank You to LeeT5 For This Useful Post:
graemewelch (Friday 7th March 2014),Harvey (Friday 7th March 2014)
-
Saturday 8th March 2014, 17:05 #32Senior Member
Keeping it looking stock
- Join Date
- Mar 2012
- Location
- Newton abbot, Devon
- Posts
- 5,567
- Thanks
- 920
Thanked 1,581 Times in 1,296 PostsAny news how it's going.photos would be even better.
-
Saturday 8th March 2014, 17:23 #33Trader
This user has no status
- Join Date
- Nov 2010
- Location
- chester le street
- Posts
- 6,128
- Thanks
- 969
Thanked 1,398 Times in 1,121 Postsive split the drivers seat into two halves, thats about as far as ive got so far. Originally Posted by Harvey
s60 2.4 t5 eibach springs,up rated rear anti roll bar, poly bushed wishbones, poly lower engine mount, fmic, bmc air filter, 3" decat, 2.5" stainless exhaust,hlm remap 328bhp,
-
Saturday 8th March 2014, 17:26 #34Senior Member
Keeping it looking stock
- Join Date
- Mar 2012
- Location
- Newton abbot, Devon
- Posts
- 5,567
- Thanks
- 920
Thanked 1,581 Times in 1,296 PostsHave you picked up the dye yet ,if so what's the colour like.
-
Saturday 8th March 2014, 17:38 #35Trader
???
- Join Date
- Sep 2010
- Location
- Harwich Essex
- Posts
- 7,857
- Thanks
- 4,987
Thanked 2,863 Times in 2,155 PostsI hate bloody hog rings lol, ive recently done the drivers seat on the 850, and it was a ball ache, Zip ties make it so much easier refiiting

-
Saturday 8th March 2014, 18:29 #36Trader
This user has no status
- Join Date
- Nov 2010
- Location
- chester le street
- Posts
- 6,128
- Thanks
- 969
Thanked 1,398 Times in 1,121 Posts Originally Posted by Harvey
Not yet. They promised theyd ring when it was mixed but they didnt ring so ill chase it up on monday. Im sure the colour will be 100% perfect match.s60 2.4 t5 eibach springs,up rated rear anti roll bar, poly bushed wishbones, poly lower engine mount, fmic, bmc air filter, 3" decat, 2.5" stainless exhaust,hlm remap 328bhp,
-
Monday 10th March 2014, 21:34 #37Trader
This user has no status
- Join Date
- Nov 2010
- Location
- chester le street
- Posts
- 6,128
- Thanks
- 969
Thanked 1,398 Times in 1,121 Postsi promised myself i wouldnt post anything untill im finished and the seats are back in the car but im so impressed with what ive done so far im putting up a sneak preview. i wont go into details about what ive done as ill do a thread about that later.
befor
the oh ££££ i hope this is going to work moment
two coats with sponge and one with airbrush. still a few coats to go and satin laquer
 s60 2.4 t5 eibach springs,up rated rear anti roll bar, poly bushed wishbones, poly lower engine mount, fmic, bmc air filter, 3" decat, 2.5" stainless exhaust,hlm remap 328bhp,
-
Monday 10th March 2014, 21:47 #38Senior Member
Keeping it looking stock
- Join Date
- Mar 2012
- Location
- Newton abbot, Devon
- Posts
- 5,567
- Thanks
- 920
Thanked 1,581 Times in 1,296 PostsLooking good.
-
Monday 10th March 2014, 23:33 #39Senior Member
...here we go again...
- Join Date
- Oct 2004
- Location
- Kent
- Posts
- 5,337
- Thanks
- 1,075
Thanked 1,393 Times in 1,068 PostsBefore you put the leather back on the seat it's worth considering replacing the seat base foam. Volvo do an up rated firmer foam for the P2 models. It's not that expensive if I remember rightly.
-
Monday 10th March 2014, 23:41 #40Trader
This user has no status
- Join Date
- Nov 2010
- Location
- chester le street
- Posts
- 6,128
- Thanks
- 969
Thanked 1,398 Times in 1,121 Poststhe foam on the base isnt in bad condition at all. but the back rest isnt all that good. ill phone up tomora and see how much the foam kit is. only down side is more striping as ive only seperated the base from the backrest. Originally Posted by LeeT5
s60 2.4 t5 eibach springs,up rated rear anti roll bar, poly bushed wishbones, poly lower engine mount, fmic, bmc air filter, 3" decat, 2.5" stainless exhaust,hlm remap 328bhp,


 Reply With Quote

 The DaRk Knight

 Roundy


Thread Information
Users Browsing this Thread
There are currently 1 users browsing this thread. (0 members and 1 guests)
 Posting Permissions

Bookmarks