


 The DaRk Knight
Finally, I now have a full set of rear lights. Just the lower sections alone retail at £165 ea from Volvo and these are rare as Hens teeth on eBay.
I managed to get hold of the two upper sections for a steal at only £20 delivered! It would be months before I located, first the N/S lower which I bargained for £40 then about 5 months later I paid a higher price for the O/S lower which I won on eBay auction for £79 delivered (but that also included the R/H upper section which I can sell on).
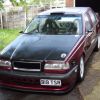
Here's the car before:
I'll spare you the fitting process as it's quite straight forwards, though some of the 10mm nuts are difficult to access without removing the upper and side plastic roof trim.
I also, removed my Diadem indicator bulbs and fitted them first:
I'll take a photo of her in the dark once I've replaced my knackered number plate bulbs.
Points to note if doing this mod:
The lower sections cannot be removed until the upper sections have been removed!
Make sure you order 8 trim clips for the side panel as these will almost certainly break or already be broken when removing the trim panels that cover the rear lights:
REAR PILLAR TRIM CLIP - 2004 VOLVO V70 (part# 9132876) x8.

Results 281 to 300 of 573
Thread: LeeT5's V70R Project
-
Wednesday 1st April 2015, 12:00 #281Senior Member
 ...here we go again...
- Join Date
- Oct 2004
- Location
- Kent
- Posts
- 5,337
- Thanks
- 1,075
Thanked 1,393 Times in 1,068 Posts05> Rear light cluster modification
Last edited by LeeT5; Wednesday 1st April 2015 at 12:10.
2014 V60 Polestar 6spd Auto :: Polestar map peak boost 17.4psi :: IPD 3" DP + 150cel :: Polestar 2.5" exhaust :: Paddle Shift Geartronic :: Black glass :: Maxton Splitter :: K+N Filter :: IPD Aluminium Top engine mount :: Brembo 6 pots :: 20" Polestar rims :: Brembo 371mm floating discs :: Sensus RTi + DAB + BT + WIFi :: D3S XENARC 6000k Active bending headlights
-
Wednesday 1st April 2015, 19:33 #282Senior Member
This user has no status
- Join Date
- Feb 2006
- Location
- manchester
- Posts
- 3,188
- Thanks
- 628
Thanked 387 Times in 366 PostsLee t5 are u going to the heritage motor museum meet on the 12 th

-
Wednesday 1st April 2015, 20:27 #283Senior Member
...here we go again...
- Join Date
- Oct 2004
- Location
- Kent
- Posts
- 5,337
- Thanks
- 1,075
Thanked 1,393 Times in 1,068 PostsWhere's that? Originally Posted by abdul

Also, can anyone confirm that the above pictures of the rear lights all came out the right way? For some reason, on my iPad, they're mostly on their side, yet on my PC they are all the right way up! Weird!!Last edited by LeeT5; Wednesday 1st April 2015 at 20:30.
2014 V60 Polestar 6spd Auto :: Polestar map peak boost 17.4psi :: IPD 3" DP + 150cel :: Polestar 2.5" exhaust :: Paddle Shift Geartronic :: Black glass :: Maxton Splitter :: K+N Filter :: IPD Aluminium Top engine mount :: Brembo 6 pots :: 20" Polestar rims :: Brembo 371mm floating discs :: Sensus RTi + DAB + BT + WIFi :: D3S XENARC 6000k Active bending headlights
-
Wednesday 1st April 2015, 20:33 #284Senior Member
The Volvo with a 'twist'!
- Join Date
- Mar 2012
- Location
- Hereford
- Posts
- 1,595
- Thanks
- 284
Thanked 801 Times in 547 PostsGaydon VT200 Meet.
All pics working fine on this PC Lee, looking good

98 V70 AWD - Long Term Companion. Loads of little changes, the Volvo with a twist.
96 850 R Estate - Pink Pus, project pulled from the weeds!
Oh, plus a glorious (but dead) 01 Alfa 166 V6 and a 05 Liquid Yellow Clio 182.
-
The Following User Says Thank You to AcidicDavey For This Useful Post:
LeeT5 (Thursday 2nd April 2015)
-
Wednesday 1st April 2015, 21:21 #285Senior Member
This user has no status
- Join Date
- Aug 2006
- Location
- Sunny Bournemouth
- Posts
- 2,999
- Thanks
- 851
Thanked 1,102 Times in 727 PostsYou've got your show plates on again for the pics, James won't be happy lol. Also viewing on my IPad, the pictures are showing up on their sides.
-
Thursday 2nd April 2015, 09:32 #286Senior Member
...here we go again...
- Join Date
- Oct 2004
- Location
- Kent
- Posts
- 5,337
- Thanks
- 1,075
Thanked 1,393 Times in 1,068 PostsNo. Too short notice and I've got too much on as I'm getting a new van. I'll try next year though! Originally Posted by abdul
Thanks. Originally Posted by AcidicDavey
Who cares what James thinks!? Originally Posted by MIKESC70T5

Weird how they are the wrong way on iPad. At least you can lay the pad flat and then turn it to see them the right way up.2014 V60 Polestar 6spd Auto :: Polestar map peak boost 17.4psi :: IPD 3" DP + 150cel :: Polestar 2.5" exhaust :: Paddle Shift Geartronic :: Black glass :: Maxton Splitter :: K+N Filter :: IPD Aluminium Top engine mount :: Brembo 6 pots :: 20" Polestar rims :: Brembo 371mm floating discs :: Sensus RTi + DAB + BT + WIFi :: D3S XENARC 6000k Active bending headlights
-
Thursday 2nd April 2015, 09:47 #287Senior Member
...here we go again...
- Join Date
- Oct 2004
- Location
- Kent
- Posts
- 5,337
- Thanks
- 1,075
Thanked 1,393 Times in 1,068 Posts Originally Posted by V70 Graham
I stand corrected. After contacting them yesterday, it would appear that 'new' parts carry a 1 year guarantee and second hand is 3 months. The work carried out, also carries a 3 month guarantee. Originally Posted by LeeT5
The RTI board they fitted in my RTI unit was indeed a previously repaired PCB as the PCB is not available from Volvo.
2014 V60 Polestar 6spd Auto :: Polestar map peak boost 17.4psi :: IPD 3" DP + 150cel :: Polestar 2.5" exhaust :: Paddle Shift Geartronic :: Black glass :: Maxton Splitter :: K+N Filter :: IPD Aluminium Top engine mount :: Brembo 6 pots :: 20" Polestar rims :: Brembo 371mm floating discs :: Sensus RTi + DAB + BT + WIFi :: D3S XENARC 6000k Active bending headlights
-
Friday 12th June 2015, 02:44 #288Senior Member
...here we go again...
- Join Date
- Oct 2004
- Location
- Kent
- Posts
- 5,337
- Thanks
- 1,075
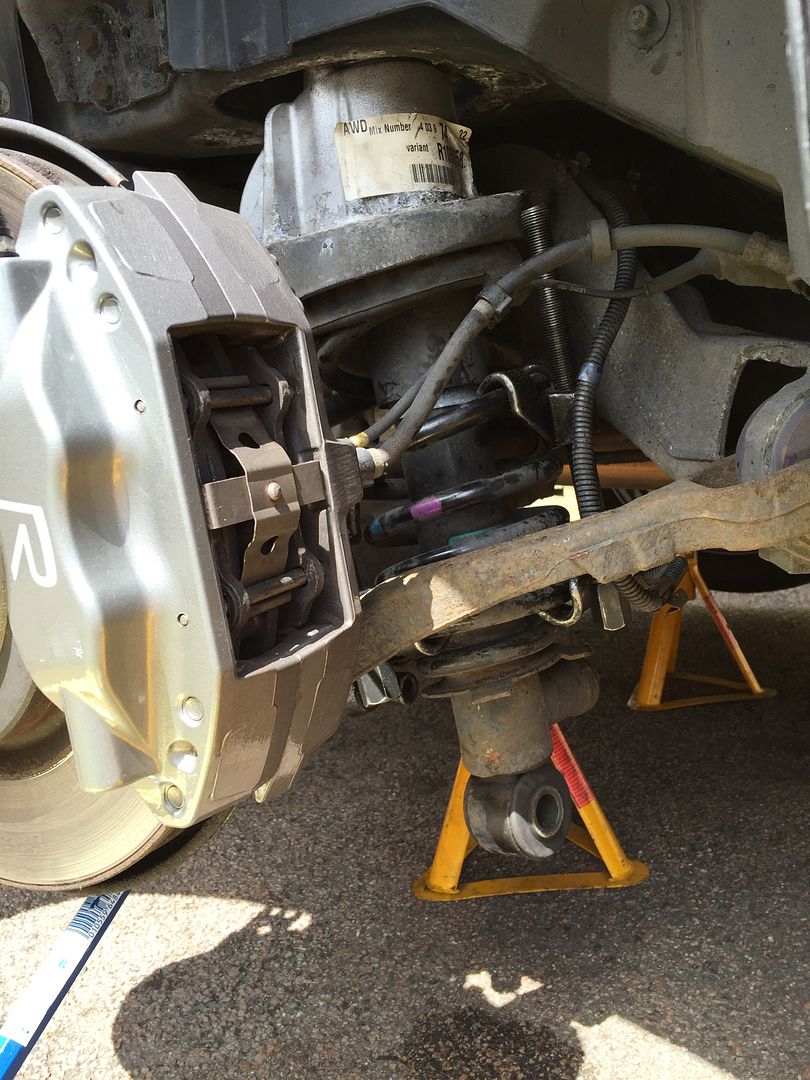
Thanked 1,393 Times in 1,068 PostsAfter a full wheel alignment, new tyres all round I still felt like the rear end was still a little 'skittish' and disconnected from the rest of the car. Don't get me wrong, it drives straight, smooth and fast but on rough B roads, especially on bends, there was still a slight amount of 'side hop' and floatiness to the rear end. So I thought I'd have a closer look and see if anything was amiss.....
(Look and ye shall find).... Bingo!!
My rear off side level sensor was dangling around in the breeze
Happy that I'd found the reason I rang Volvo to order the parts.
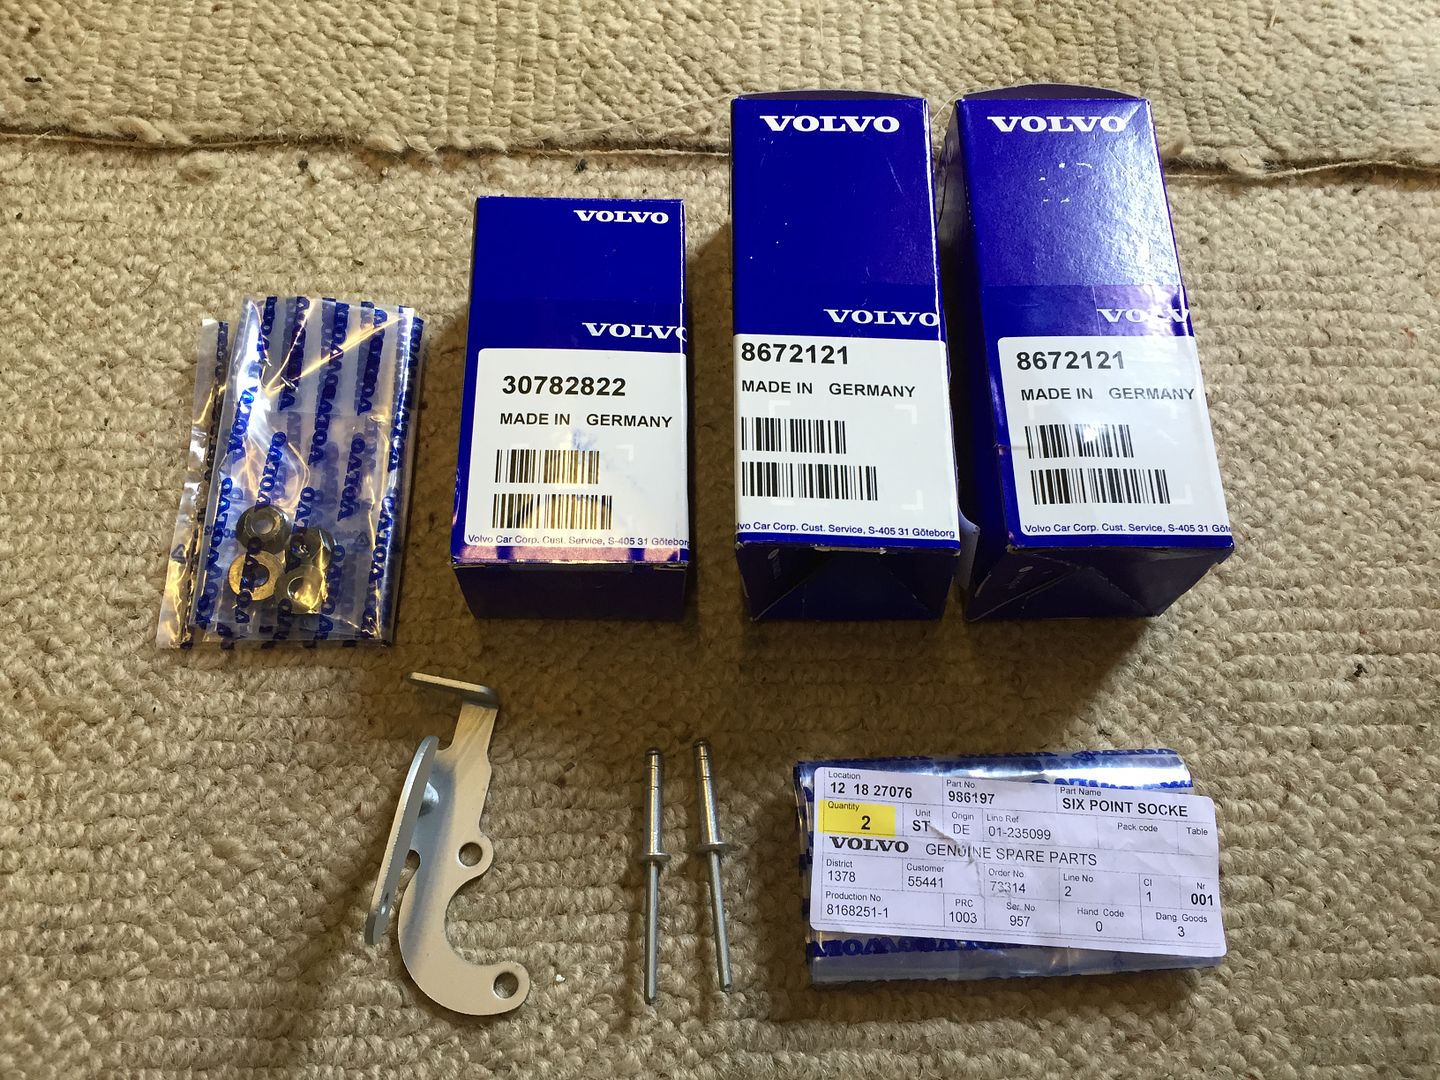
Total cost £97 inc 12% discount and VAT.
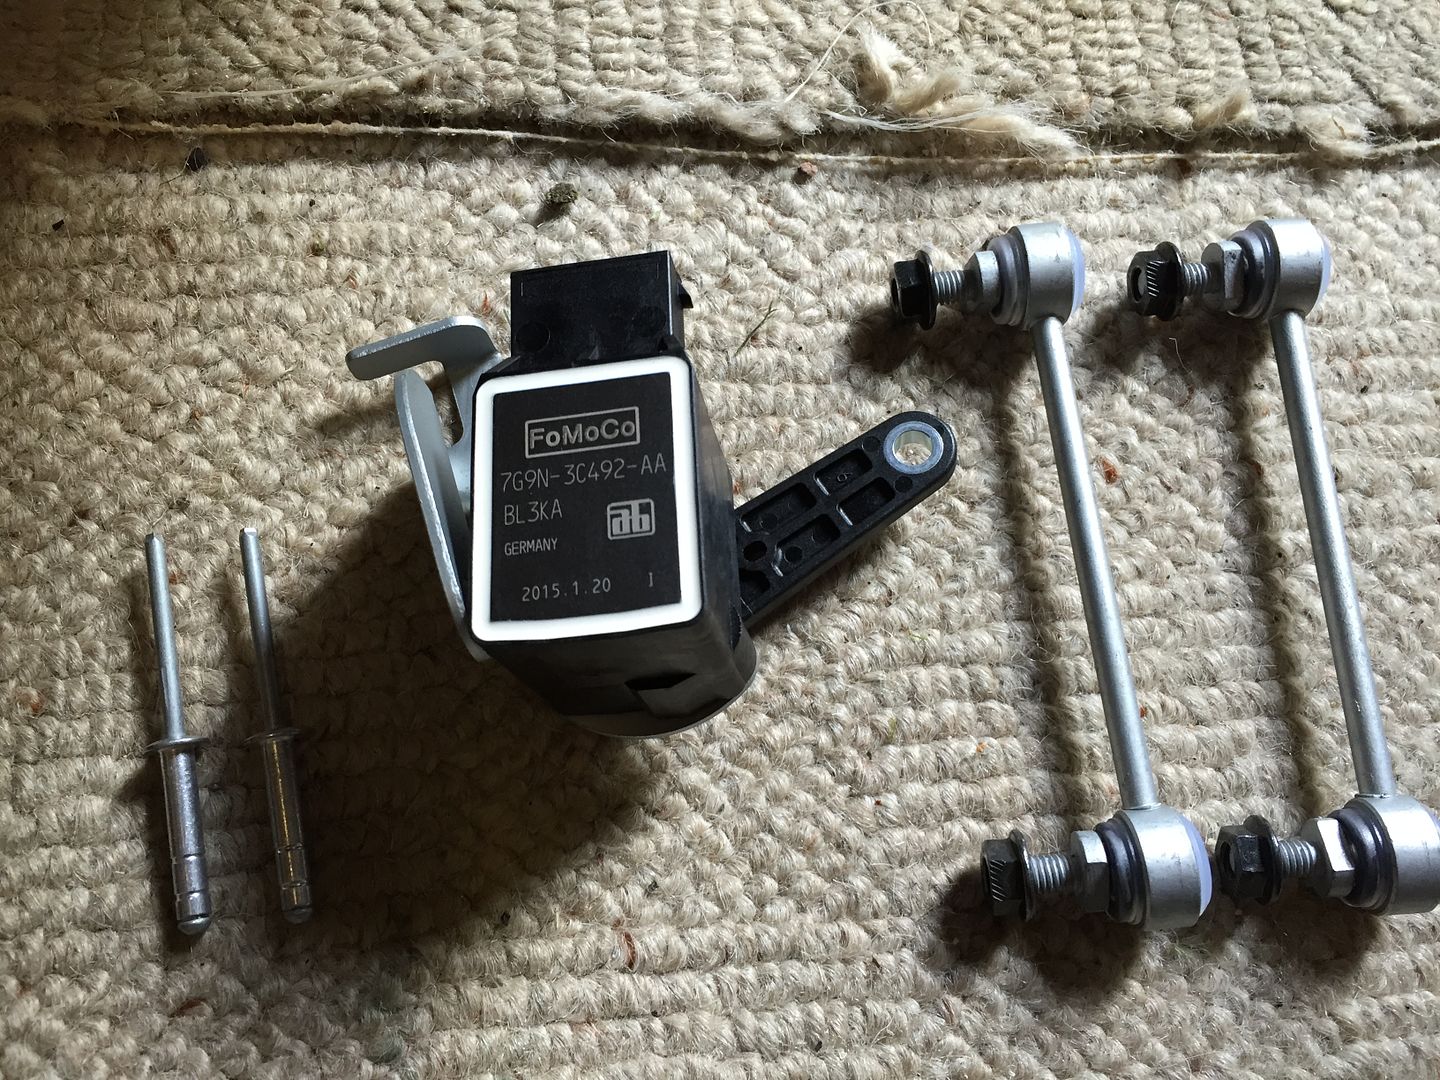
(Removed from boxes and set up ready to install)
Removal
Open tailgate and remove the floor panel nearest the seats. Lift away foam and sound deadening to access single 12mm nut with 'half moon' washer...Remove.
Next, Close tailgate and crack off wheel nuts on Rear O/S wheel. Raise rear of vehicle and support on two axle stands (both wheels need to be raised).
Remove wheel. Lubricate with penetrating oil the Shock lower bolt. Using a 14mm socket, remove the two bolts holding the Spring seat assy to the bottom of the car. Now remove the lower shock bolt (having had a chance to soak in oil).
Using good quality spring compressors, compress the spring just enough so the spring can be moved independent of the spring assy.
Use a big flat screw driver or a pry bar and gently lever the lower part of the shock off the Lower arm mounting point.
TIP: I slid a vehicle jack in next to the strut to catch it incase it drops!! You don't want to damage any wiring.
Next, unclip the three shock absorber wiring harness clips from the body of the car and the metal tags at the base of the spring assy. Carefully lower the jack and, holding the springs, carefully wiggle the entire assy down and out towards the ground.
Lay the spring assy on the ground, making sure the weight of the assy is NOT on the shock absorber wiring.
Using a 10mm socket or spanner, undo the two sensor bottom bracket bolts. Carefully undo the sensor harness from the plug by pressing in the side tabs and removing the plug.
NOTE
Do not pull on the sensor harness wiring! If it doesn't pull free it's not unclipped properly. Contact cleaner is useful at this stage to clean up the plug so the dog can see the rabbit!
Once removed, you'll see this....
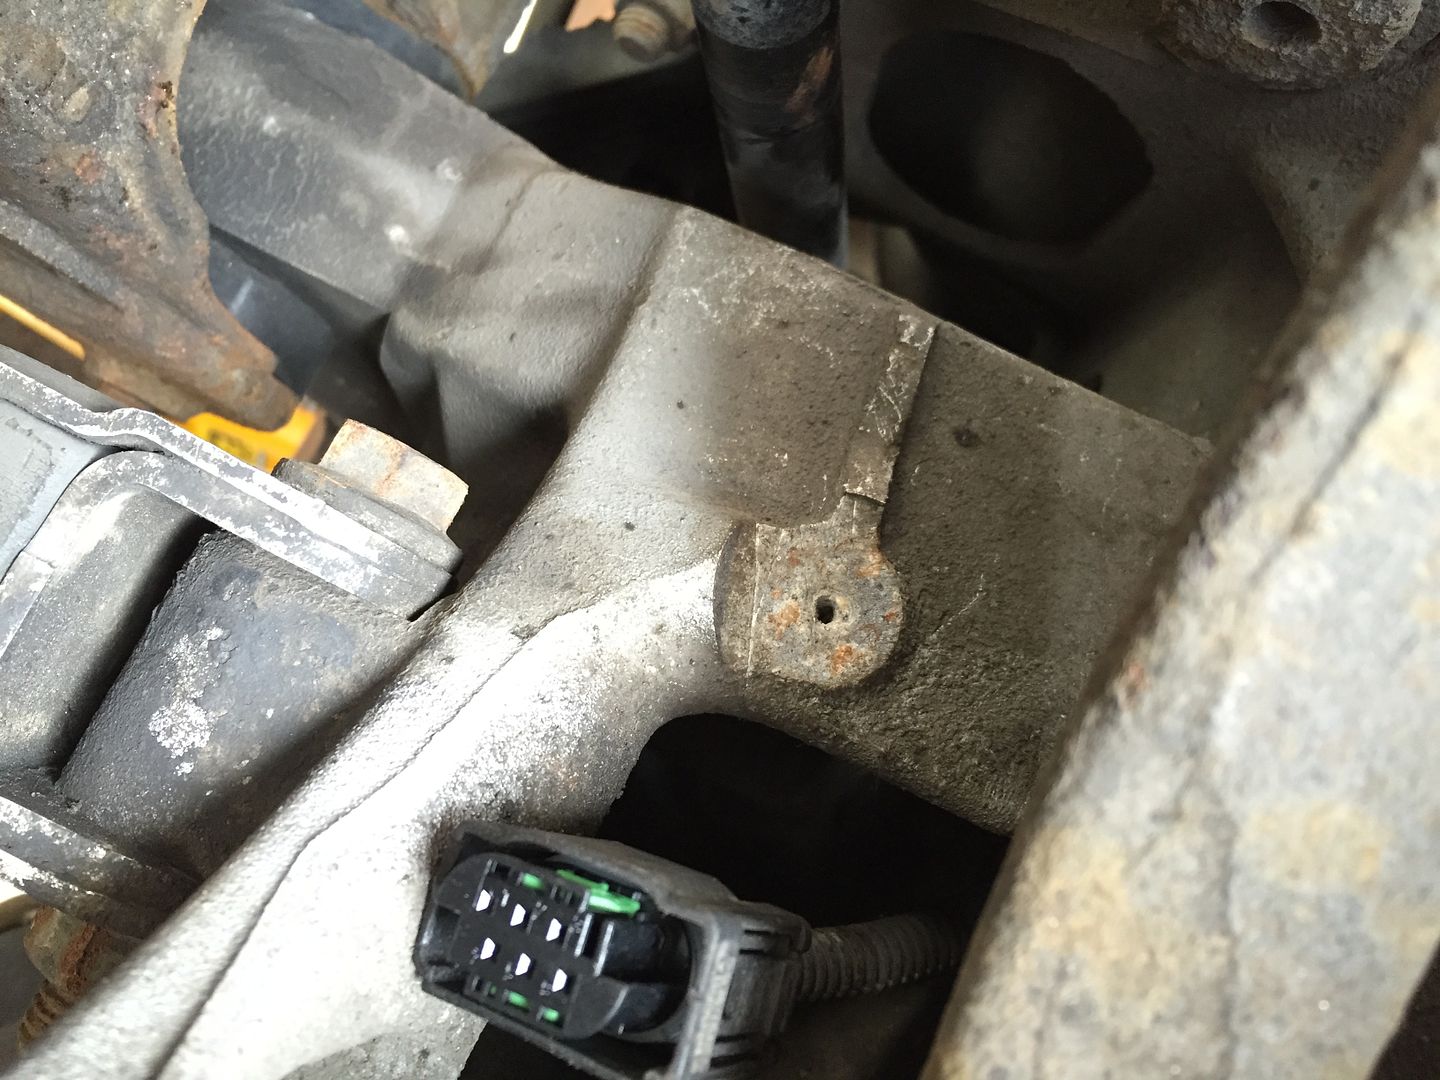
The tiny hole is where the blind rivet used to be that attached the sensor bracket to the body of the car. This needs to be a 5mm hole to allow the new blind rivet to fit.
Using a pin punch and small lump hammer, gently tap out the remains of the old rivet and then clean up the hole with a 5mm drill bit. Do not make the hole any bigger!
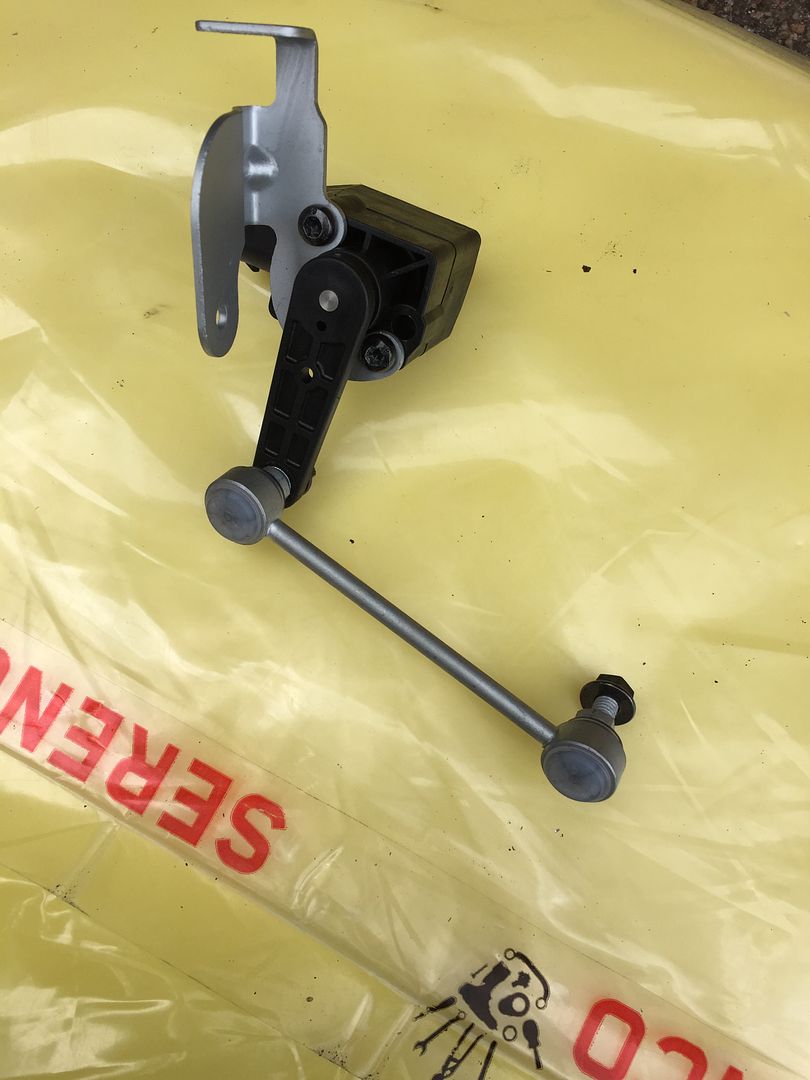
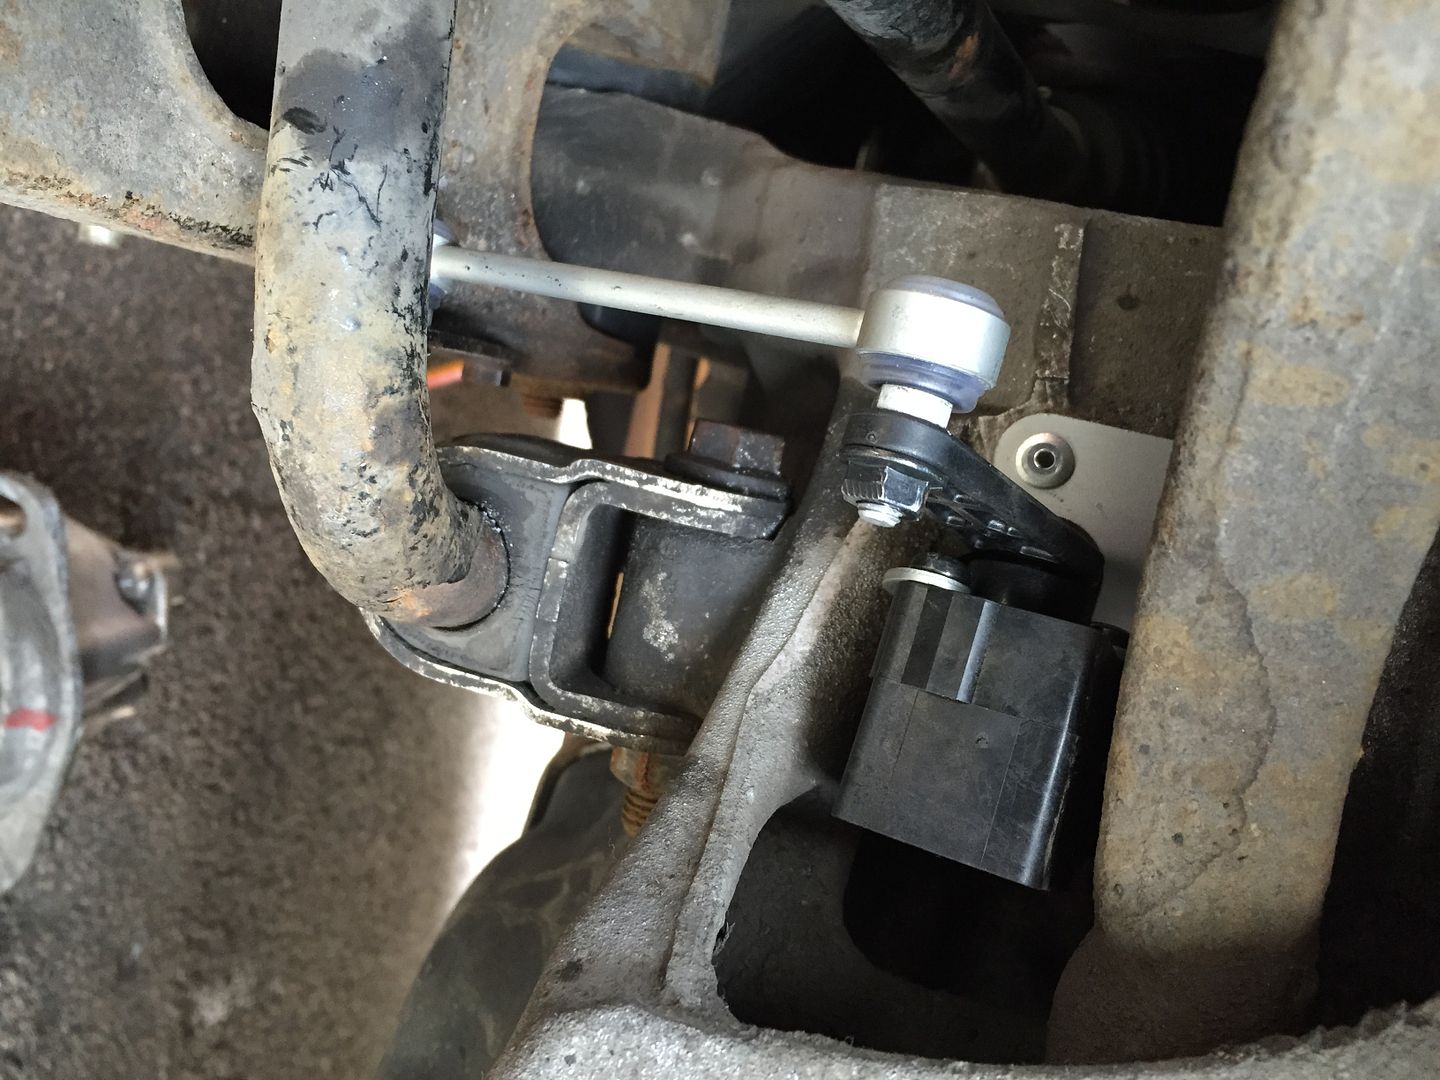
With the sensor, link rod assembled, offer the sensor up to the harness plug and plug it back in. (You'll hear a positive "click" on both sides of the plug)
Offer up Sensor, bracket and link rod and then fix the bracket to the body. Plug in the new sensor then, ensuring the locating peg on the bracket fits in the obvious slot above the 5mm hole you drilled, fit the sensor and fit the blind rivet using a rivet gun (obviously). Do not fit the lower 2 bolts on the sensor (triangle shaped bracket) yet, as you want it positioned out the way of the reassembly of the spring assy.
Refitting
I found it easier to refit the spring assy by removing the spring compressors. This will give you vital room and alleviate some of the weight on the assy as you begin the slightly frustrating part of lifting the assy back up into position, remembering not to damage the wiring.
TOP TIP
Extreme care must be taken to ensure the spring has seated in its correct position BEFORE removing the spring compressors!
Bolt up the spring seat and use a car jack to raise the shock onto the lower arm locating pin. Fit M12 bolt - torque 100NM.
Torque 2 x spring seat to 50NM and just tighten the 12mm using a 1/4" drive socket to FT (That's Fairly Tight, not F'ing Tight).
Refit harness mounting clips.

TIP
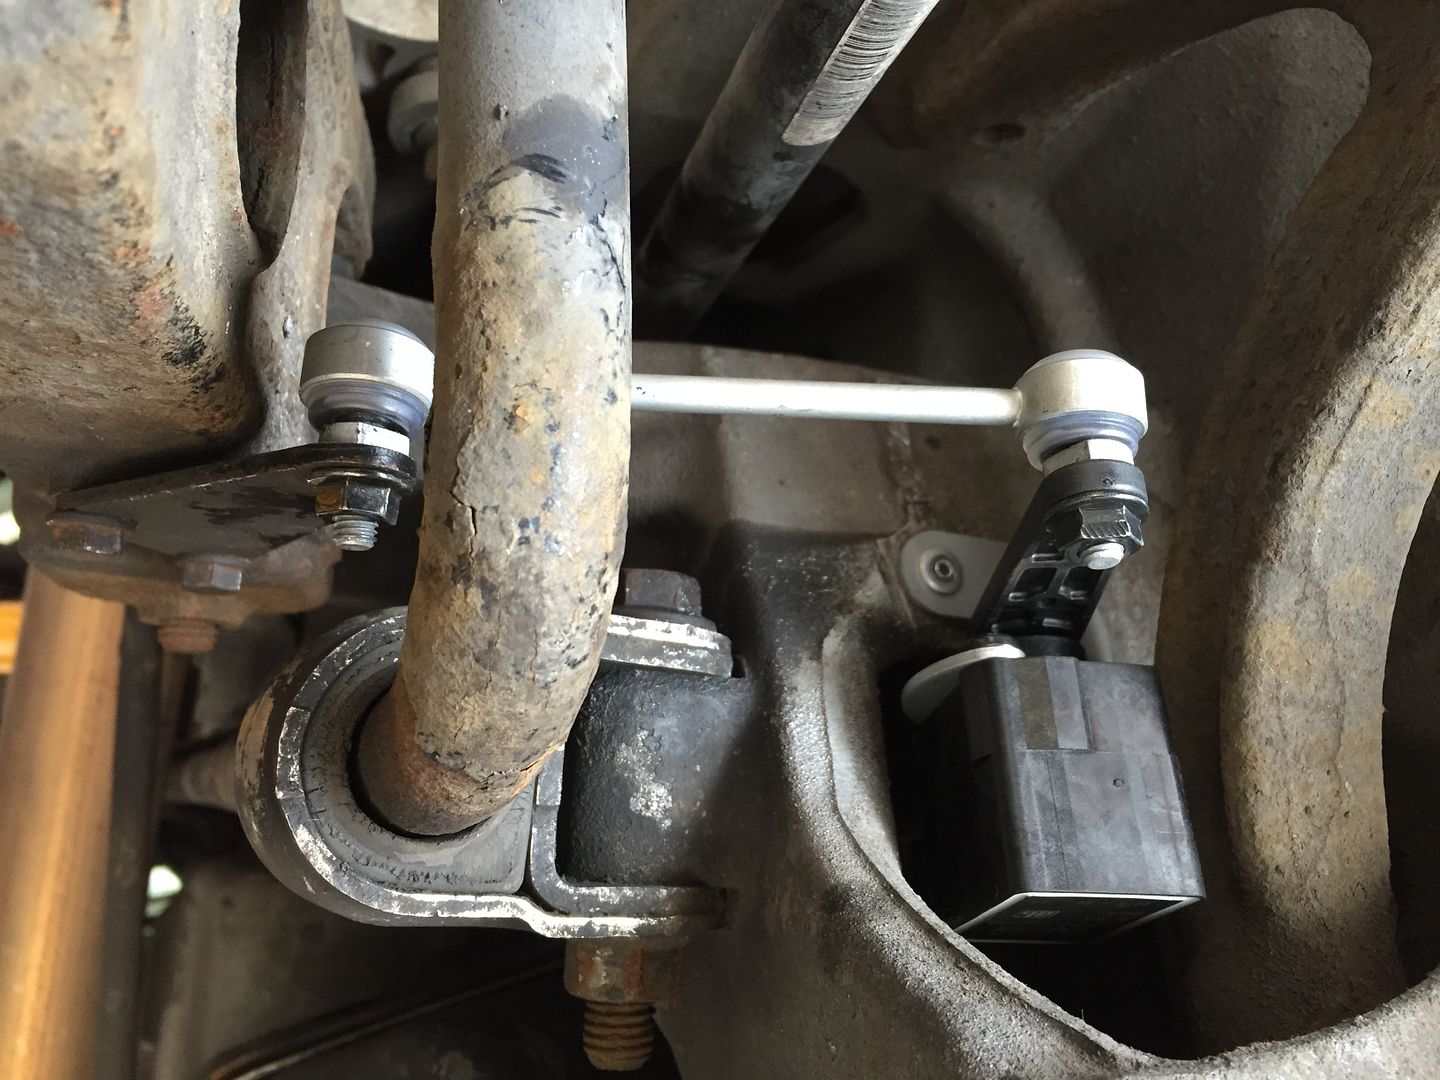
I also fitted a new link rod and nuts to the other side. This will prevent the sensor from shearing it's mounting point because the link rod ends were dry and seized up.
The link rods have been modified since they were different to my old rods.
Refit wheel, torque wheel bolts to 140NM. Lower car to ground then you'll need to park on flat, level ground and calibrate the SUM.
Calibration is vital when fitting a new sensor or removing any suspension components.
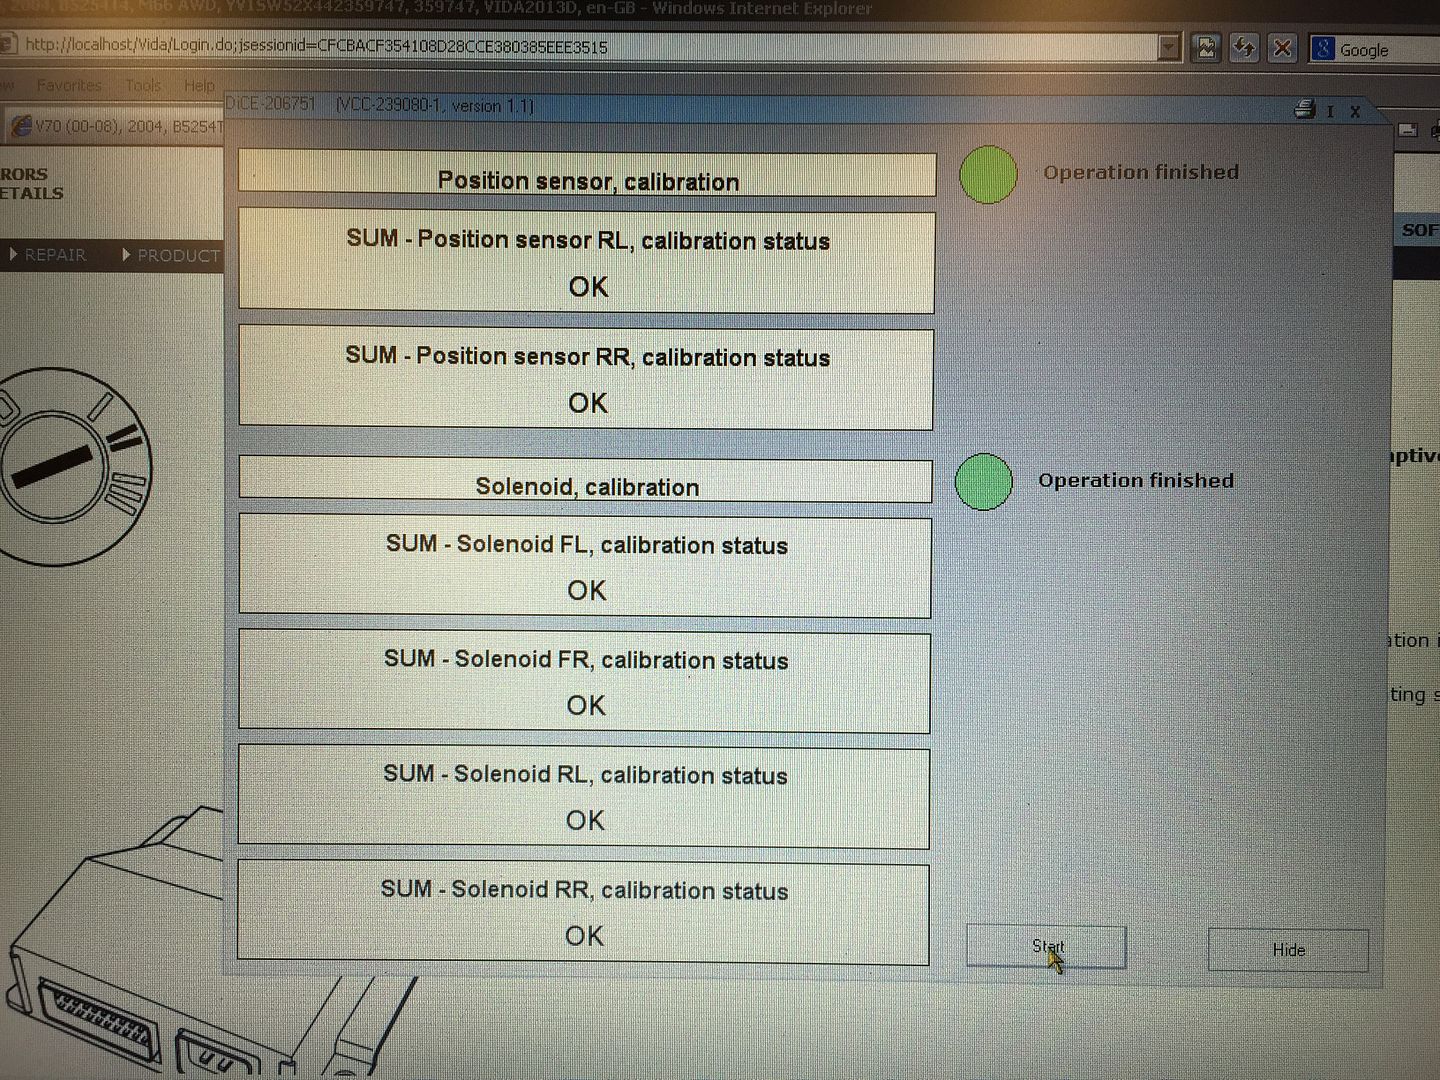
Cleared error memory...
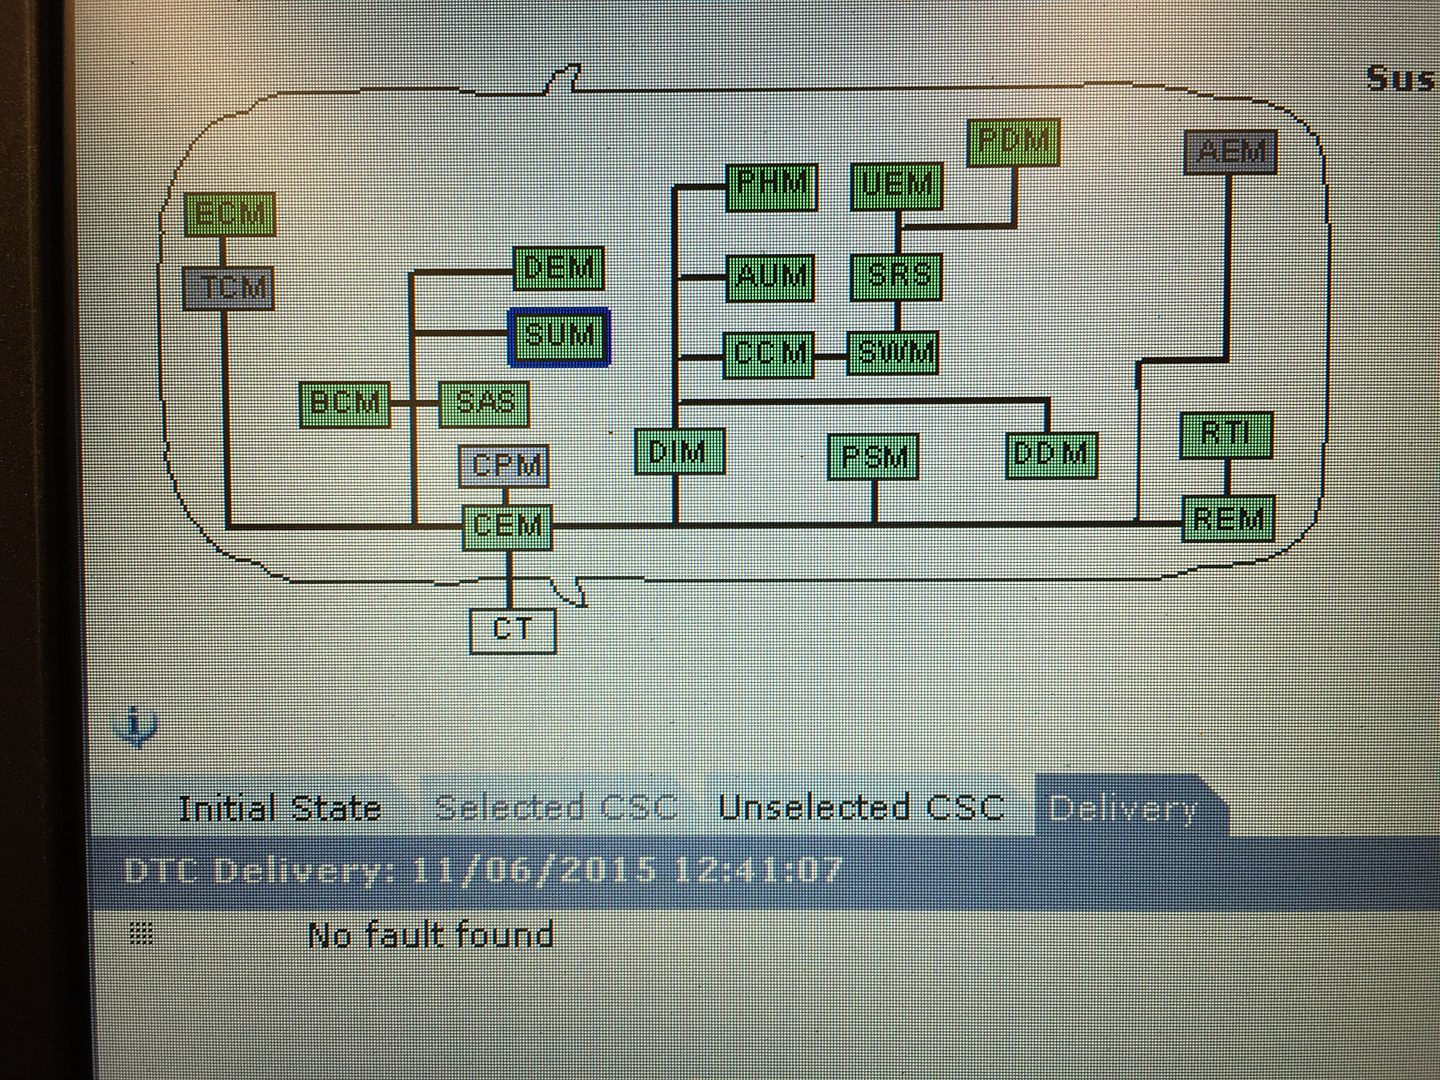
Test Drive!!
WOW!!!! No more skittishness. No more disconnected feel. Suspension feels firmer yet smoother and the whole car feels more planted. Definitely more confidence on the road, especially in COMFORT mode, where the suspension moves the most.
Brilliant!!Last edited by LeeT5; Friday 12th June 2015 at 02:54.
2014 V60 Polestar 6spd Auto :: Polestar map peak boost 17.4psi :: IPD 3" DP + 150cel :: Polestar 2.5" exhaust :: Paddle Shift Geartronic :: Black glass :: Maxton Splitter :: K+N Filter :: IPD Aluminium Top engine mount :: Brembo 6 pots :: 20" Polestar rims :: Brembo 371mm floating discs :: Sensus RTi + DAB + BT + WIFi :: D3S XENARC 6000k Active bending headlights
-
The Following 5 Users Say Thank You to LeeT5 For This Useful Post:
craigoodwood (Friday 12th June 2015),Harvey (Saturday 13th June 2015),MIKESC70T5 (Friday 12th June 2015),MoleT-5R (Sunday 14th June 2015),silverhorse (Saturday 13th June 2015)
-
Friday 12th June 2015, 06:41 #289Senior Member
Still more fettling needed,
will it never end?
- Join Date
- Jan 2012
- Location
- Tadley
- Posts
- 13,326
- Thanks
- 2,620
Thanked 4,587 Times in 3,404 PostsGood work Lee, interesting to see the sensor is a Ford part.
-
The Following User Says Thank You to stribo For This Useful Post:
960kg (Sunday 14th June 2015)
-
Saturday 13th June 2015, 09:11 #290Senior Member
Norfolk born and bred.
Give me a high 6!!!
- Join Date
- Oct 2012
- Location
- Great Moulton Norfolk NR15
- Posts
- 953
- Thanks
- 221
Thanked 211 Times in 181 PostsNice one Lee. Did your dangly sensor not put any fault light on the dash or log any codes?
Me: 2005 V70 2.4 T5 SE. All standard.
The Wife: 2008 C70 2.5 T5 SE. All standard.
-
Saturday 13th June 2015, 10:11 #291Senior Member
...here we go again...
- Join Date
- Oct 2004
- Location
- Kent
- Posts
- 5,337
- Thanks
- 1,075
Thanked 1,393 Times in 1,068 PostsYes it did! SUM 0221 iirc. No light on dash, just a stored 'Amber' code. Originally Posted by silverhorse
2014 V60 Polestar 6spd Auto :: Polestar map peak boost 17.4psi :: IPD 3" DP + 150cel :: Polestar 2.5" exhaust :: Paddle Shift Geartronic :: Black glass :: Maxton Splitter :: K+N Filter :: IPD Aluminium Top engine mount :: Brembo 6 pots :: 20" Polestar rims :: Brembo 371mm floating discs :: Sensus RTi + DAB + BT + WIFi :: D3S XENARC 6000k Active bending headlights
-
Sunday 12th July 2015, 22:47 #292Senior Member
...here we go again...
- Join Date
- Oct 2004
- Location
- Kent
- Posts
- 5,337
- Thanks
- 1,075
Thanked 1,393 Times in 1,068 PostsHad Dealer service done last week....144k service.
Included:
0W30 Shell Helix Ultra AS + filter
Spark plugs
Service 2.0 upgrade for CCM, CEM and DIM
pollen filter
Both VVT solenoid gaskets replaced (64% labour discount)
Headlamp align (FREE)
Labour 25% discount
29 point check
cleaned inside and out
Things that need doing:
Drive Shaft output seal weeping (cleaned and needs re inspecting in 30 days)
5% moisture content in brake fluid
Front pads getting very low
Hand brake cables are shagged (I told the dealer not to apply the handbrake as I knew it was buggered)
Overall a bloody good service by my local dealer! 2014 V60 Polestar 6spd Auto :: Polestar map peak boost 17.4psi :: IPD 3" DP + 150cel :: Polestar 2.5" exhaust :: Paddle Shift Geartronic :: Black glass :: Maxton Splitter :: K+N Filter :: IPD Aluminium Top engine mount :: Brembo 6 pots :: 20" Polestar rims :: Brembo 371mm floating discs :: Sensus RTi + DAB + BT + WIFi :: D3S XENARC 6000k Active bending headlights
-
Sunday 12th July 2015, 23:44 #293Senior Member
...here we go again...
- Join Date
- Oct 2004
- Location
- Kent
- Posts
- 5,337
- Thanks
- 1,075
Thanked 1,393 Times in 1,068 PostsThe Air filter would have been replaced on the 144k service, but mine is a cotton type, so I gave it a good clean in...
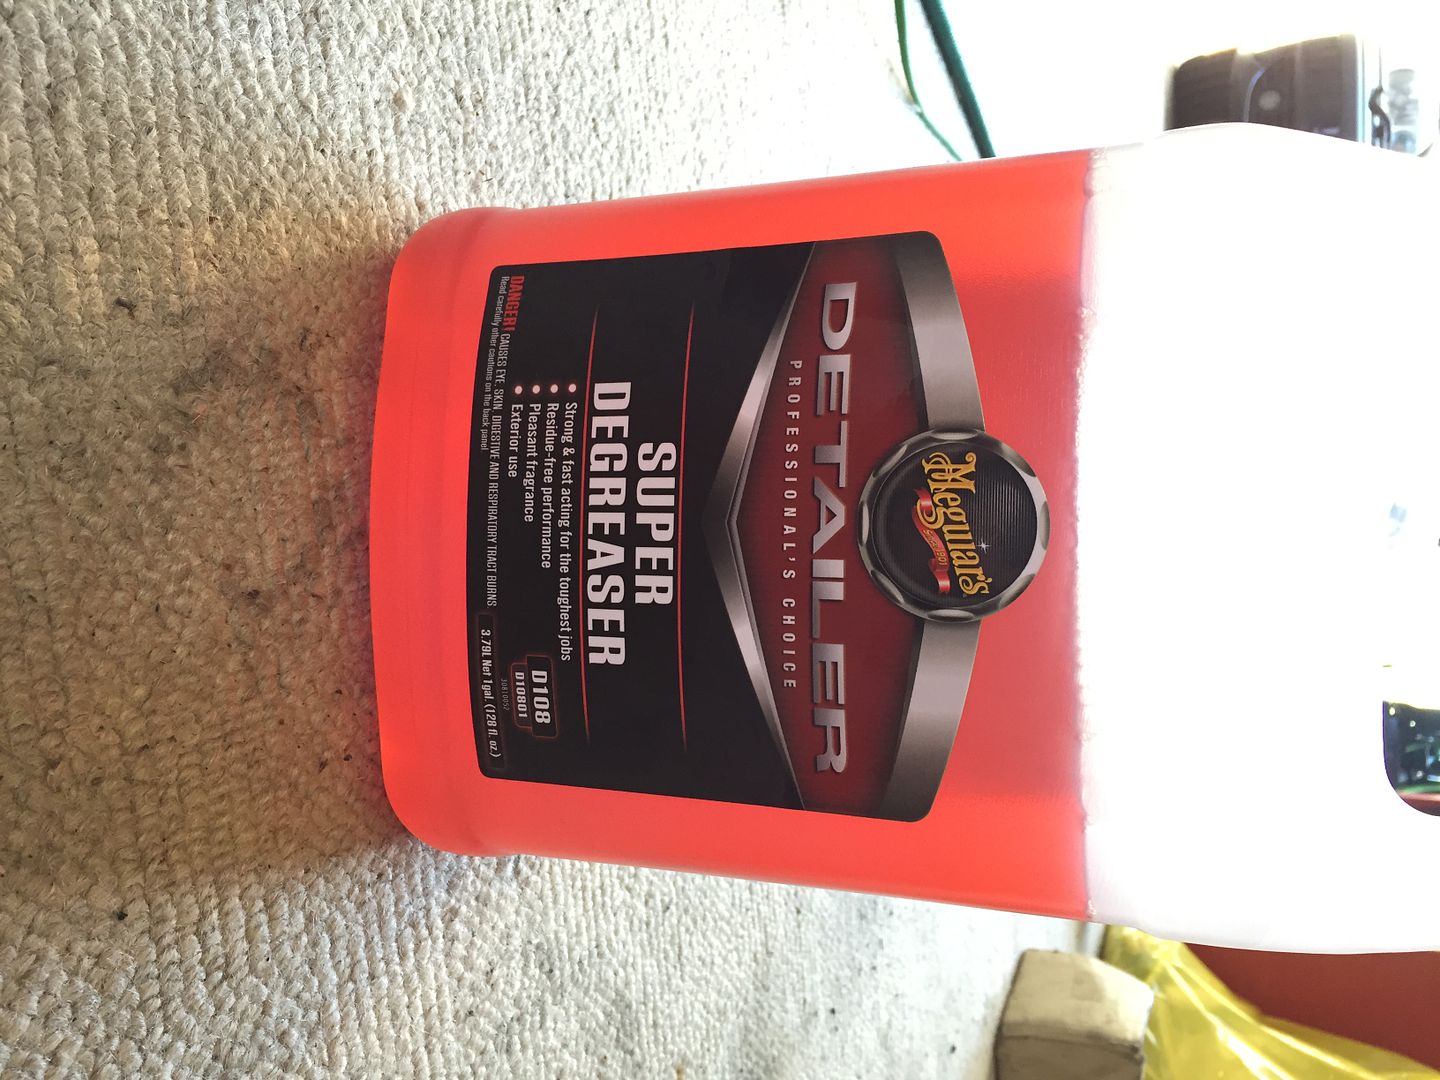
Then after leaving to air dry for a few hours, refitted and gave the engine a good clean.
Before:
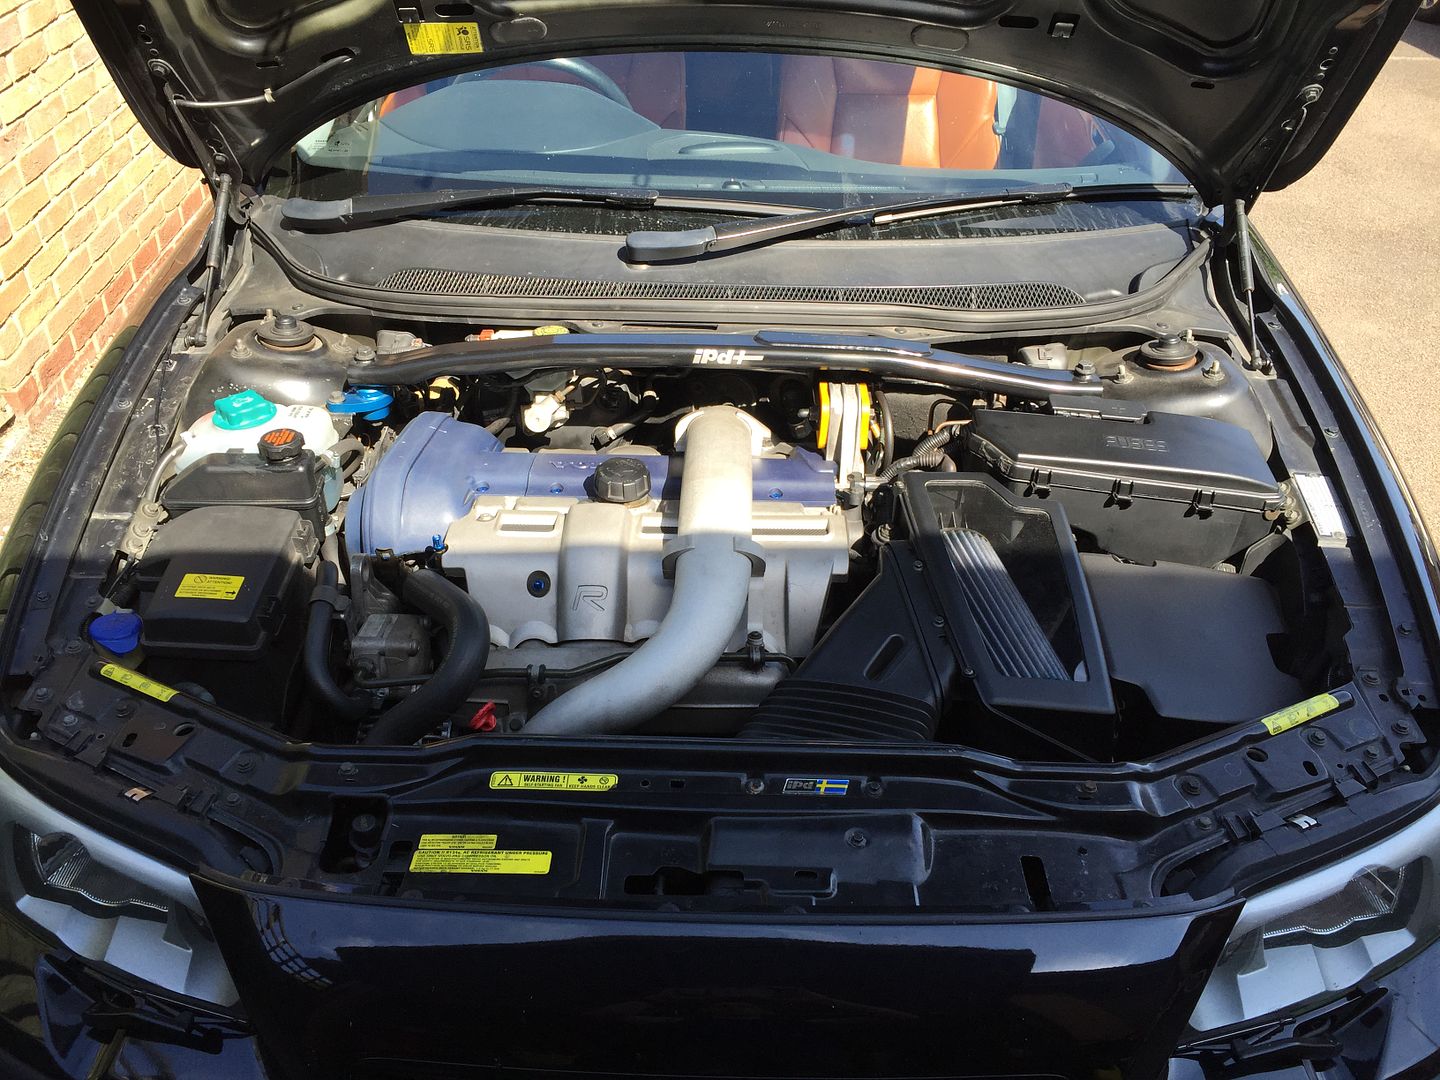
After:
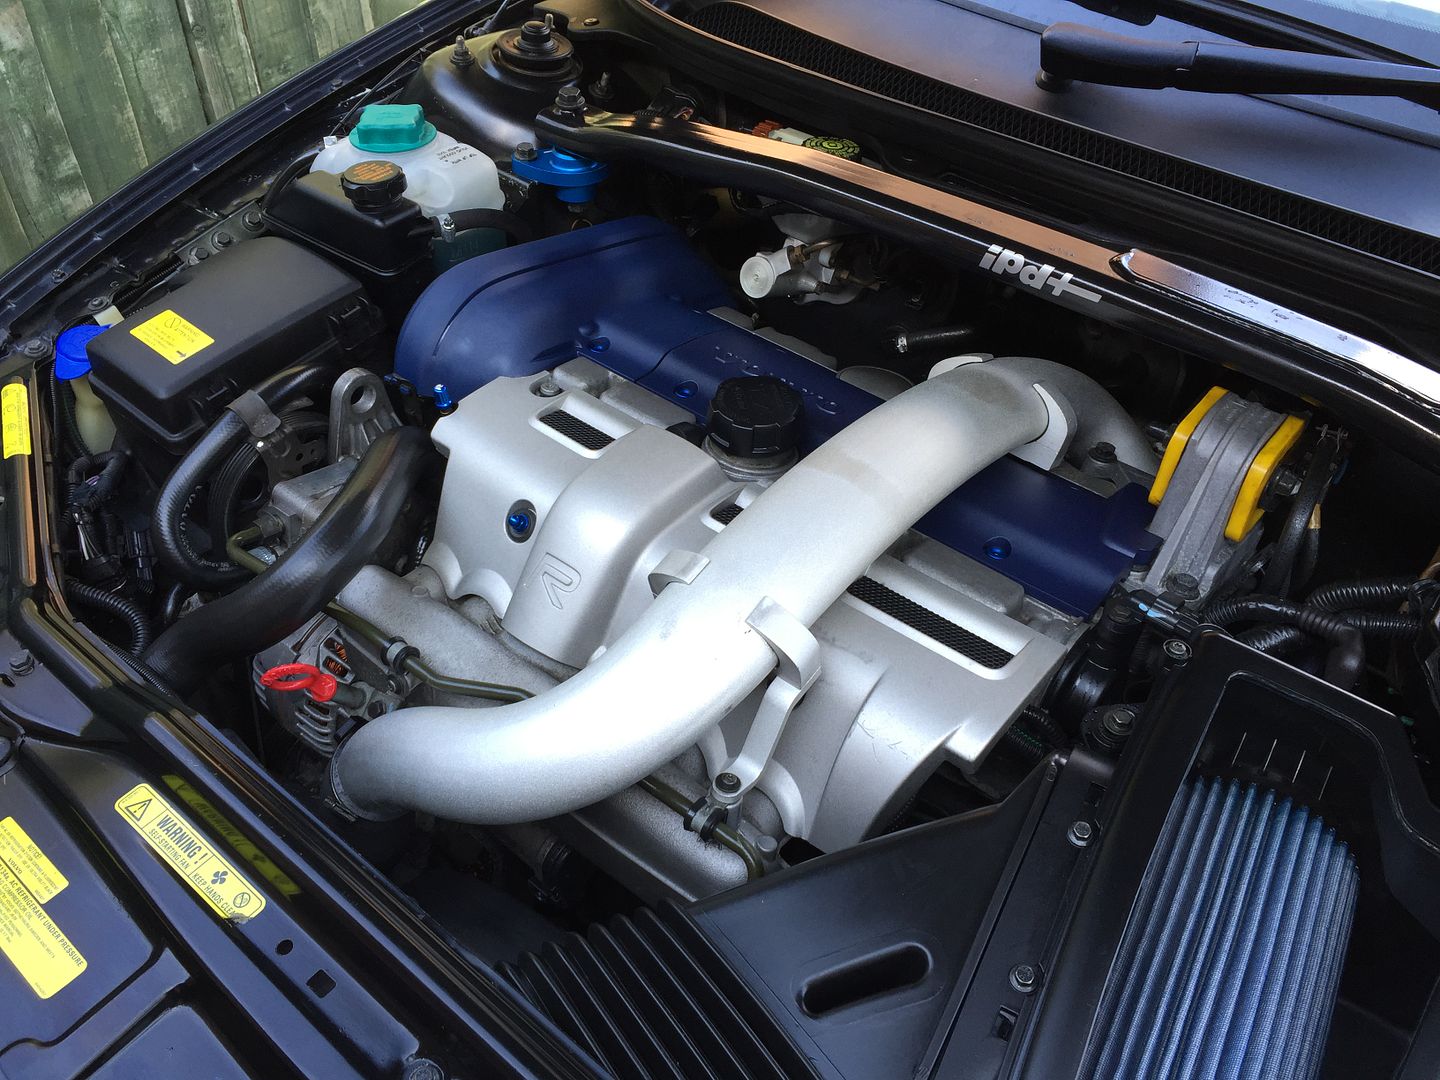
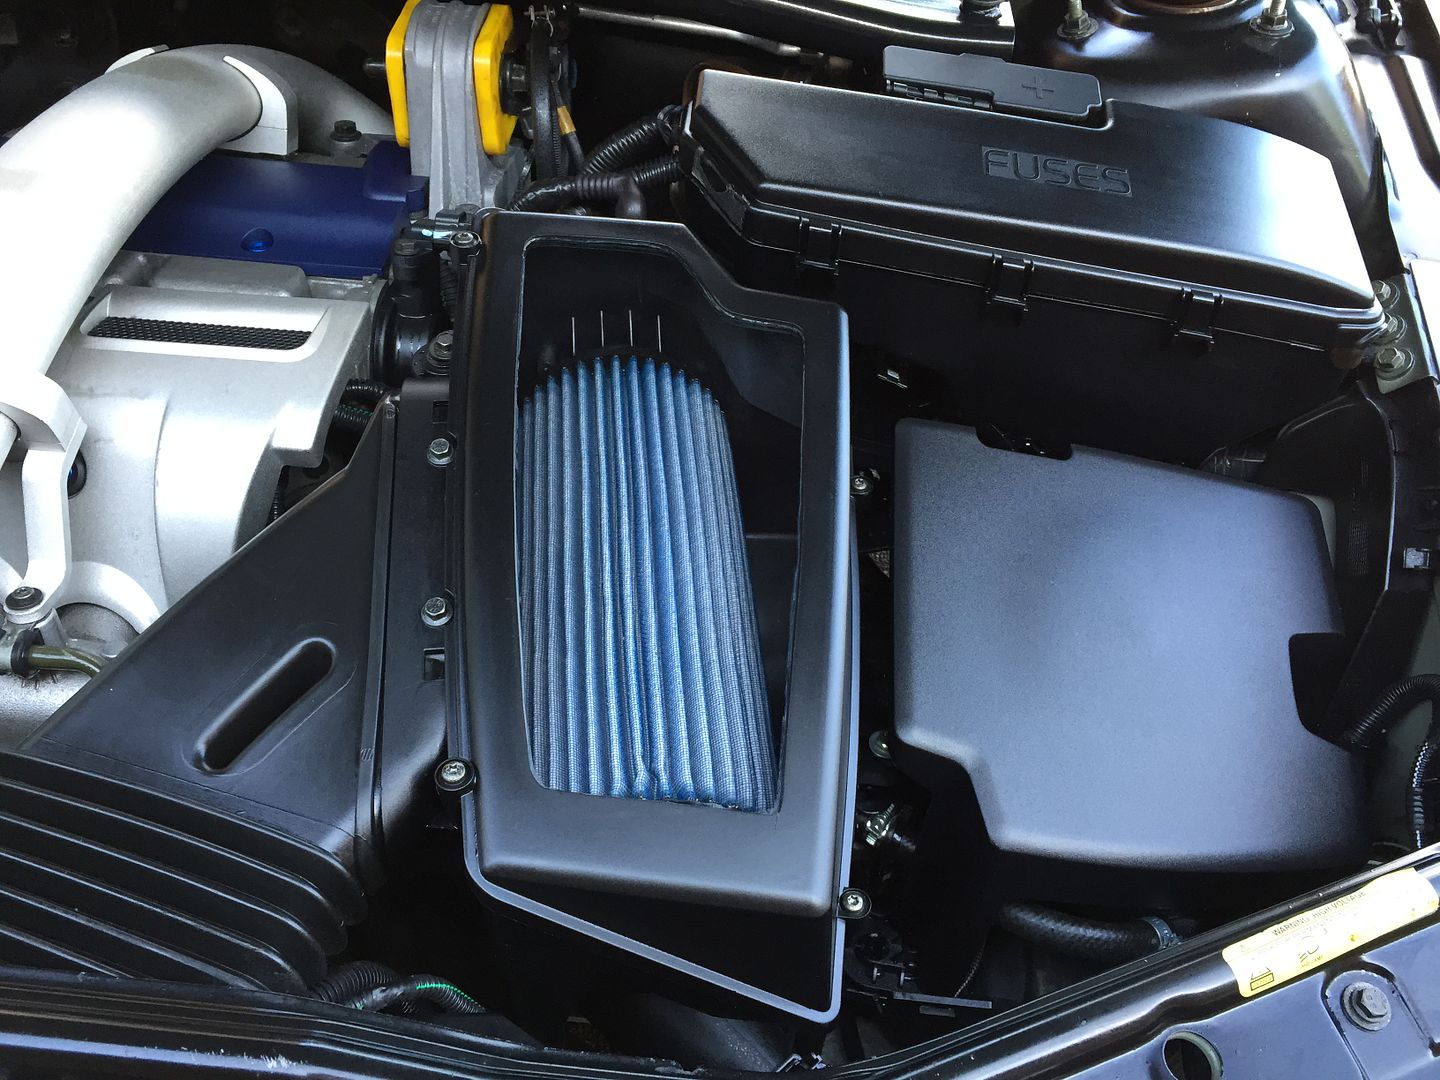
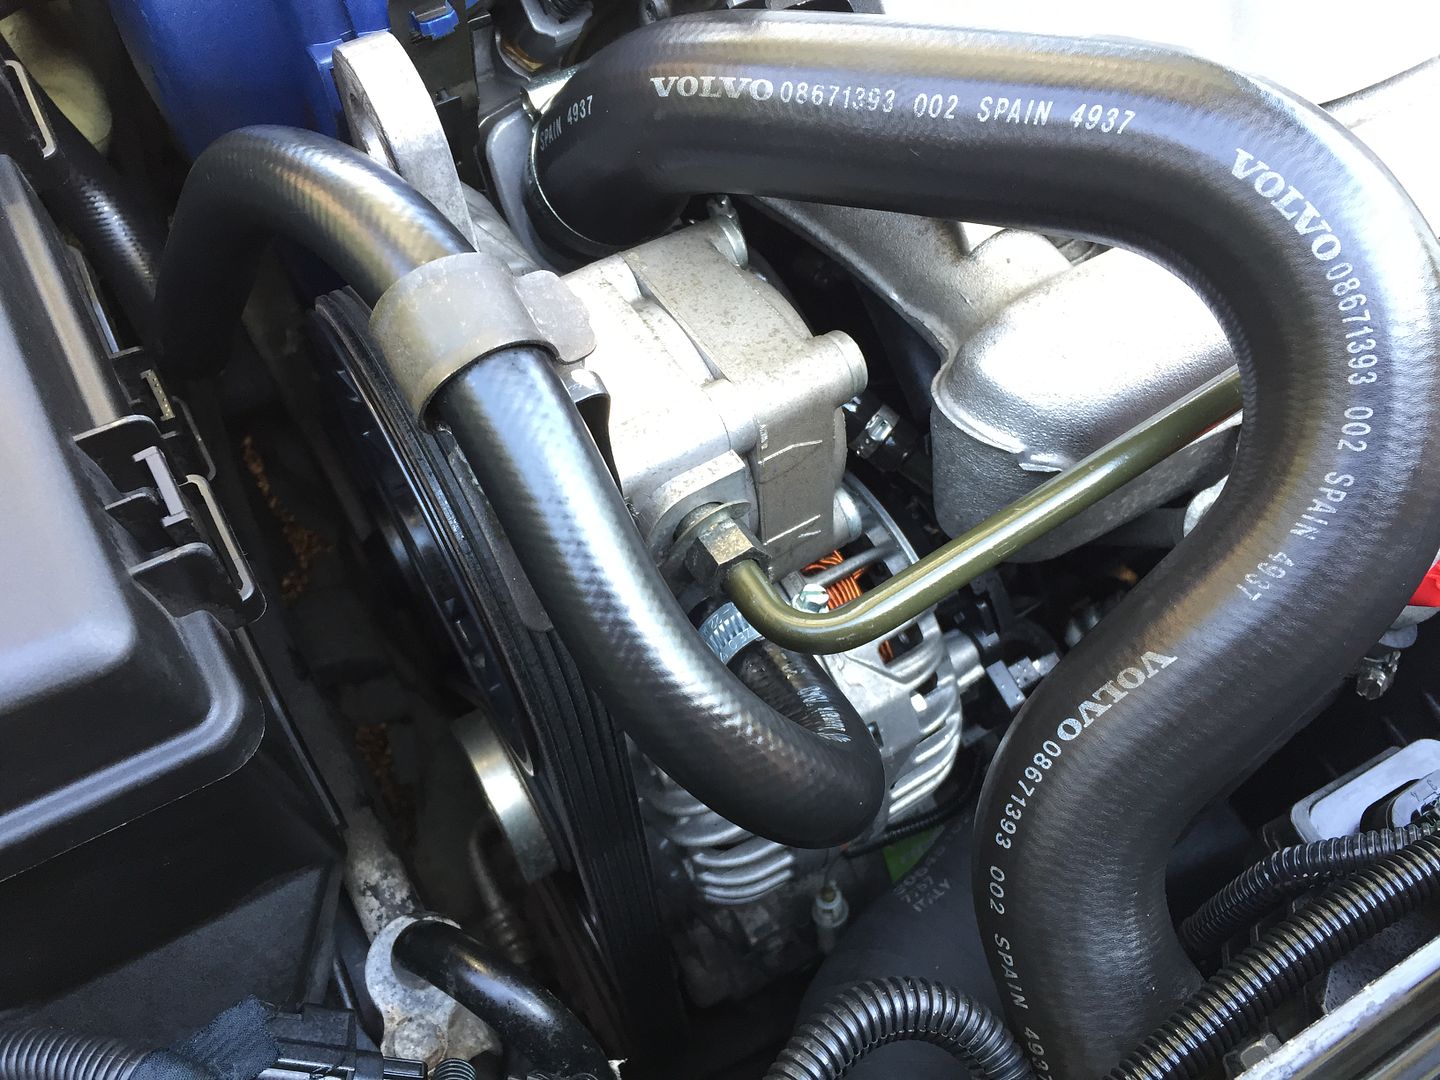
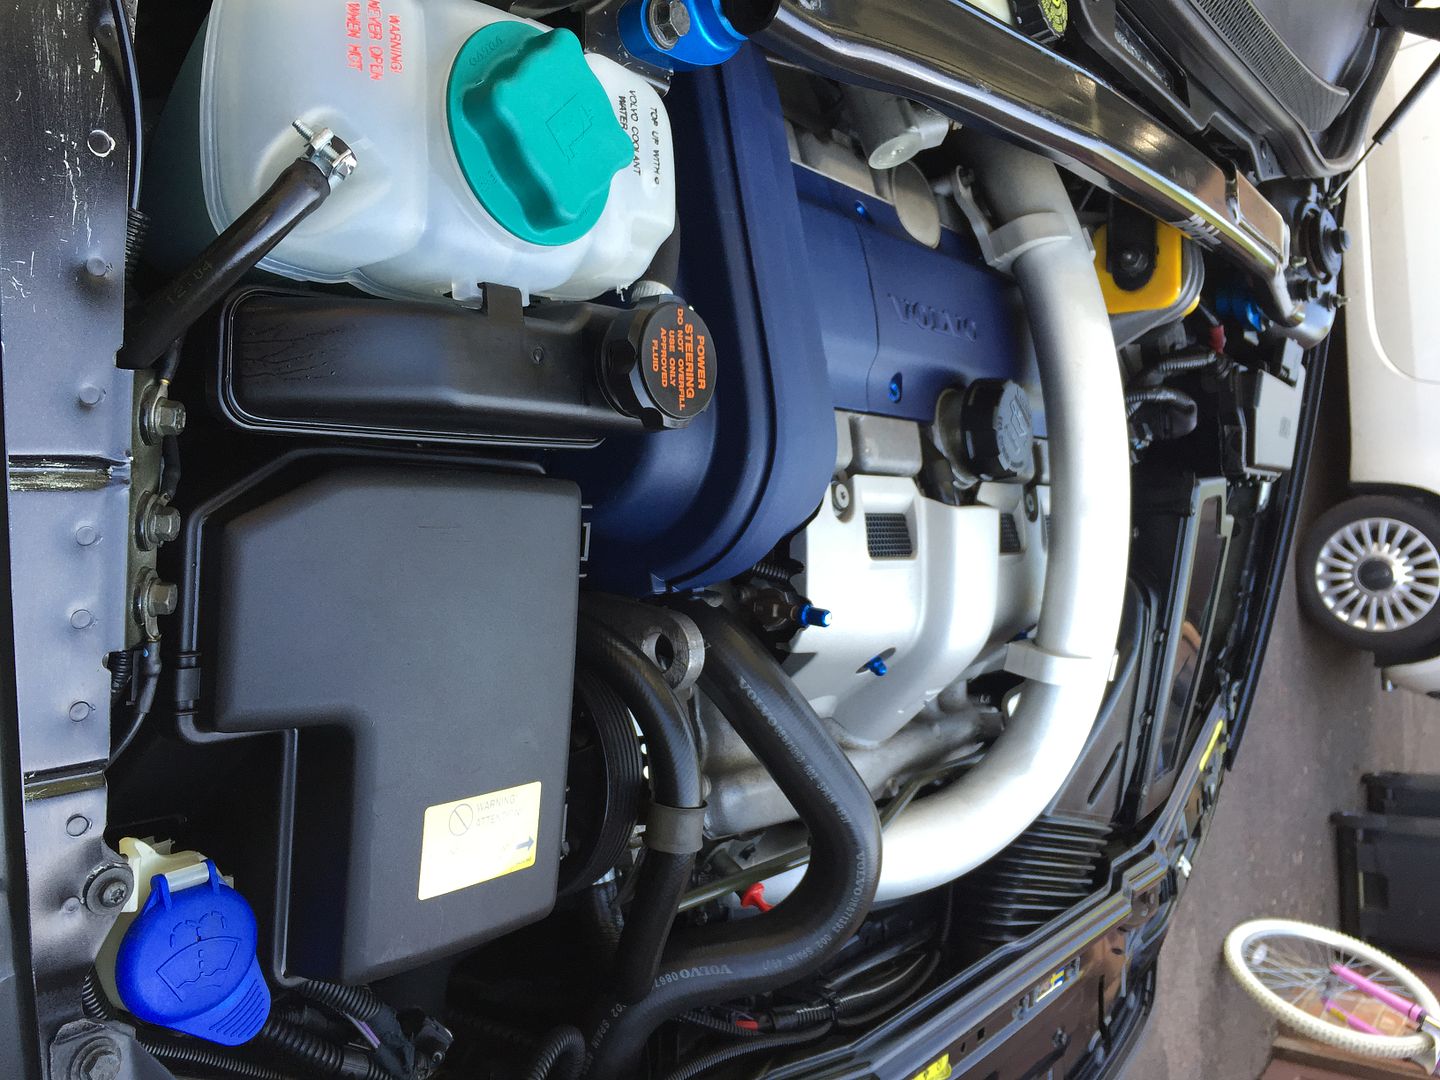
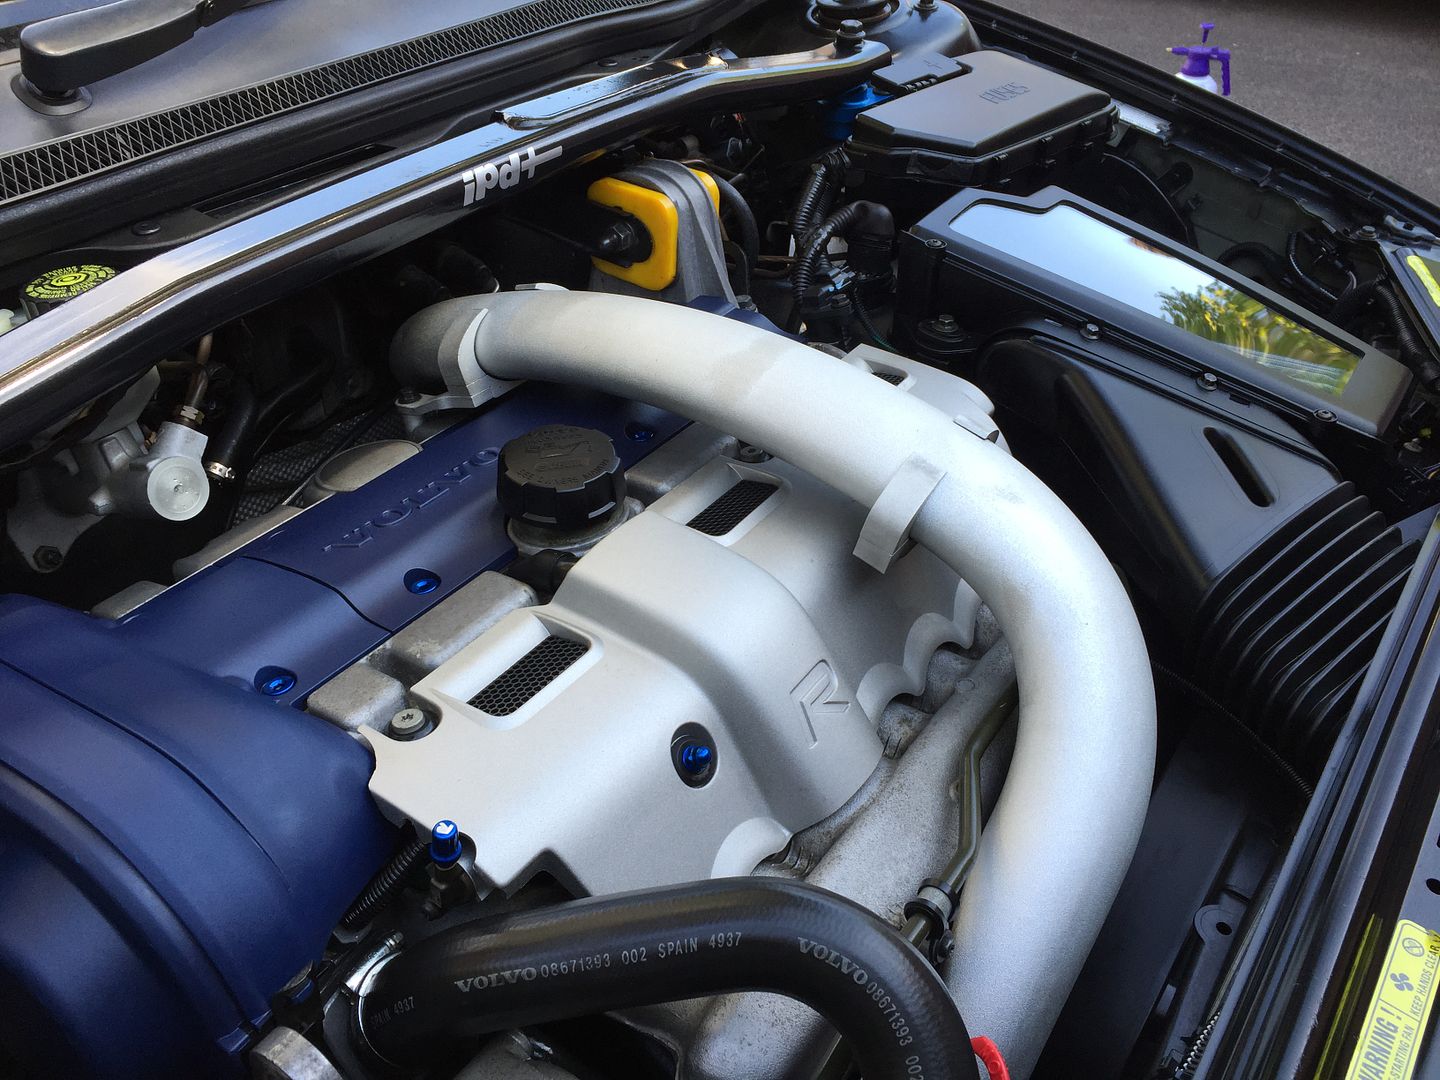
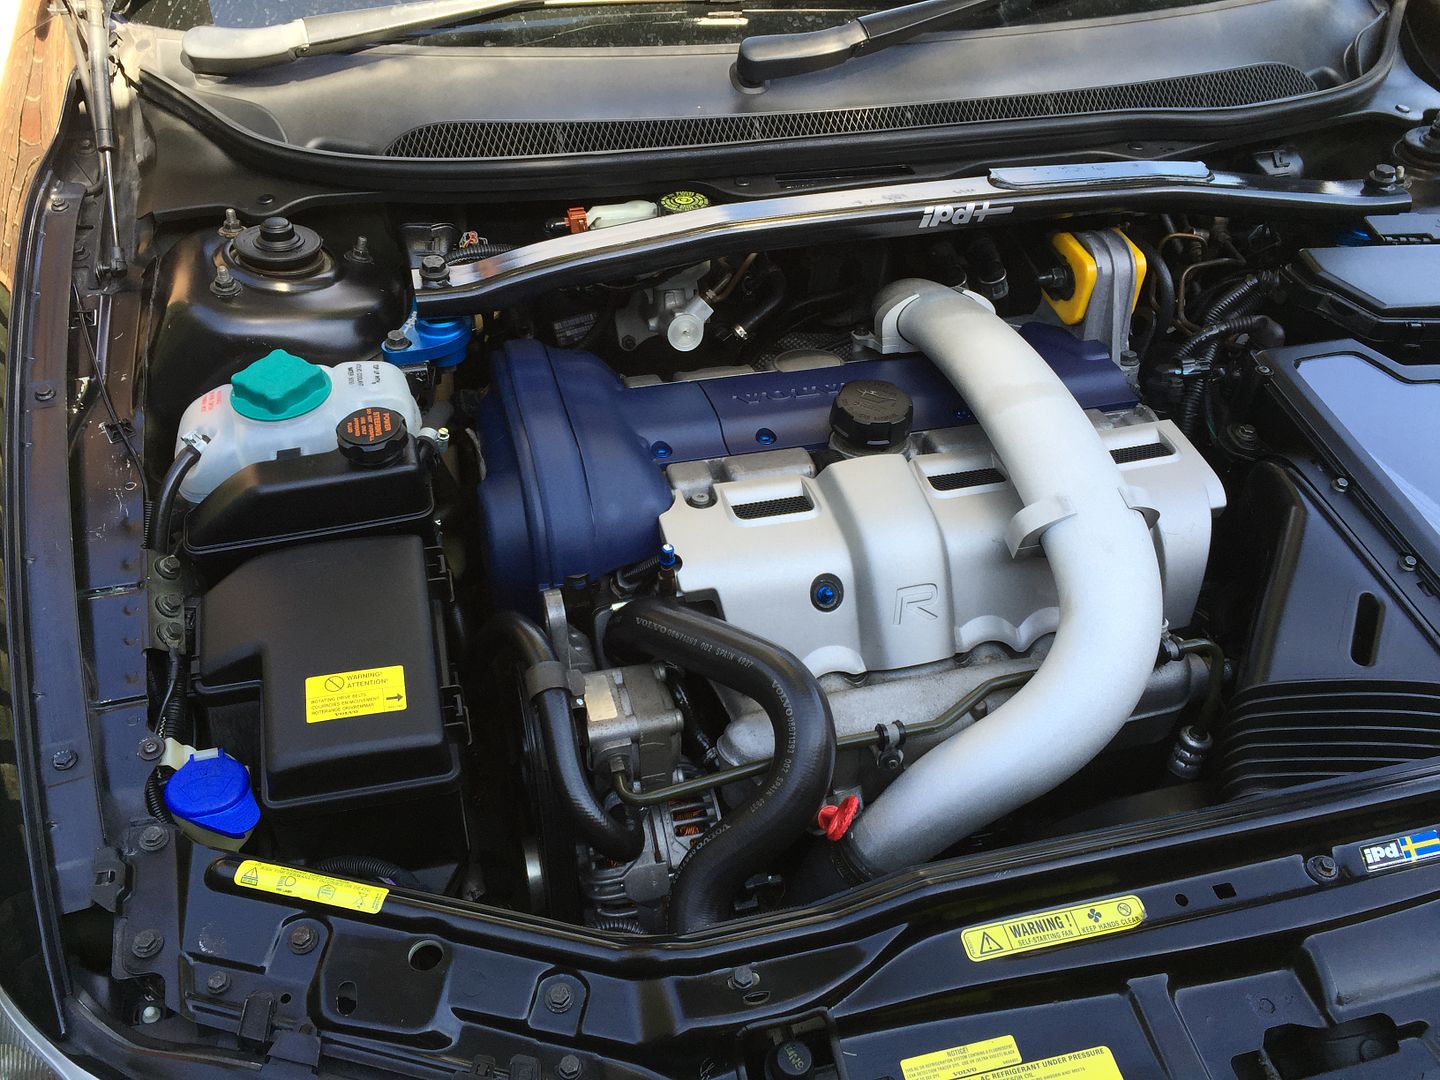
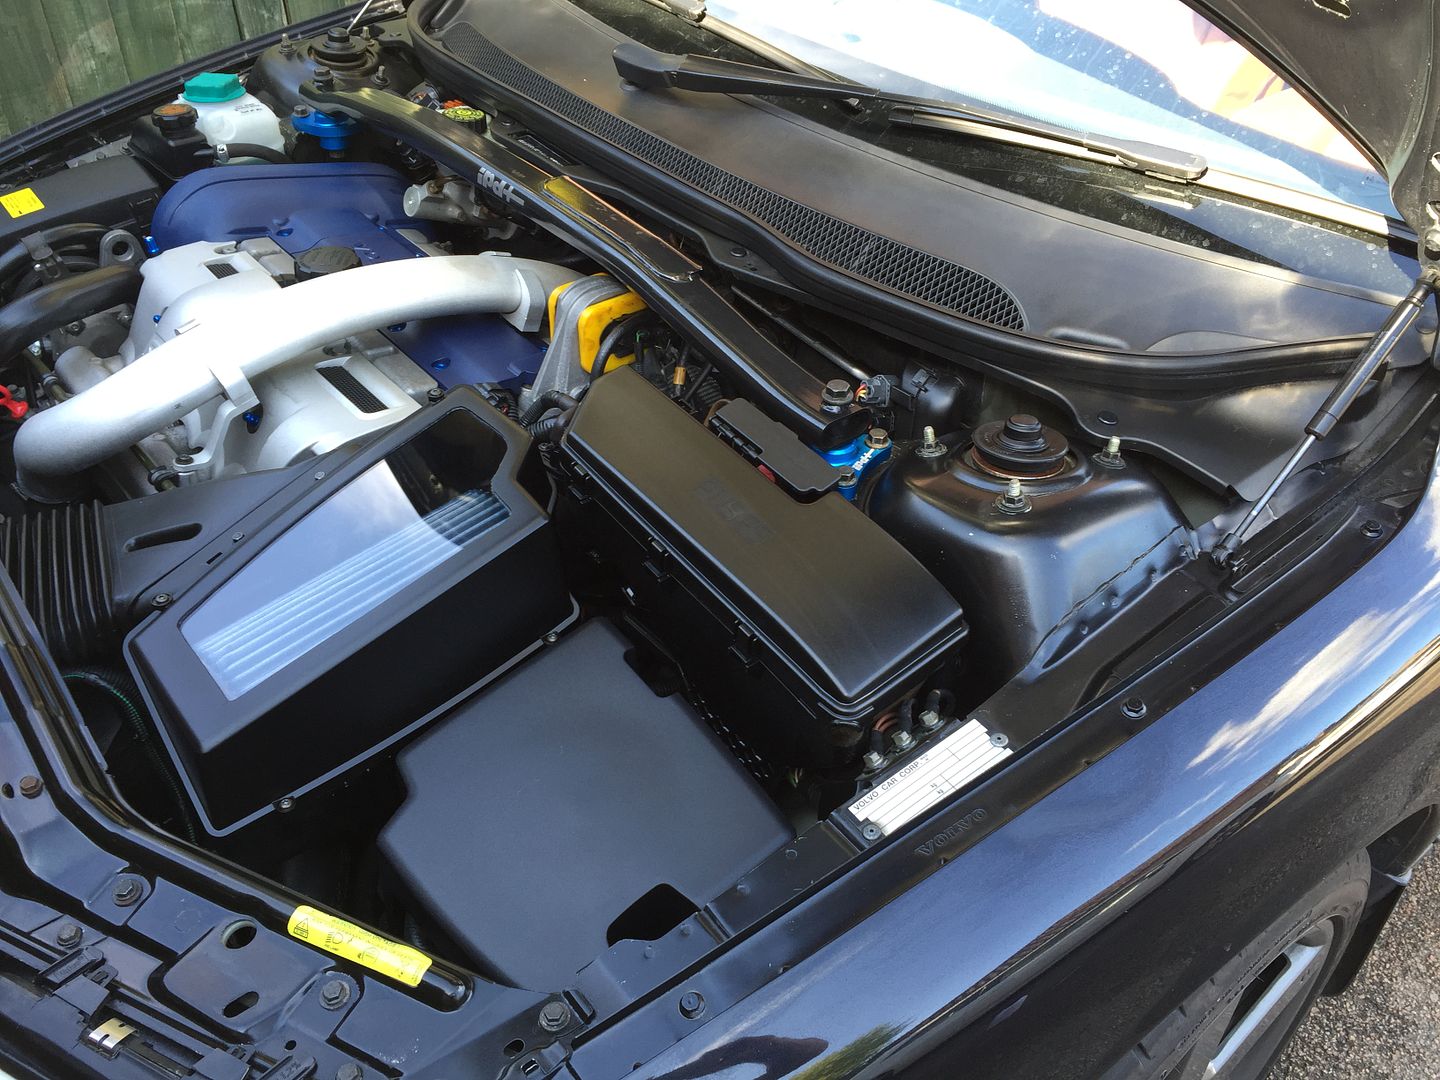
Cleaning the Air filter made a big difference too!2014 V60 Polestar 6spd Auto :: Polestar map peak boost 17.4psi :: IPD 3" DP + 150cel :: Polestar 2.5" exhaust :: Paddle Shift Geartronic :: Black glass :: Maxton Splitter :: K+N Filter :: IPD Aluminium Top engine mount :: Brembo 6 pots :: 20" Polestar rims :: Brembo 371mm floating discs :: Sensus RTi + DAB + BT + WIFi :: D3S XENARC 6000k Active bending headlights
-
Monday 13th July 2015, 00:28 #294Senior Member
This user has no status
- Join Date
- Aug 2006
- Location
- Sunny Bournemouth
- Posts
- 2,999
- Thanks
- 851
Thanked 1,102 Times in 727 PostsLooking good Lee, I'm doing my engine bay this coming week
-
Monday 13th July 2015, 00:44 #295Senior Member
The Volvo with a 'twist'!
- Join Date
- Mar 2012
- Location
- Hereford
- Posts
- 1,595
- Thanks
- 284
Thanked 801 Times in 547 PostsThat's a lovely clean bay.
Love the window on the airbox
98 V70 AWD - Long Term Companion. Loads of little changes, the Volvo with a twist.
96 850 R Estate - Pink Pus, project pulled from the weeds!
Oh, plus a glorious (but dead) 01 Alfa 166 V6 and a 05 Liquid Yellow Clio 182.
-
The Following User Says Thank You to AcidicDavey For This Useful Post:
LeeT5 (Thursday 8th October 2015)
-
Monday 13th July 2015, 08:59 #296Senior Member
...here we go again...
- Join Date
- Oct 2004
- Location
- Kent
- Posts
- 5,337
- Thanks
- 1,075
Thanked 1,393 Times in 1,068 PostsCheers! It will hopefully look even better, once I finish it. Have got 1m of blue LEDs to be installed inside the air box. I know it's kinda pointless cos the bonnets shut etc, but I thought It would look great at a show or meet. Originally Posted by AcidicDavey
2014 V60 Polestar 6spd Auto :: Polestar map peak boost 17.4psi :: IPD 3" DP + 150cel :: Polestar 2.5" exhaust :: Paddle Shift Geartronic :: Black glass :: Maxton Splitter :: K+N Filter :: IPD Aluminium Top engine mount :: Brembo 6 pots :: 20" Polestar rims :: Brembo 371mm floating discs :: Sensus RTi + DAB + BT + WIFi :: D3S XENARC 6000k Active bending headlights
-
Monday 13th July 2015, 10:12 #297Senior Member
Still more fettling needed,
will it never end?
- Join Date
- Jan 2012
- Location
- Tadley
- Posts
- 13,326
- Thanks
- 2,620
Thanked 4,587 Times in 3,404 PostsI'd have gone for orange LEDs. Originally Posted by LeeT5
-
Monday 13th July 2015, 21:35 #298Senior Member
...here we go again...
- Join Date
- Oct 2004
- Location
- Kent
- Posts
- 5,337
- Thanks
- 1,075
Thanked 1,393 Times in 1,068 PostsYep, would look good with an orange engine bay. Unfortunately, my cars black and they don't do black led's...... Originally Posted by stribo
 2014 V60 Polestar 6spd Auto :: Polestar map peak boost 17.4psi :: IPD 3" DP + 150cel :: Polestar 2.5" exhaust :: Paddle Shift Geartronic :: Black glass :: Maxton Splitter :: K+N Filter :: IPD Aluminium Top engine mount :: Brembo 6 pots :: 20" Polestar rims :: Brembo 371mm floating discs :: Sensus RTi + DAB + BT + WIFi :: D3S XENARC 6000k Active bending headlights
-
Monday 13th July 2015, 21:43 #299Senior Member
...here we go again...
- Join Date
- Oct 2004
- Location
- Kent
- Posts
- 5,337
- Thanks
- 1,075
Thanked 1,393 Times in 1,068 Posts1. Fit 6000k HID fog lights - (COMPLETE)
2. 3" downpipe --(in the new year)
3. 200 cell race cat --(in the new year)
4. Fit Volvotech CFE --(COMPLETE)
5. Handbrake mod --(in the new year)
6. Replace windscreen --(in the spring)
7. New leather OE gear knob --(still waiting....)
8. Refit rear mudflaps --(COMPLETE)
9. Fit magnetic engine oil drain plug on next service --(COMPLETE)
10. IPD Rear adjustable toe rods --(Need to order)
11. IPD DEM alloy cover --(need to order)
12. IPD Billet blue alloy engine oil cap. --(NO LONGER AVAILABLE)
13. larger exhaust tips
14. Fuel filter bracket and bolt -- (COMPLETE)
15. Fit stock air box once acrylic window mod -- (COMPLETE)
16. Fit Blue Jetex cotton filter -- (COMPLETE)
17. Swap Forge CBV yellow spring for blue spring (17psi).
18. 144k service at Dealer in April (COMPLETE)
19. P/S fluid flush (COMPLETE)
20. Fit BREMBO drilled discs and pads.
21. Fit D5 oil cooler -- (COMPLETE)2014 V60 Polestar 6spd Auto :: Polestar map peak boost 17.4psi :: IPD 3" DP + 150cel :: Polestar 2.5" exhaust :: Paddle Shift Geartronic :: Black glass :: Maxton Splitter :: K+N Filter :: IPD Aluminium Top engine mount :: Brembo 6 pots :: 20" Polestar rims :: Brembo 371mm floating discs :: Sensus RTi + DAB + BT + WIFi :: D3S XENARC 6000k Active bending headlights
-
Monday 13th July 2015, 21:52 #300Senior Member
a 19t just isn't laggy enough
- Join Date
- Aug 2004
- Posts
- 19,785
- Thanks
- 4,216
Thanked 5,021 Times in 4,072 Postsfog lights permanently on, led lit perspex airfilter. You do know this is a Volvo forum & not a Saxo one?


 Reply With Quote
 98 V70 AWD - The Volvo with a Twist :)
 1999 Volvo C70 T5 MANUAL ME7
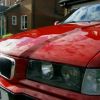 Bmw m3


 Veronica


 BT
BT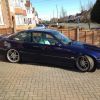 Meshashmitt
Thread Information
Users Browsing this Thread
There are currently 1 users browsing this thread. (0 members and 1 guests)
 Posting Permissions

Bookmarks