


 The DaRk Knight
Right, I know MartinPeachey has done a thread but this is for a door pod and guage. I used an IPD 'R' guage seen here:
http://www.ipdusa.com/products/6153/...ed-boost-gauge
Also i used a Carbon fibre door pod from Carbonfiberwerks....
http://carbonfiberwerks.stimuluscreations.com/v70.htm
You can have them prime the pod if you want to spray a different colour. I primed mine myself using Halfords surface cleaner, 2 coats of primer and 3 coats of top coat Matte black.
OK, on with the mod.
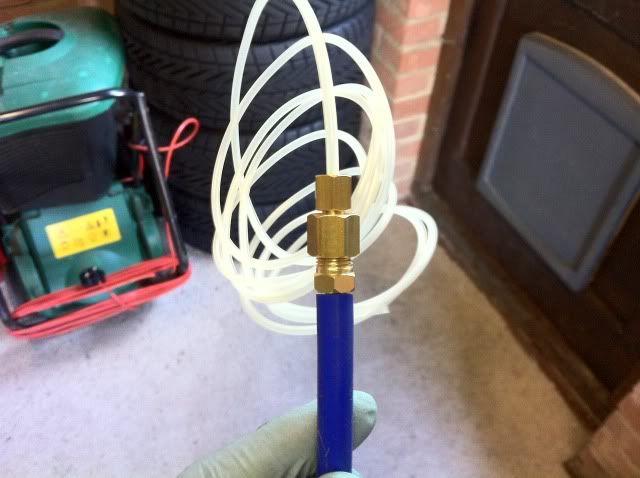
You'll need at least 3m of silicone vac hose as the polyurethane tubing they provide only gets you into the wing under the bonnet.
First of all open the bonnet and remove the Air box or in my case AMS system:
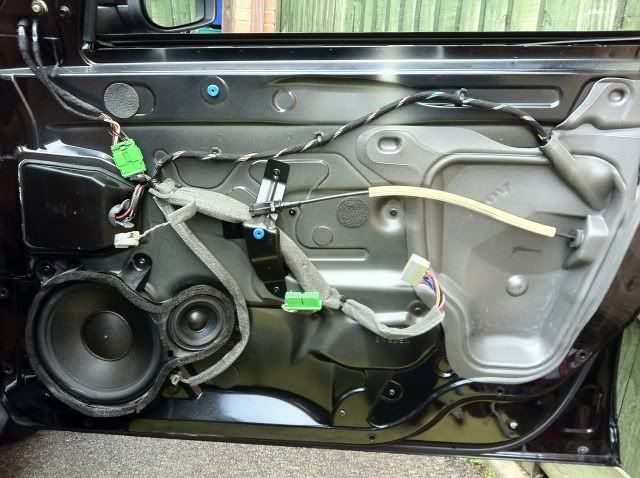
Next, remove the drivers door card following this easy to follow video:
[ame]http://www.youtube.com/watch?v=v_UpoWWpP2U[/ame]
Your door will look like this:
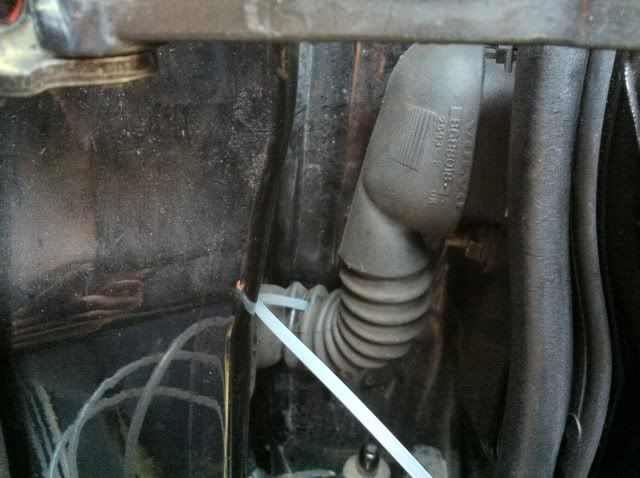
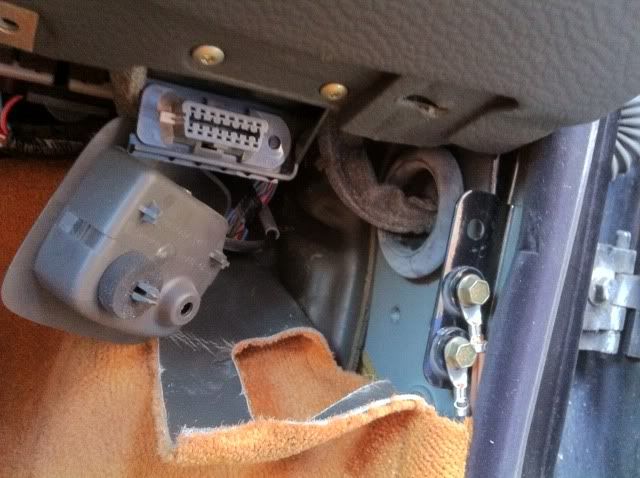
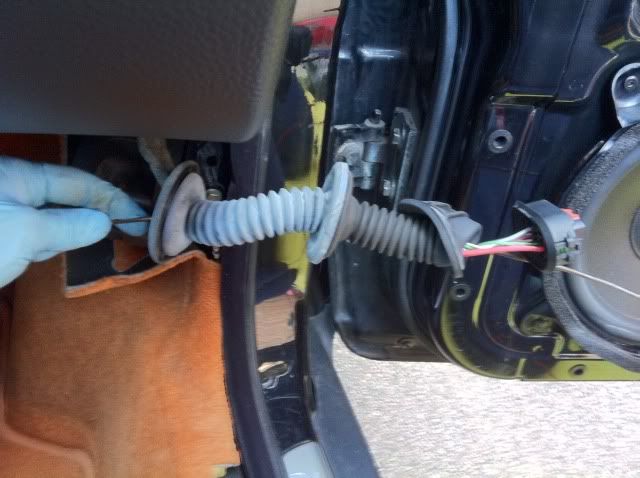
Next, unbolt bonnet catch using a 10mm socket. Pull back carpet, remove footwell light lower shroud and gain access to rubber cable harness trunking on drivers kick panel:
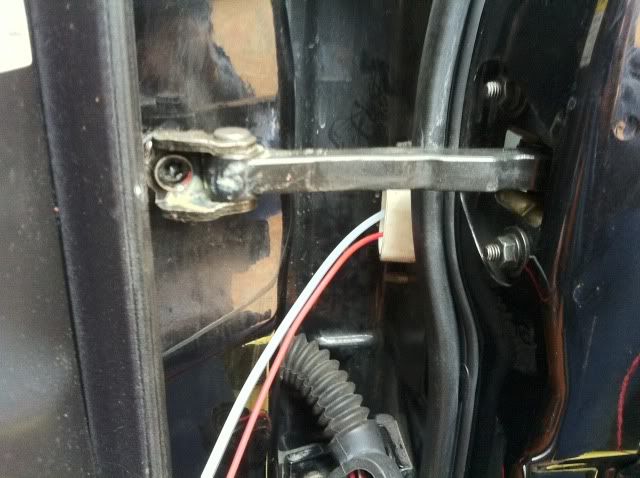
Undo door check strap - shown in this picture:
This will gain you vital access later in the mod.
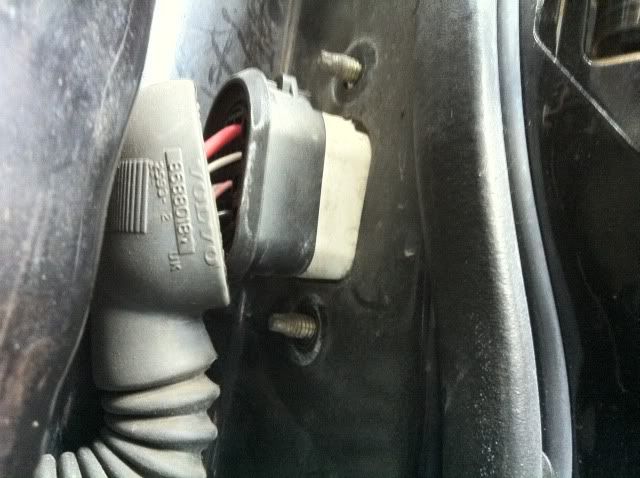
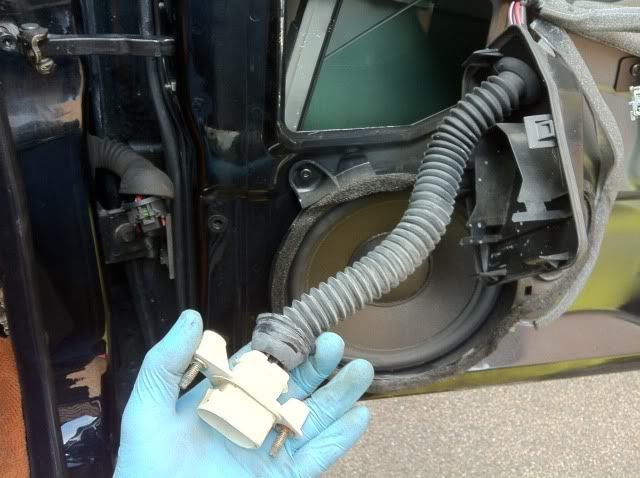
Undo the two 10mm nuts and squeeze the black pegs at the top of the harness plug. this will come apart.
Pull out the white plugged harness:
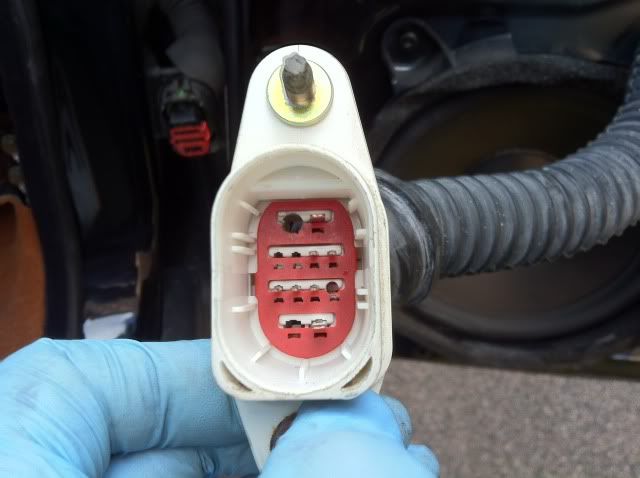
using a 4mm drill bit and 2.5mm drill bit, drill into the empty sockets like so....
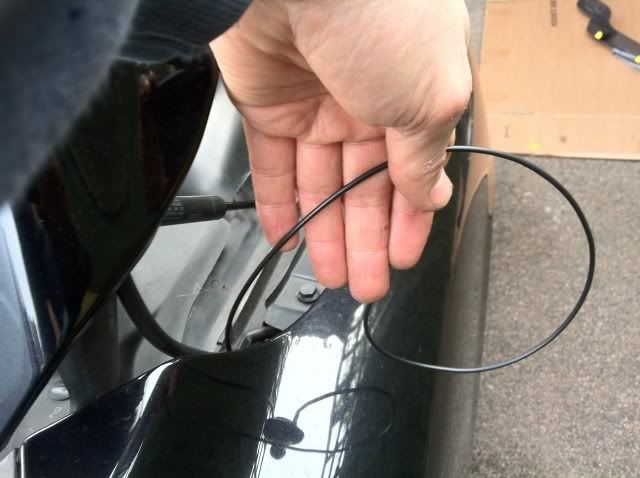
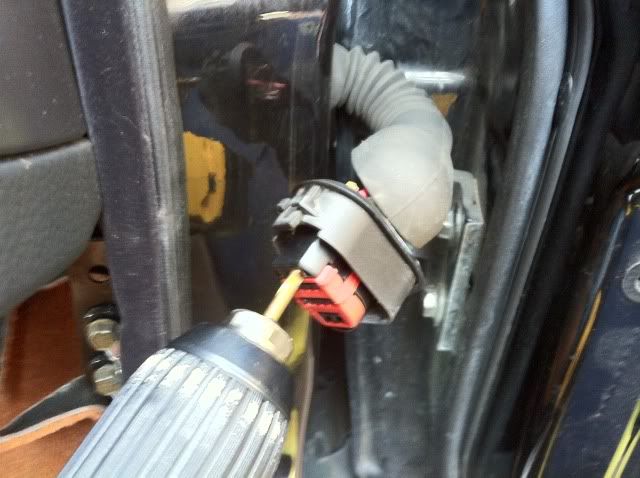
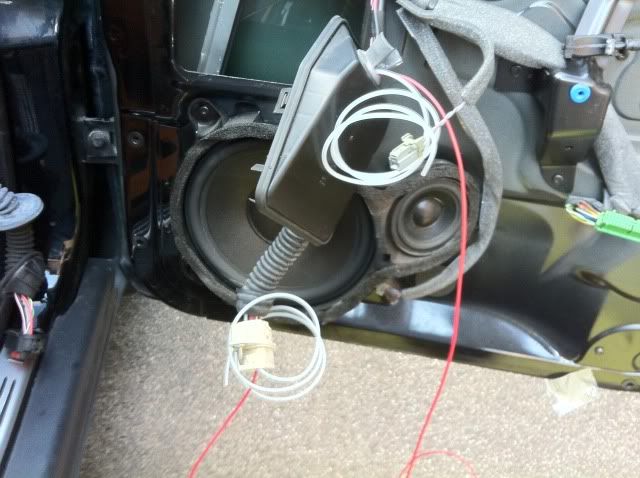
Undo the other harness that goes through the side of the car and drill out the opposite plug. This will enable you to feed the vac hose and 5amp wire for the light on the guage.
make sure you only push the vac hose as far as the middle harness as you'll need to make a hole for it to protrude through. The 5amp wire will continue into the car.
(To be continued)
Results 1 to 20 of 41
-
Monday 30th April 2012, 22:15 #1Senior Member
 ...here we go again...
- Join Date
- Oct 2004
- Location
- Kent
- Posts
- 5,337
- Thanks
- 1,075
Thanked 1,393 Times in 1,068 PostsFitting an IPD boost guage and door pod (P2)
2014 V60 Polestar 6spd Auto :: Polestar map peak boost 17.4psi :: IPD 3" DP + 150cel :: Polestar 2.5" exhaust :: Paddle Shift Geartronic :: Black glass :: Maxton Splitter :: K+N Filter :: IPD Aluminium Top engine mount :: Brembo 6 pots :: 20" Polestar rims :: Brembo 371mm floating discs :: Sensus RTi + DAB + BT + WIFi :: D3S XENARC 6000k Active bending headlights
-
The Following 4 Users Say Thank You to LeeT5 For This Useful Post:
d2k (Monday 30th April 2012),stephenevans99 (Friday 4th May 2012),stribo (Tuesday 1st May 2012),volvokid (Tuesday 1st May 2012)
-
Tuesday 1st May 2012, 01:00 #2Trader
This user has no status
- Join Date
- Nov 2010
- Location
- chester le street
- Posts
- 6,128
- Thanks
- 969
Thanked 1,398 Times in 1,121 Postswill be watching this with intrest. been thinking about doing this exact mod for a while. if you dont mind me asking whats the cost inc import tax. i was just going to order it a while ago but when it went yo basket it said couldnt take payment or sumit along those lines
-
Tuesday 1st May 2012, 01:21 #3Shiny Superstar
Back in the game!
- Join Date
- Aug 2004
- Location
- Stunning Shropshire
- Posts
- 17,773
- Thanks
- 2,501
Thanked 3,484 Times in 2,466 Posts
why are you making this so difficult by mounting on the door?
Volvo ABS ECU Repair
Join my projecteers tribe - Old Volvos Never Die - They just get faster.
Visit my VPCUK garage and my YouTube channel - WobblyDave72
-
Tuesday 1st May 2012, 02:36 #4Senior Member
...here we go again...
- Join Date
- Oct 2004
- Location
- Kent
- Posts
- 5,337
- Thanks
- 1,075
Thanked 1,393 Times in 1,068 PostsI'm not making it difficult Dave. You'll see when i finished. i don't like the IPD pod (it looks crap) and i didn't want it just stuck on the dash like a bloody tom tom! Originally Posted by Wobbly Dave
 2014 V60 Polestar 6spd Auto :: Polestar map peak boost 17.4psi :: IPD 3" DP + 150cel :: Polestar 2.5" exhaust :: Paddle Shift Geartronic :: Black glass :: Maxton Splitter :: K+N Filter :: IPD Aluminium Top engine mount :: Brembo 6 pots :: 20" Polestar rims :: Brembo 371mm floating discs :: Sensus RTi + DAB + BT + WIFi :: D3S XENARC 6000k Active bending headlights
-
The Following User Says Thank You to LeeT5 For This Useful Post:
volvokid (Tuesday 1st May 2012)
-
Tuesday 1st May 2012, 04:11 #5Trader
This user has no status
- Join Date
- Nov 2010
- Location
- chester le street
- Posts
- 6,128
- Thanks
- 969
Thanked 1,398 Times in 1,121 Postsmy thoughts exactly. if modding a interior it has to look oe
-
The Following User Says Thank You to graemewelch For This Useful Post:
LeeT5 (Friday 4th May 2012)
-
Tuesday 1st May 2012, 04:37 #6More cars than a Showroom
This user has no status
- Join Date
- Jul 2008
- Location
- Cruden Bay (Scotland)
- Posts
- 6,355
- Thanks
- 1,464
Thanked 1,624 Times in 1,141 Posts
Looking forward to see this finished
Thanks
Martyn
-
Friday 4th May 2012, 21:08 #7Senior Member
...here we go again...
- Join Date
- Oct 2004
- Location
- Kent
- Posts
- 5,337
- Thanks
- 1,075
Thanked 1,393 Times in 1,068 PostsOk ladies, i finished the install today so heres the rest of it:
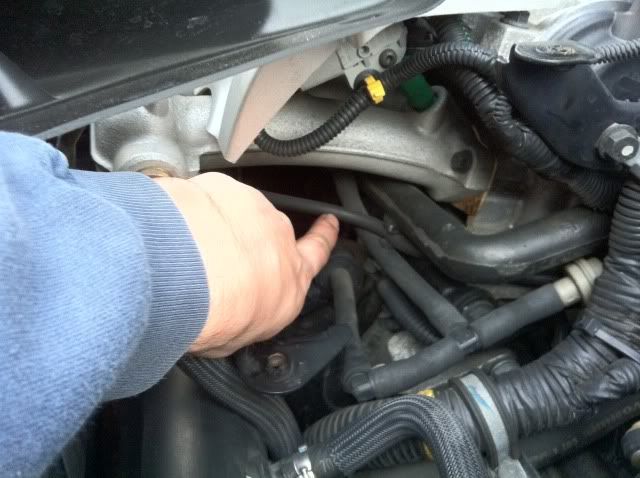
With air box removed, locate vac hose shown by my finger....
Then, using the supplied T piece, cut into hose and fit like so....
I used my own silicone hose to make up the bits i removed.

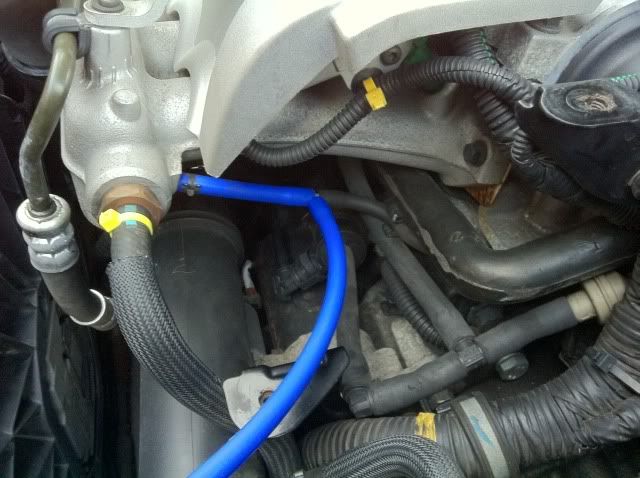
With the vac hose plumbed through the rubber trunking, attach it to a metal rod and feed it up through the wing like so. I also used spare wire to pull it through. Be careful not to kink the polyurthane tubing....
Next, using the supplied brass fittings, attach the poly tubing to the silicone tubing. I ran the blue silicone tubing round the front of the scuttle to the o/s wing....
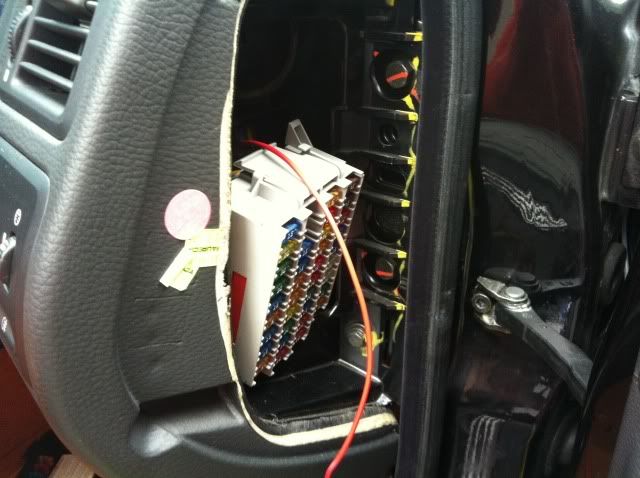
Next, Using fuse 20 in the side fuse box, remove the fuse box by pushing on the white tab at the top. Pull it towards you and gain access to the rear of fuse 20. Two blue wires (both ignition feed). Splice into one of these using a scitch lock and connect your live feed wire.
Now, working from the door end. Twist the white and red wires of the guage together and solder. Then connect to a 5 amp female/female connector. Then connect the other end of your feed wire to the connector.
Note:
If you want your guage to be bright, do not connect the white wire, just the red. If you want it to be dimmed (like i do) connect both wires. The black wire is earth and i connected it to the black earth wire for the door locking control module earth in the door.
Then connect your poly tubing to the guage, refit the door card after tidying up the wiring using cable ties.
Refit fuse box and cover. Refit bonnet latch and carpet and floor lighting panel.
I used black mastic (that sticky stuff that can be used again and again. It holds the pod perfect and is very strong. Makes it permenant but easily removed if it needs to be.
Stand back and admire your handy work.
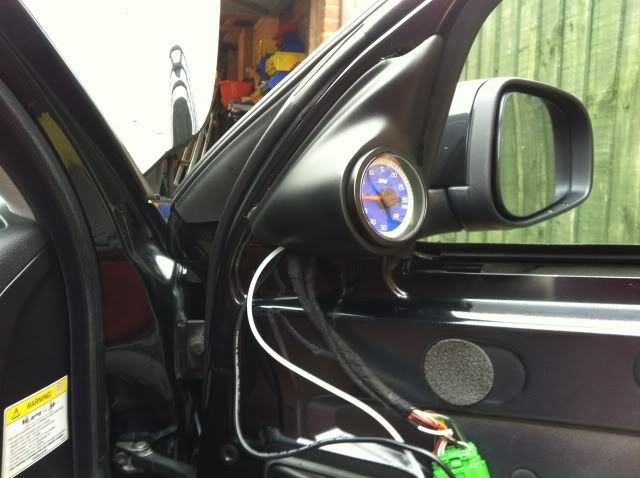
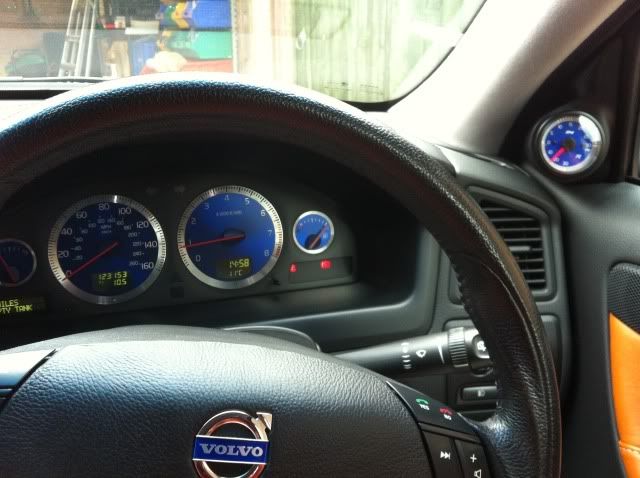
Engine running on idle...
Night time shot to follow......
Guage is reading -20 psi vac on deceleration and boosting at 15psi with a peak boost of 20 psi. I noted that the needle was fluctuating a little between 15 - 20 psi on WOT but i know this is because of a weak Recirculating valve.
That's next on my list.
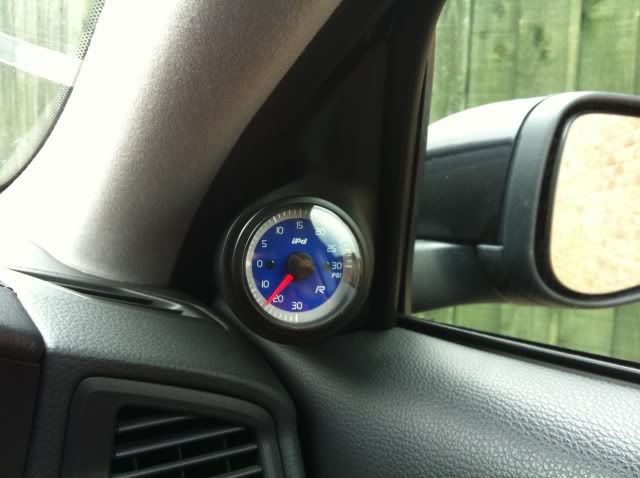
The needle sits on 0 psi when switched off.2014 V60 Polestar 6spd Auto :: Polestar map peak boost 17.4psi :: IPD 3" DP + 150cel :: Polestar 2.5" exhaust :: Paddle Shift Geartronic :: Black glass :: Maxton Splitter :: K+N Filter :: IPD Aluminium Top engine mount :: Brembo 6 pots :: 20" Polestar rims :: Brembo 371mm floating discs :: Sensus RTi + DAB + BT + WIFi :: D3S XENARC 6000k Active bending headlights
-
The Following 4 Users Say Thank You to LeeT5 For This Useful Post:
claymore (Friday 4th May 2012),Jamest5r (Saturday 5th May 2012),jamesy12345 (Thursday 4th February 2016),stephenevans99 (Friday 4th May 2012)
-
Friday 4th May 2012, 21:17 #8Whiny Old Git
Aching bones :(
- Join Date
- Aug 2009
- Location
- Shrewsbury
- Posts
- 9,069
- Thanks
- 4,385
Thanked 4,999 Times in 3,015 PostsThat's a great write up, and that gauge looks realy oem, nice job.
PIC][/SIGPIC]
aaaaaaaaaaaaaaaaaaaaaaaaa
aaaaaaaaaaaaaaaaaaaaaaaaaaaaaaaaaaaaaaaaaaaaa aaaaaa
Facebook^^^^^^^^^^^^^^^^ Old T-5 Kompressor Thread^^^^^^^^^^^^^^^ New TT-10 Kompressor Thread
-
The Following User Says Thank You to claymore For This Useful Post:
LeeT5 (Friday 4th May 2012)
-
Friday 4th May 2012, 21:19 #9Senior Member
...here we go again...
- Join Date
- Oct 2004
- Location
- Kent
- Posts
- 5,337
- Thanks
- 1,075
Thanked 1,393 Times in 1,068 Posts Night time shots......
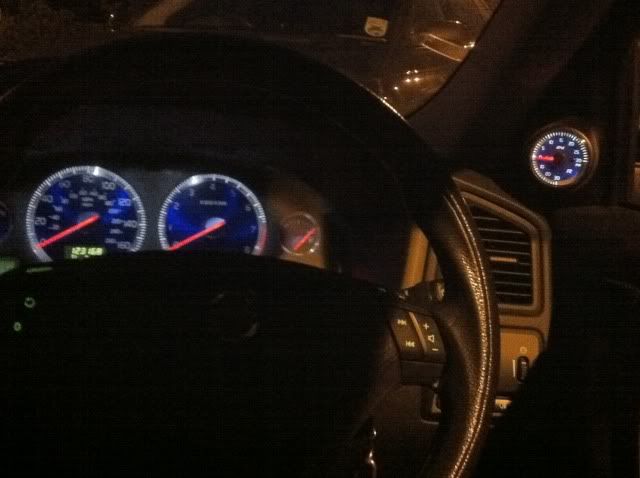
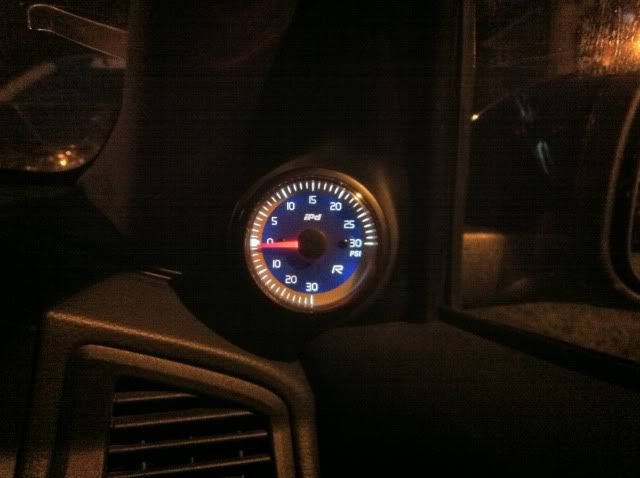
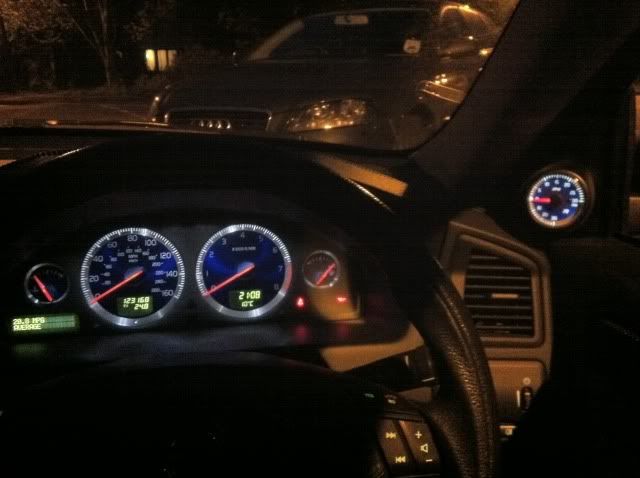
Hope you enjoyed!! I am very very pleased with the results and wish i'd done it last year when i bought the gear.2014 V60 Polestar 6spd Auto :: Polestar map peak boost 17.4psi :: IPD 3" DP + 150cel :: Polestar 2.5" exhaust :: Paddle Shift Geartronic :: Black glass :: Maxton Splitter :: K+N Filter :: IPD Aluminium Top engine mount :: Brembo 6 pots :: 20" Polestar rims :: Brembo 371mm floating discs :: Sensus RTi + DAB + BT + WIFi :: D3S XENARC 6000k Active bending headlights
-
The Following 2 Users Say Thank You to LeeT5 For This Useful Post:
Aberdeen Loon (Saturday 5th May 2012),stephenevans99 (Friday 4th May 2012)
-
Friday 4th May 2012, 21:52 #10Senior Member
This user has no status
- Join Date
- Jul 2008
- Posts
- 1,820
- Thanks
- 154
Thanked 313 Times in 273 PostsI like were you fitted the gauge as it looks as if it had always been there.
The only concern i would have is causing damage to the internals over a period with the knock when shutting the door.
-
Friday 4th May 2012, 22:16 #11Shiny Superstar
Back in the game!
- Join Date
- Aug 2004
- Location
- Stunning Shropshire
- Posts
- 17,773
- Thanks
- 2,501
Thanked 3,484 Times in 2,466 Posts I take back wot I said. As installs go that really looks smart
Volvo ABS ECU Repair
Join my projecteers tribe - Old Volvos Never Die - They just get faster.
Visit my VPCUK garage and my YouTube channel - WobblyDave72
-
The Following User Says Thank You to Wobbly Dave For This Useful Post:
LeeT5 (Saturday 5th May 2012)
-
Friday 4th May 2012, 22:36 #12Senior Member
...here we go again...
- Join Date
- Oct 2004
- Location
- Kent
- Posts
- 5,337
- Thanks
- 1,075
Thanked 1,393 Times in 1,068 PostsRun that by me again? What do you mean Jimmie? Originally Posted by Jimmie
2014 V60 Polestar 6spd Auto :: Polestar map peak boost 17.4psi :: IPD 3" DP + 150cel :: Polestar 2.5" exhaust :: Paddle Shift Geartronic :: Black glass :: Maxton Splitter :: K+N Filter :: IPD Aluminium Top engine mount :: Brembo 6 pots :: 20" Polestar rims :: Brembo 371mm floating discs :: Sensus RTi + DAB + BT + WIFi :: D3S XENARC 6000k Active bending headlights
-
Friday 4th May 2012, 22:43 #13Senior Member
This user has no status
- Join Date
- Jul 2008
- Posts
- 1,820
- Thanks
- 154
Thanked 313 Times in 273 PostsLee as its fitted to the door will the internals e.g needle etc not get damaged when the door gets slammed as does happen.
-
Friday 4th May 2012, 23:12 #14Senior Member
...here we go again...
- Join Date
- Oct 2004
- Location
- Kent
- Posts
- 5,337
- Thanks
- 1,075
Thanked 1,393 Times in 1,068 PostsNo mate. Think about it...... Where the door pod is, in relation to a fulcrum. It's at the closest point to the fulcrum, therefore, less movement. Also, who said anything about slamming the door? I can close my door very gently as i have the door shims fitted and the alighnment is perfect. I only have to gently push or pull it and the door closes firmly with a solid 'Thunk'! Also, when the door is closed the pod doesn't actually touch the A pillar. It nestles up against the soft rubber A pillar strip. Originally Posted by Jimmie
It's a perfect fit - i promise!2014 V60 Polestar 6spd Auto :: Polestar map peak boost 17.4psi :: IPD 3" DP + 150cel :: Polestar 2.5" exhaust :: Paddle Shift Geartronic :: Black glass :: Maxton Splitter :: K+N Filter :: IPD Aluminium Top engine mount :: Brembo 6 pots :: 20" Polestar rims :: Brembo 371mm floating discs :: Sensus RTi + DAB + BT + WIFi :: D3S XENARC 6000k Active bending headlights
-
Friday 4th May 2012, 23:21 #15Trader
This user has no status
- Join Date
- Nov 2010
- Location
- chester le street
- Posts
- 6,128
- Thanks
- 969
Thanked 1,398 Times in 1,121 Postsgood write up. its a mod i plan on doing soon.
-
Saturday 5th May 2012, 05:53 #16Senior Member
...here we go again...
- Join Date
- Oct 2004
- Location
- Kent
- Posts
- 5,337
- Thanks
- 1,075
Thanked 1,393 Times in 1,068 PostsThankyou!!
I would just like to say a big thanks to my friend Bill who owns an R the same as mine. He has already done this mod and provided me with his photos to help me do mine.
 2014 V60 Polestar 6spd Auto :: Polestar map peak boost 17.4psi :: IPD 3" DP + 150cel :: Polestar 2.5" exhaust :: Paddle Shift Geartronic :: Black glass :: Maxton Splitter :: K+N Filter :: IPD Aluminium Top engine mount :: Brembo 6 pots :: 20" Polestar rims :: Brembo 371mm floating discs :: Sensus RTi + DAB + BT + WIFi :: D3S XENARC 6000k Active bending headlights
-
Saturday 5th May 2012, 12:47 #17Senior Member
This user has no status
- Join Date
- Feb 2012
- Posts
- 890
- Thanks
- 135
Thanked 356 Times in 276 PostsOn deceleration you should read about -24psi vac and idle on -22psi vac depending on engine condition. Originally Posted by LeeT5
The reason your readings are out is because of the long route of hose, you should really shorten it as much as you can so that as well as deceleration being accurate so will the boost be more accurate the reason for the fluctuation between boost figures is because you have used silicon hose instead of hard plastic 4mm clear hose which does not compress so therefore the boost will cause the hose to pulse , it won`t be your recirculating valve as these are good for 24psi and are reliable as long as the vacuum pipe to it is in good condition, even a stronger spring will not stop pulsing of the boost as the valve is closed shut because of the boost in the inlet manifold!!
Believe me i have been there and wasted time!!
Although the end result does look nice the gauge cannot be accurate because of the hose length to it from the engine vacuum tree. Boost has to be accurate otherwise Bang!
It is the same as having the hoses from the wastegate to the compression side of the turbo the hoses have to be as short as possible for the ECU to quickly apply accurate boost control and not spike damaging boost.
Only trying to help.
Mercedes C320CDI Sport Estate 3 litre V6 7 Gear Auto
Remap 290bhp 628Nm torque @ 1600revs 45.1mpg
-
Saturday 5th May 2012, 14:04 #18More cars than a Showroom
This user has no status
- Join Date
- Jul 2008
- Location
- Cruden Bay (Scotland)
- Posts
- 6,355
- Thanks
- 1,464
Thanked 1,624 Times in 1,141 Posts
Looks really pretty, I have read on swedspeed about people complaining that the IPD gauge flutters under full load
Thanks
Martyn
-
The Following User Says Thank You to volvokid For This Useful Post:
LeeT5 (Saturday 5th May 2012)
-
Saturday 5th May 2012, 18:18 #19Senior Member
...here we go again...
- Join Date
- Oct 2004
- Location
- Kent
- Posts
- 5,337
- Thanks
- 1,075
Thanked 1,393 Times in 1,068 PostsI have emailed IPD about the fluttering needle at high boost. I understand what your saying but i'm not convinced its the silicone vac hose. IPD supplied me with the hose when i ordered the guage. I asked for enough hose to do my install and that is what they provided. If the silicone hose expands under 20+ psi then surely its not fit for purpose?? Why, then, would they provide me with hose knowing its going to cause me problems. They use the same hose on their own installs. The needle is totally stable until 15 psi hense why i don't believe it's anything to to with 'expanding silicone hose causing needle fluttering from 15 - 20 psi'. Originally Posted by 960kg
In the mean time i'm going to install my oe MAP and see what happens to the guage then. Lots of interesting reading about needle flutter on boost and its mostly saying its not the guage. Some saying its the inlet valves opening causing inlet manifold pressure to oscillate.
Another reason for me not suspecting it to be the silicone hose is because if it were able to expand and cause fluttering then you would never be able to use it for IC tubing.
Anyone else experienced guage flutter??Last edited by LeeT5; Saturday 5th May 2012 at 19:10.
2014 V60 Polestar 6spd Auto :: Polestar map peak boost 17.4psi :: IPD 3" DP + 150cel :: Polestar 2.5" exhaust :: Paddle Shift Geartronic :: Black glass :: Maxton Splitter :: K+N Filter :: IPD Aluminium Top engine mount :: Brembo 6 pots :: 20" Polestar rims :: Brembo 371mm floating discs :: Sensus RTi + DAB + BT + WIFi :: D3S XENARC 6000k Active bending headlights
-
Saturday 5th May 2012, 18:23 #20Senior Member
Keeping it looking stock
- Join Date
- Mar 2012
- Location
- Newton abbot, Devon
- Posts
- 5,567
- Thanks
- 920
Thanked 1,581 Times in 1,296 PostsHi is the pipe kit for a L/H drive car not a R/H is that why it's to short ?.
Sorry must say nice looking job,lots of info as well.Last edited by Harvey; Saturday 5th May 2012 at 18:26.


 Reply With Quote
 Betsy aka Silver Shit Box (SSB)

 1996 Volvo 850 T5


 2005 Volvo S60r
 2005 Volvo V70R
Thread Information
Users Browsing this Thread
There are currently 1 users browsing this thread. (0 members and 1 guests)
 Posting Permissions

Bookmarks