


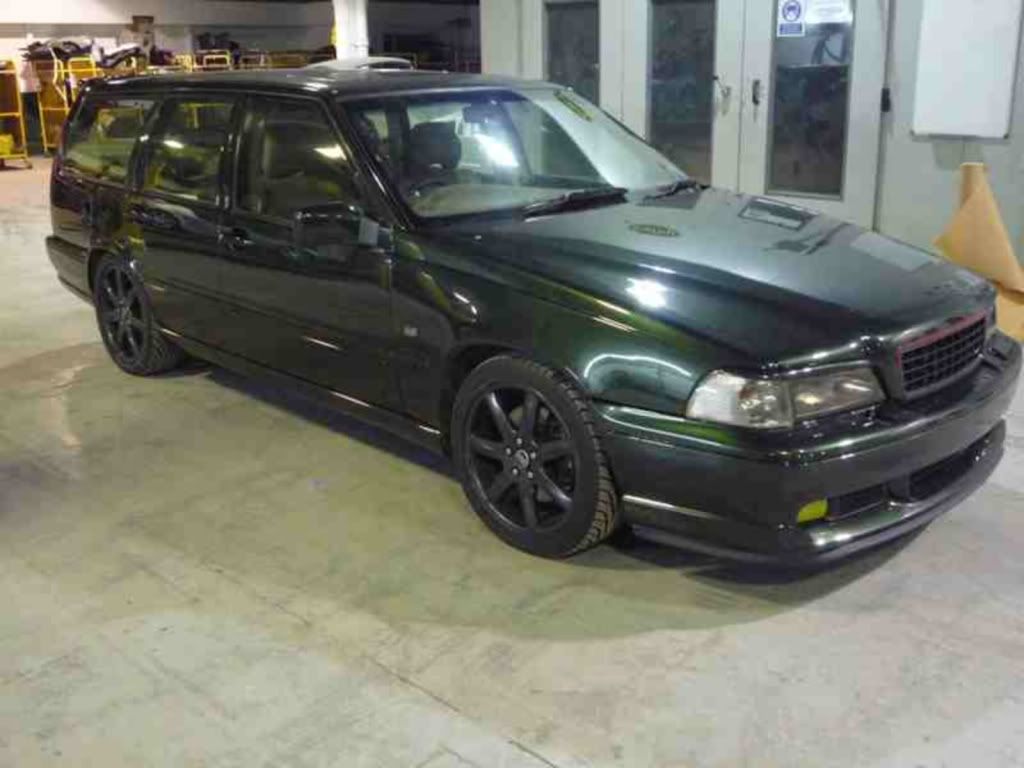
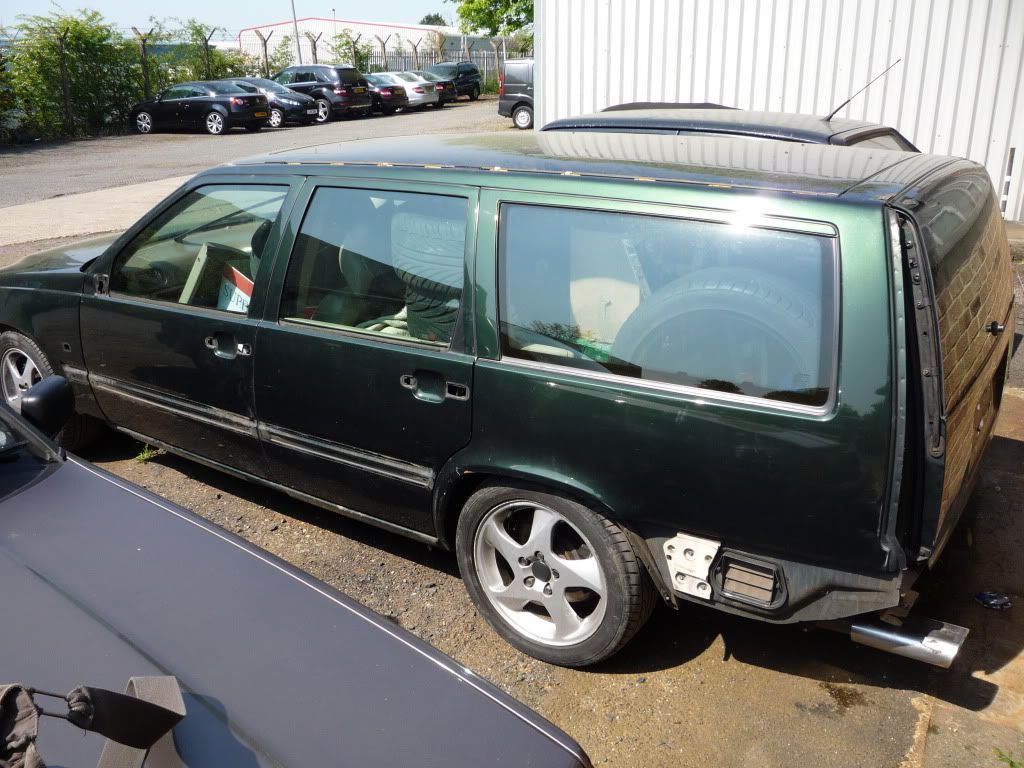
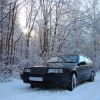
Hers the story so far of my 98 v70t5 cd
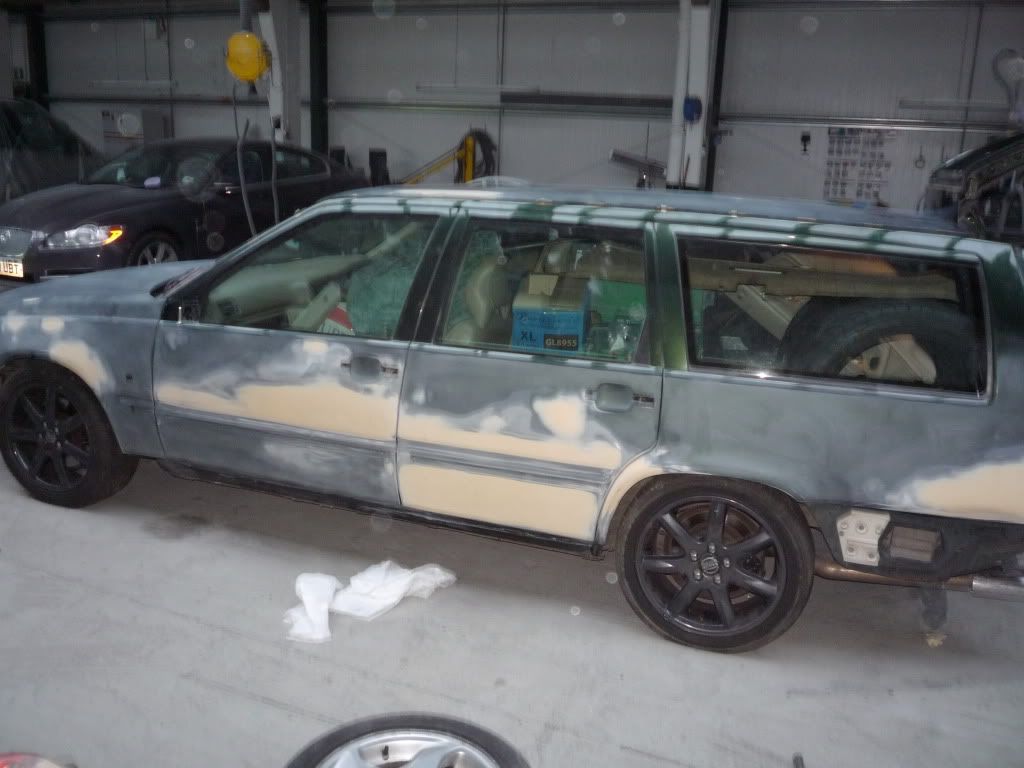
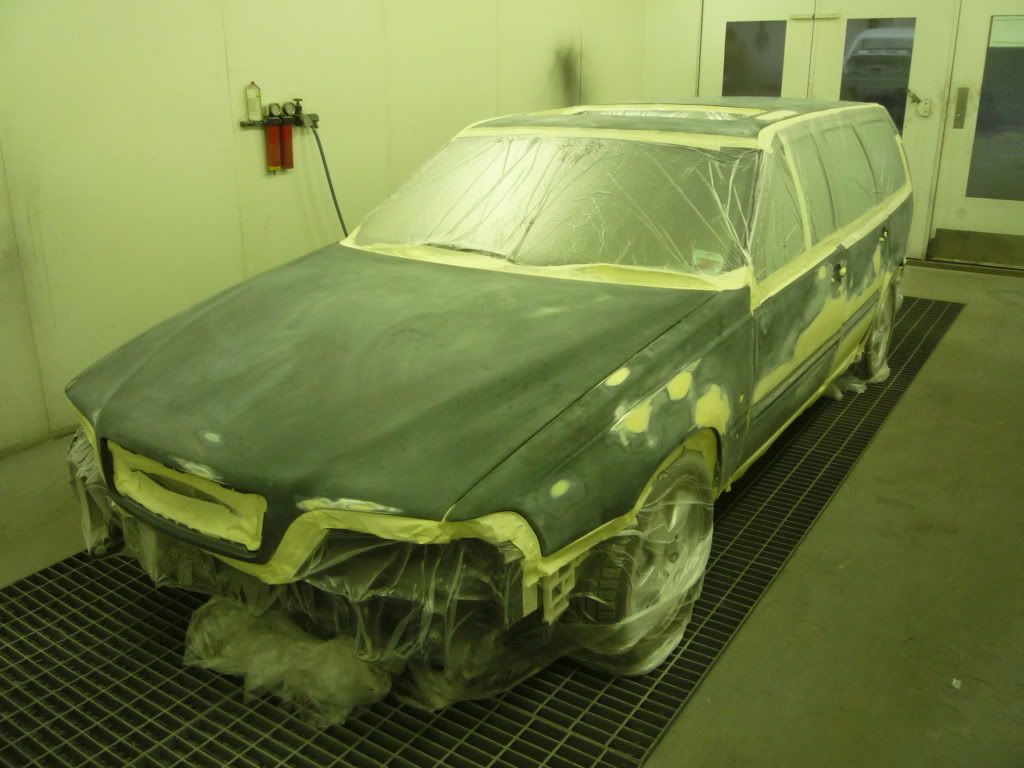
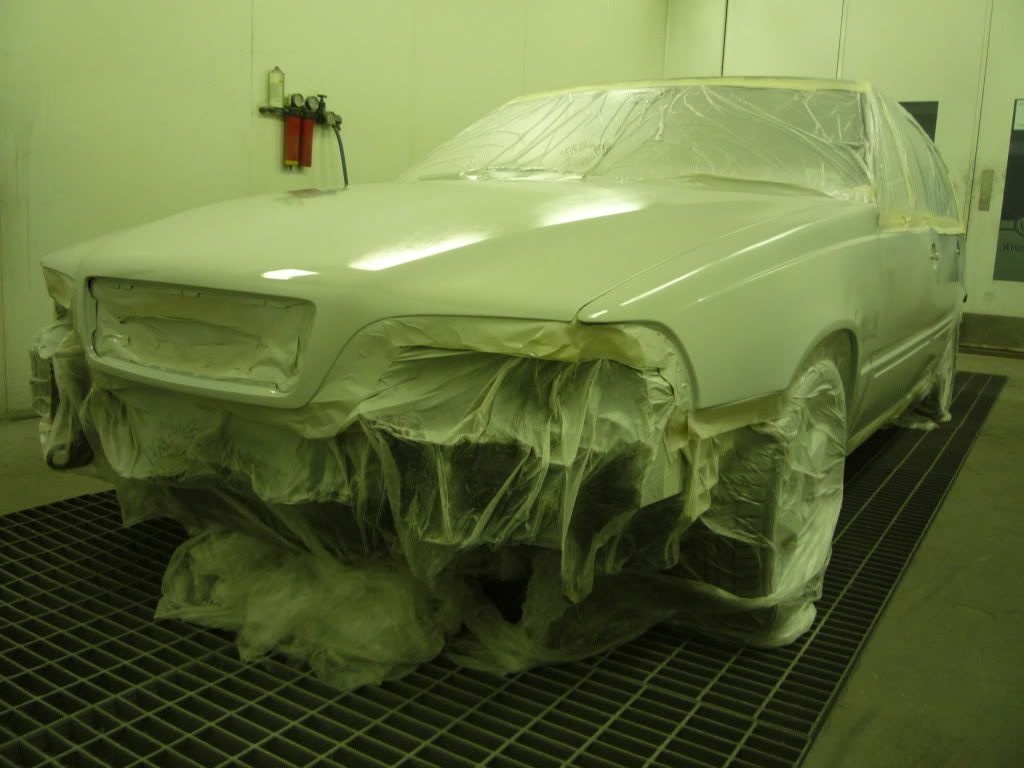
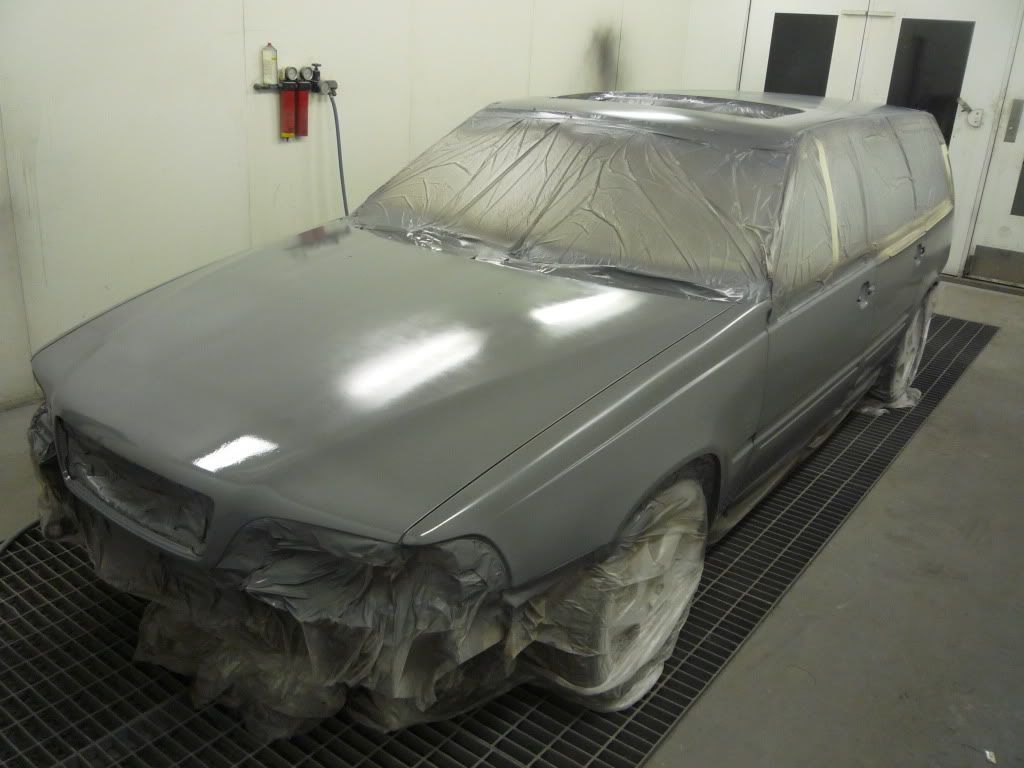
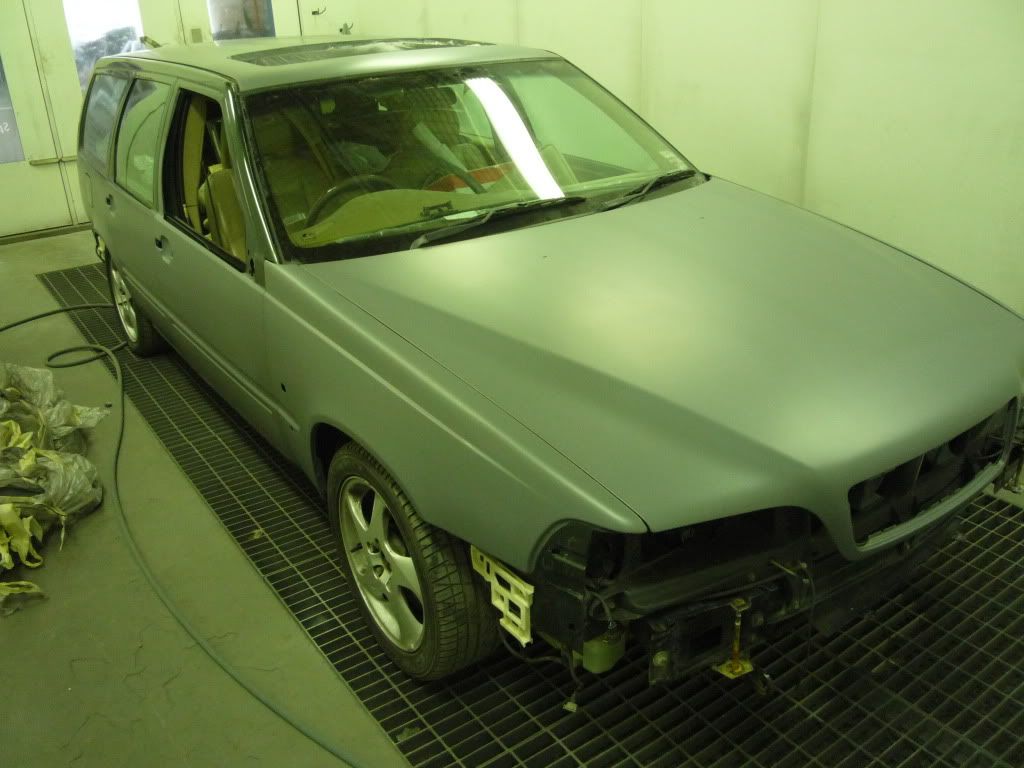
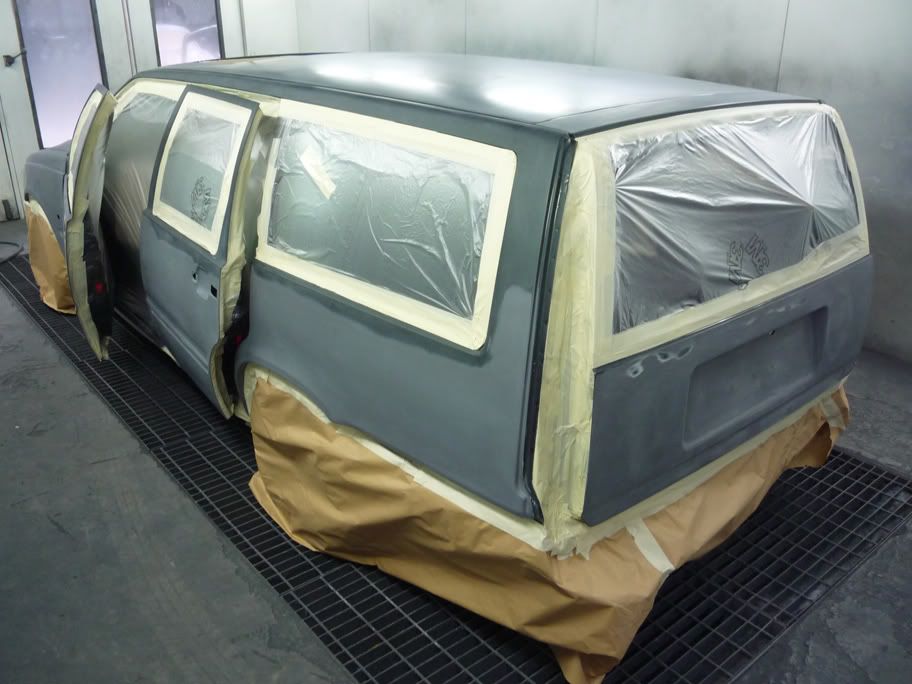
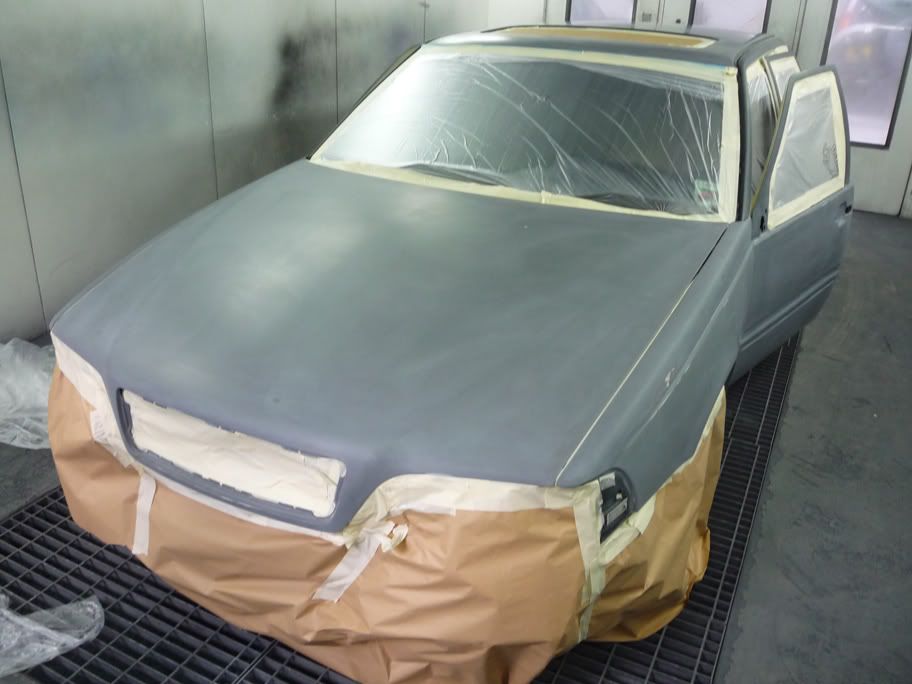
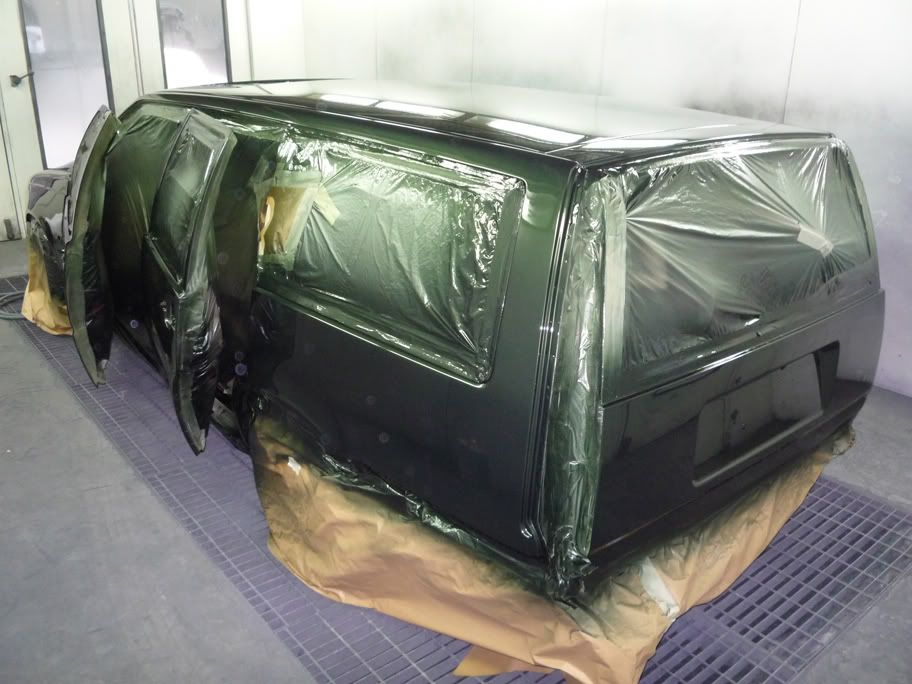
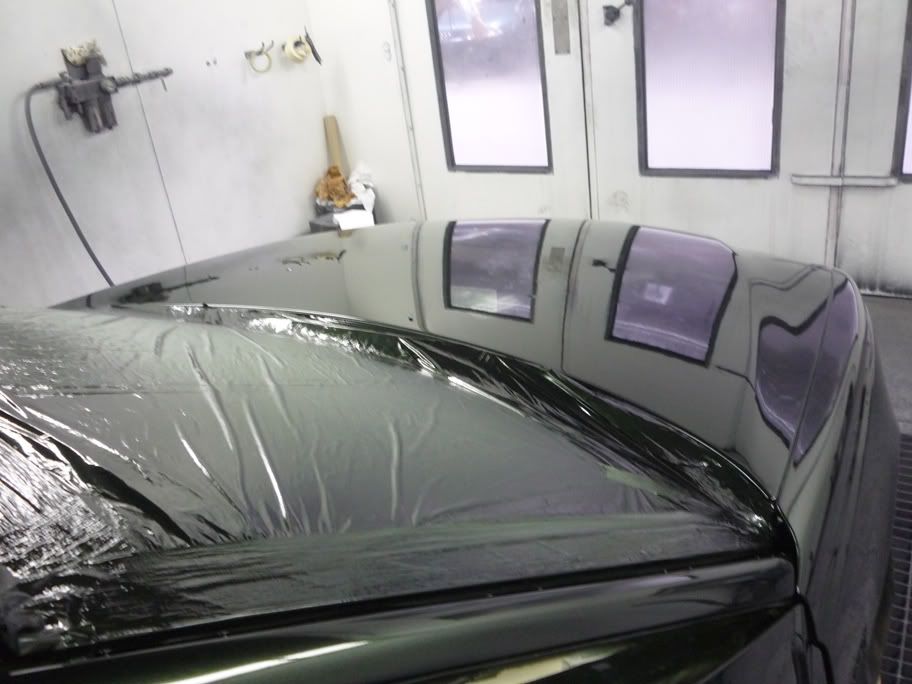
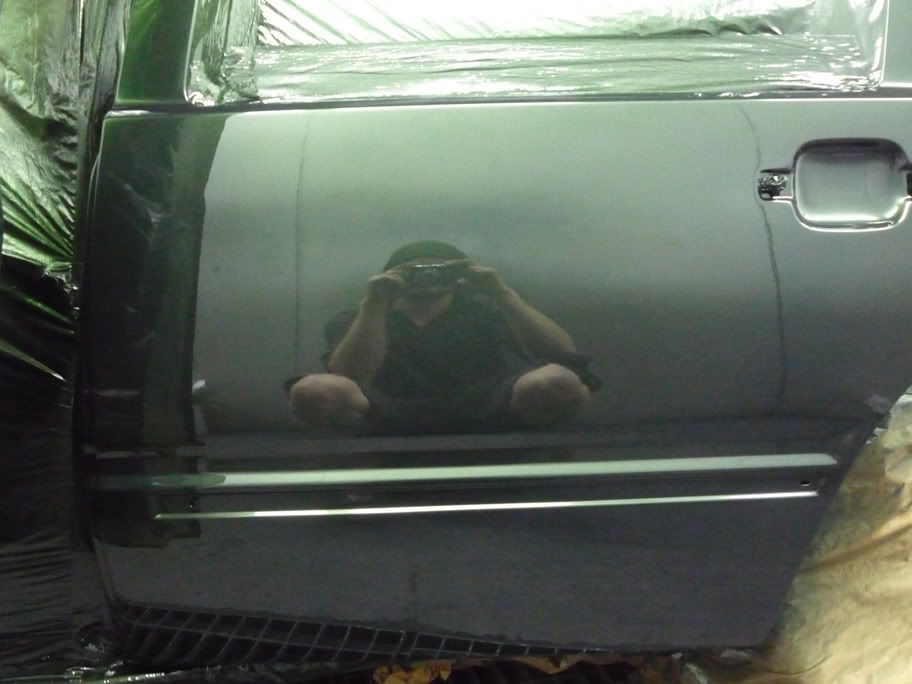
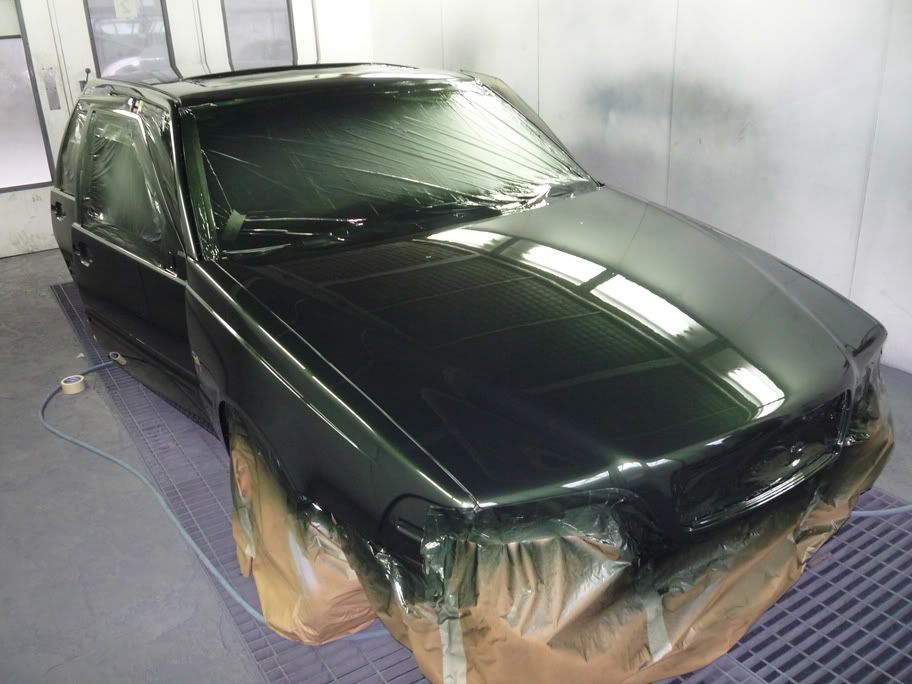
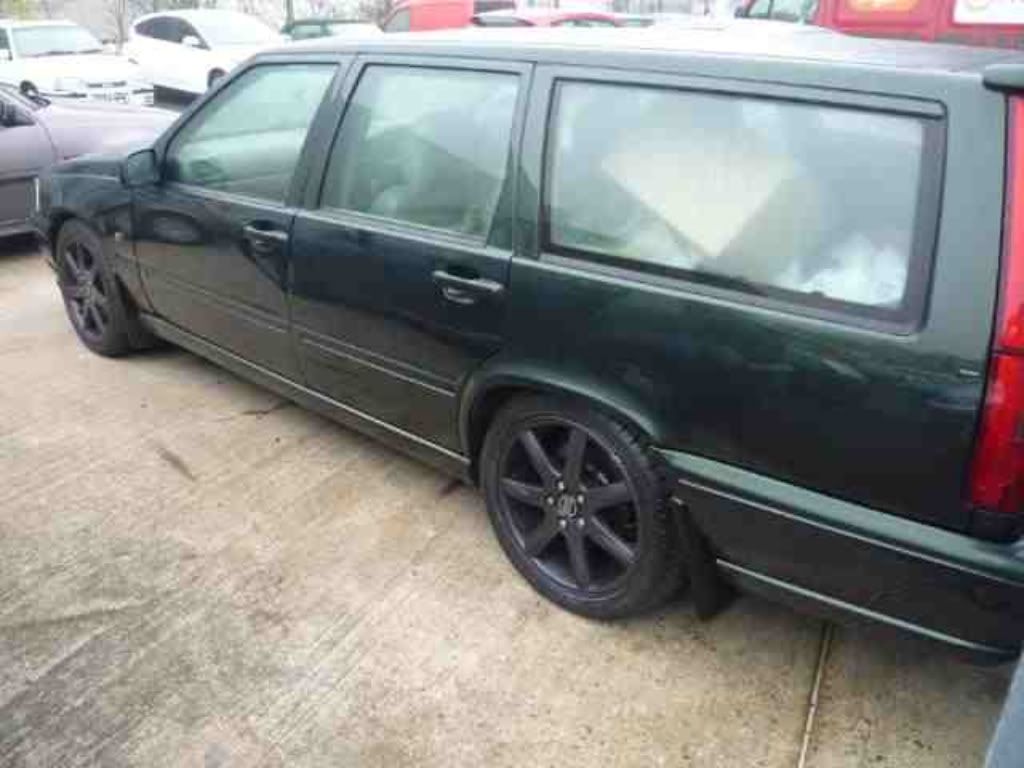
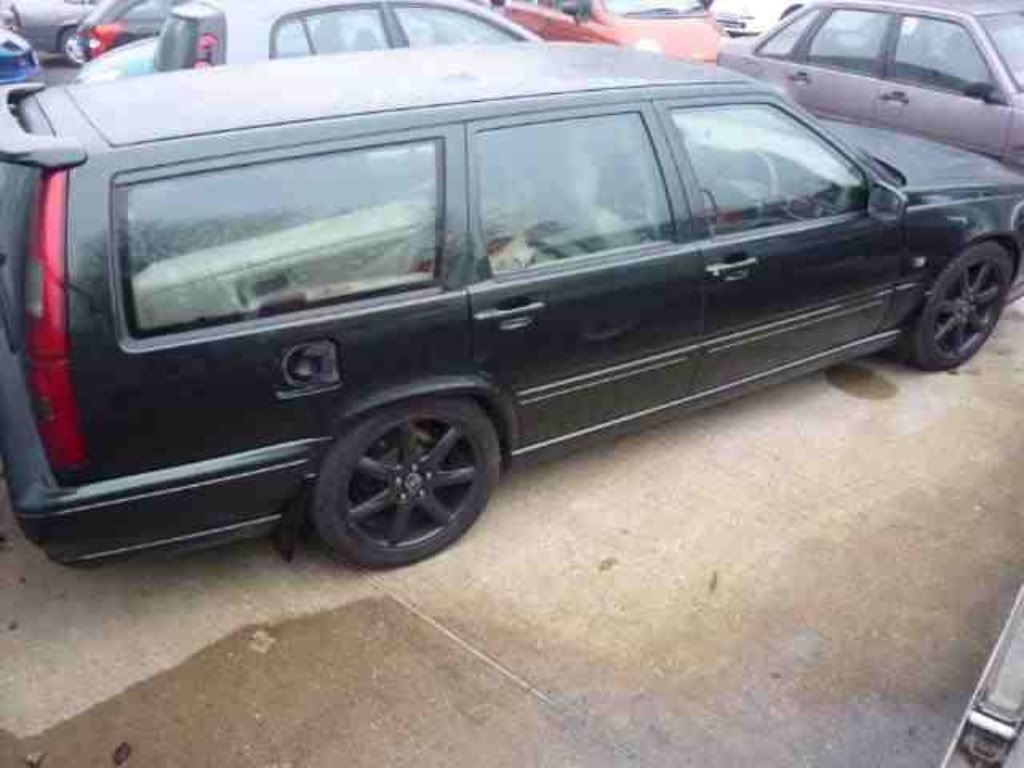
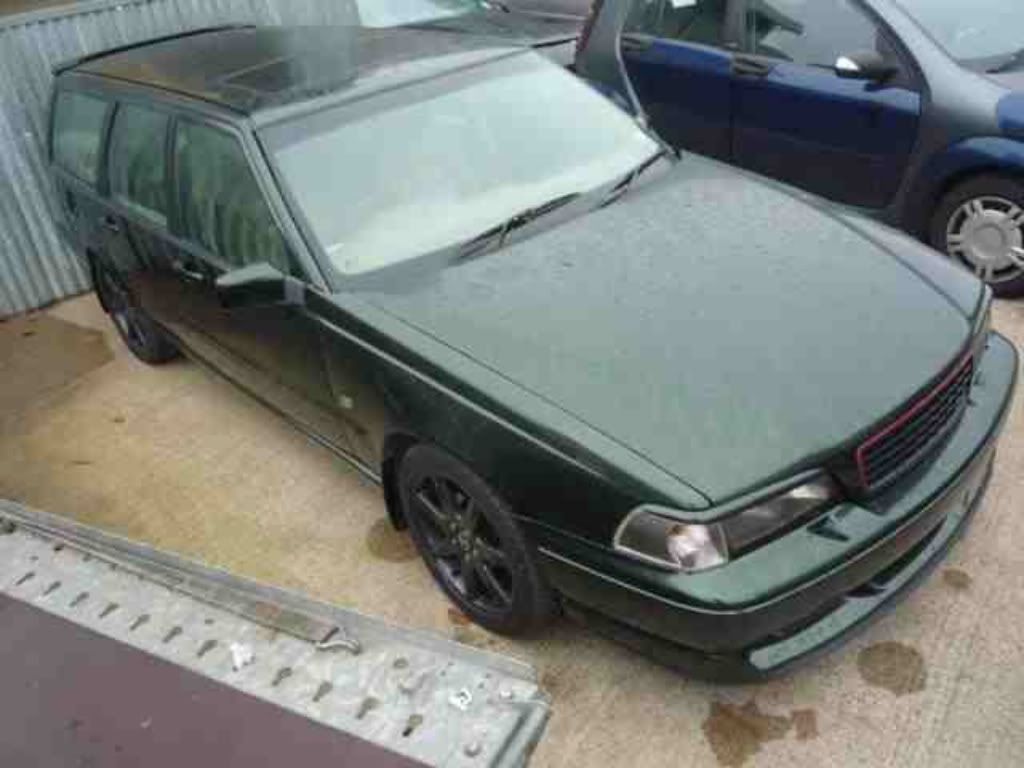
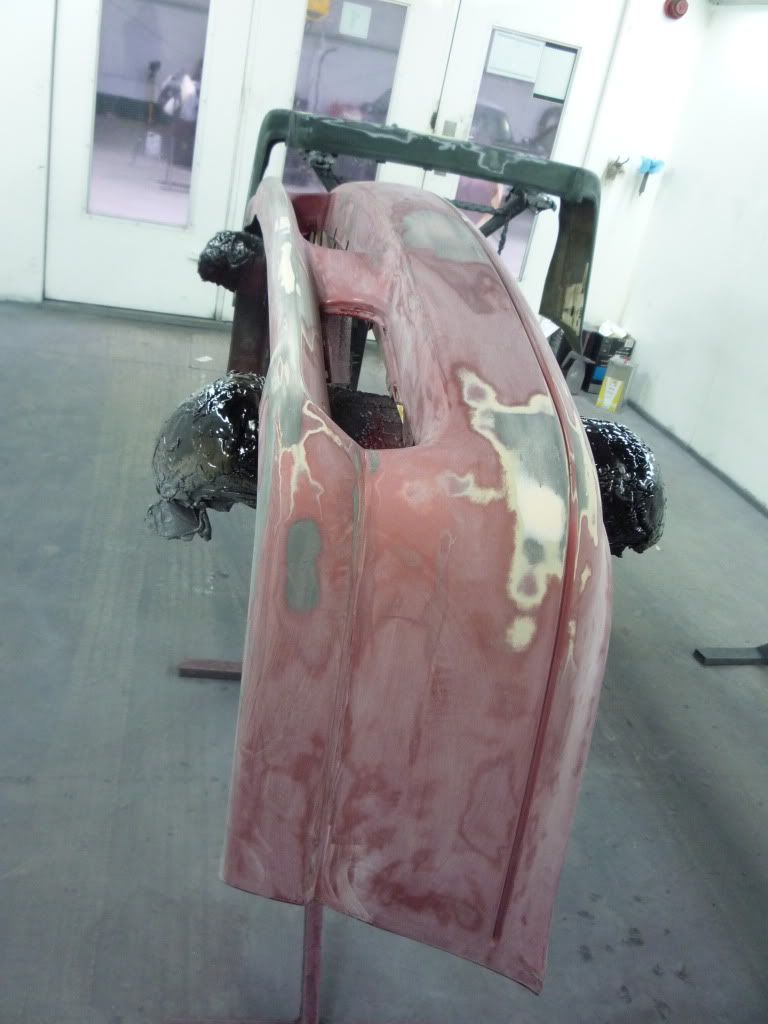
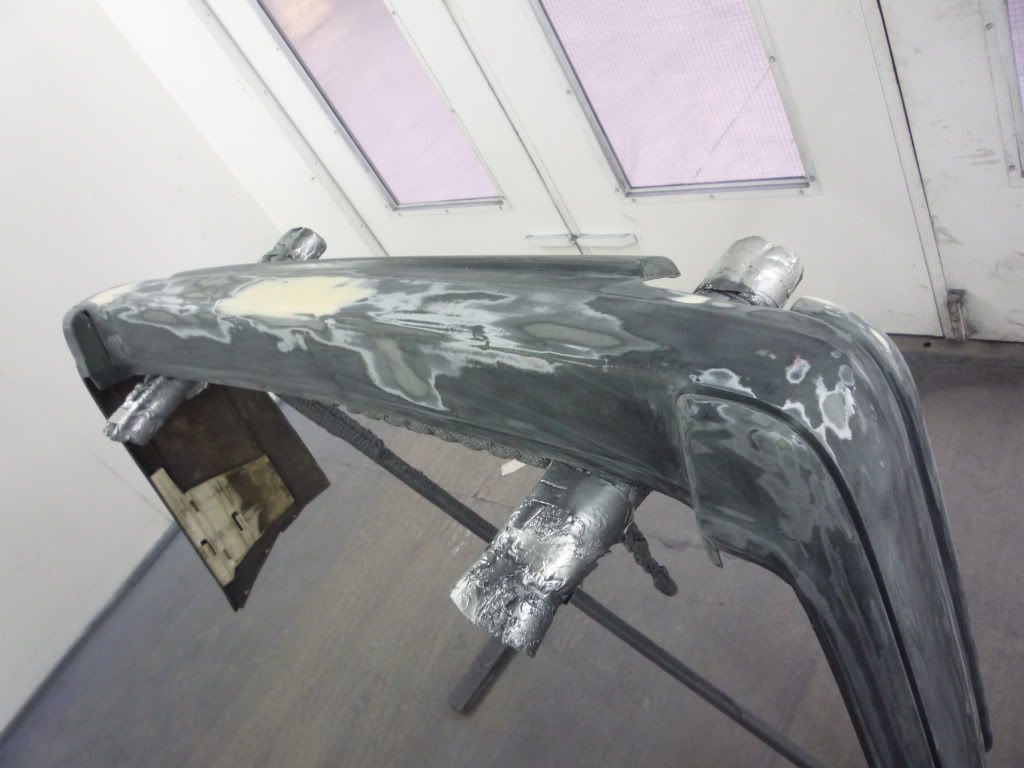
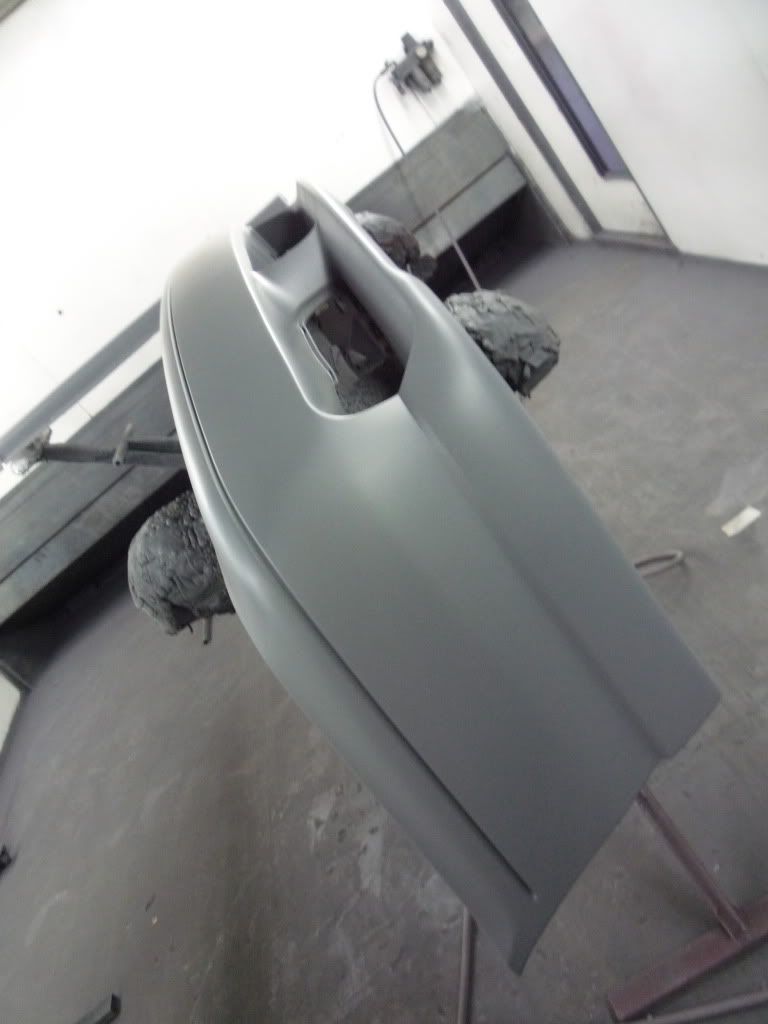
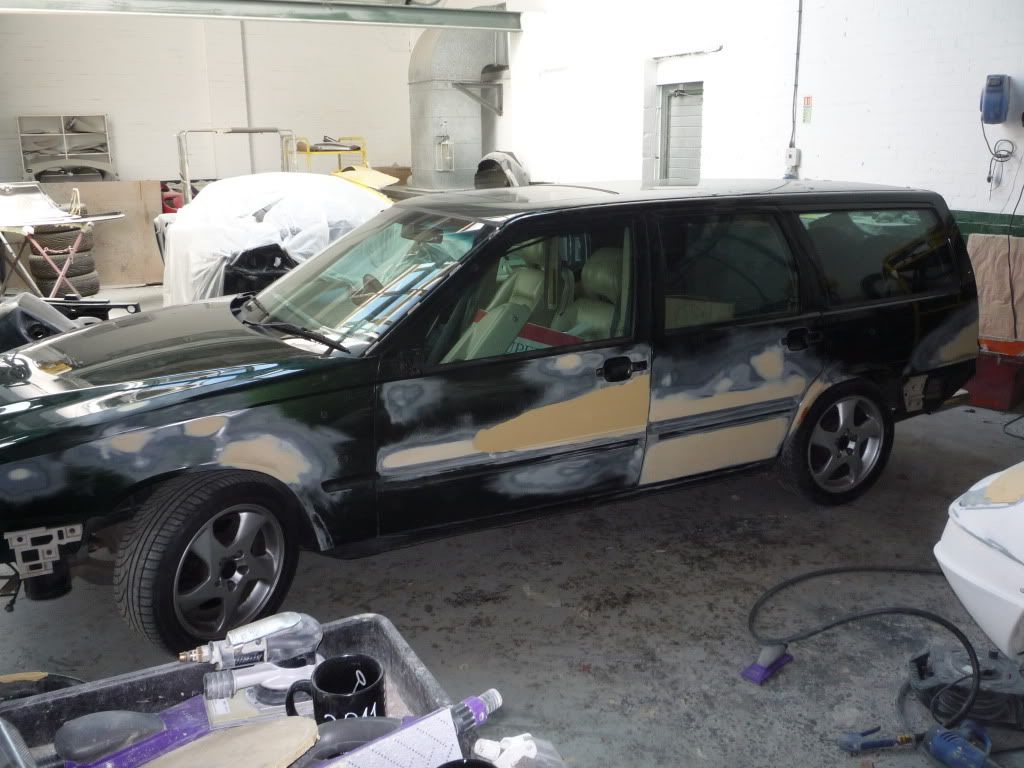
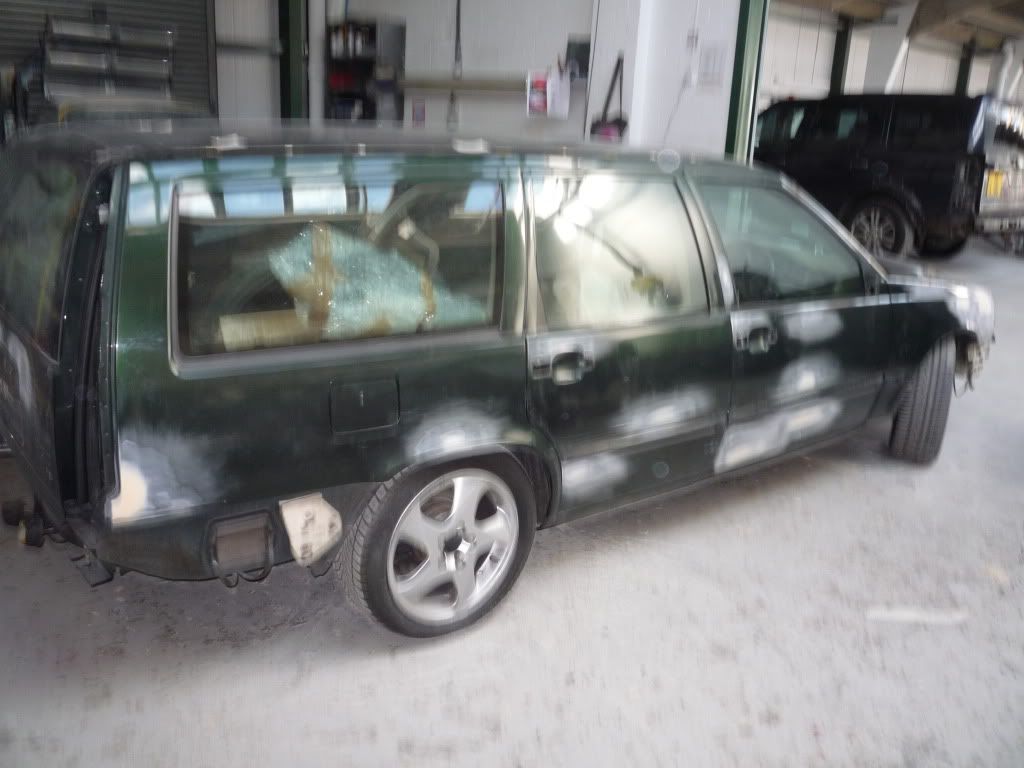
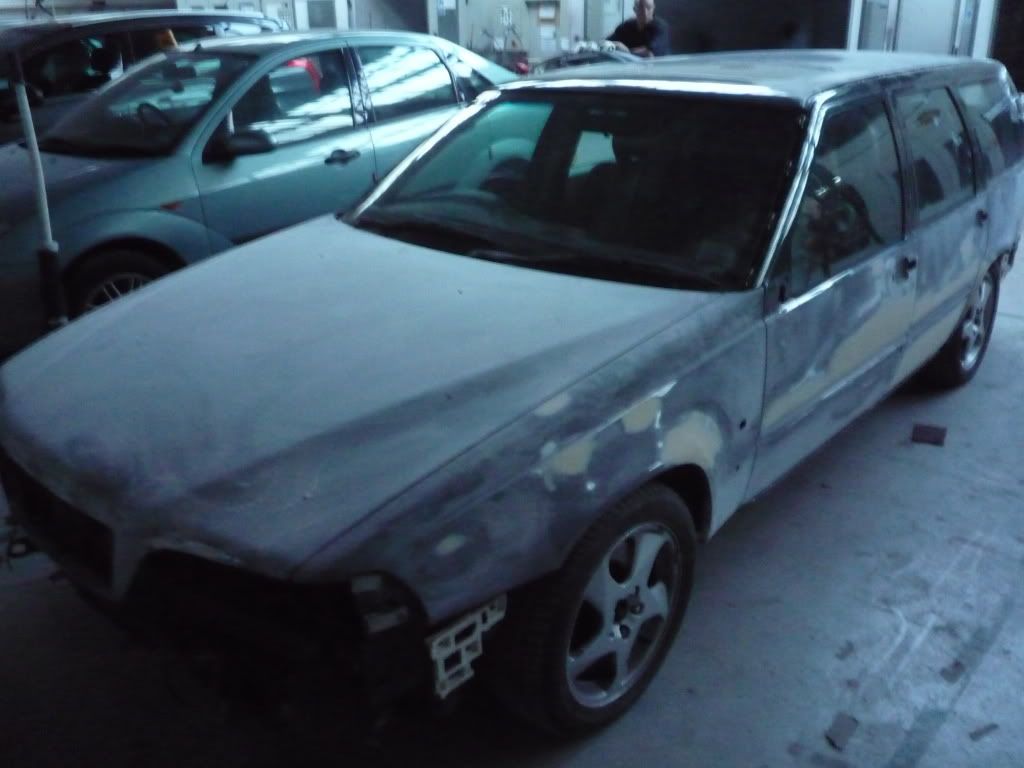
Just finished the paintjob on my v70t5, i took her off the road some while back and left her at work to do a full body resto. my car was a pocket money s*itebox and to be fair drove nice, good power etc but the bodywork was cained. accident damage, rust (yes a volvo can rust lol) and 13years of abuse. ive been playing around at work with tricks in the paint, tinting laquer and stuff but cant really play aroud too much on customers cars lol. heres some pics of the before, repair, prep and paint.........
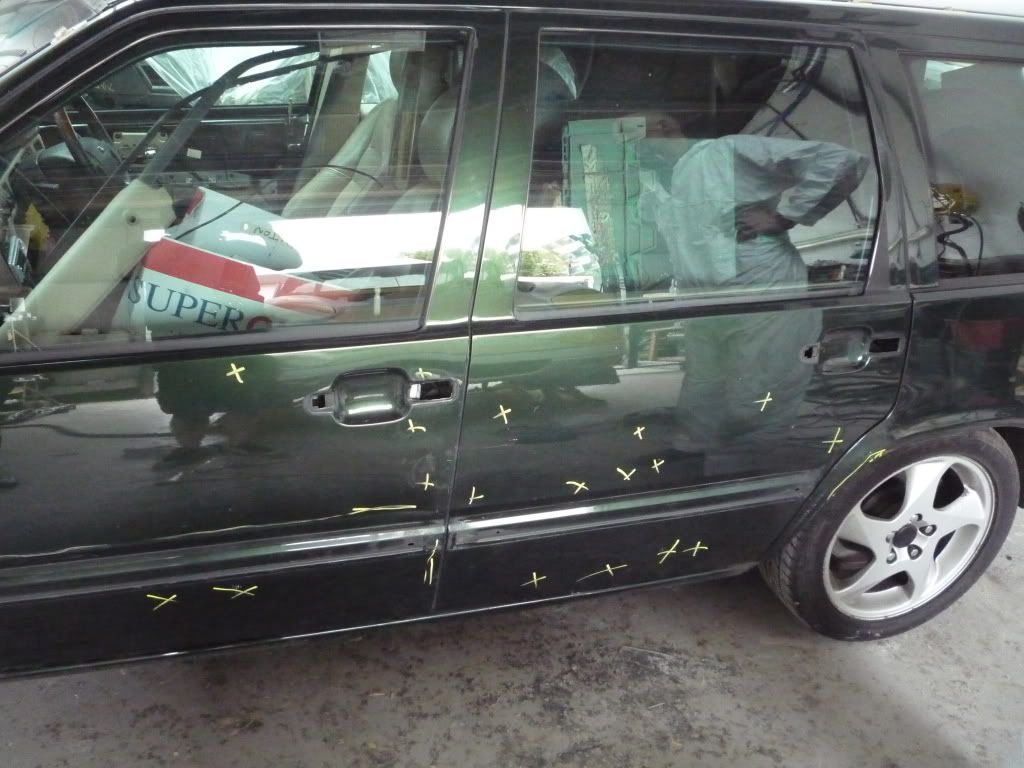
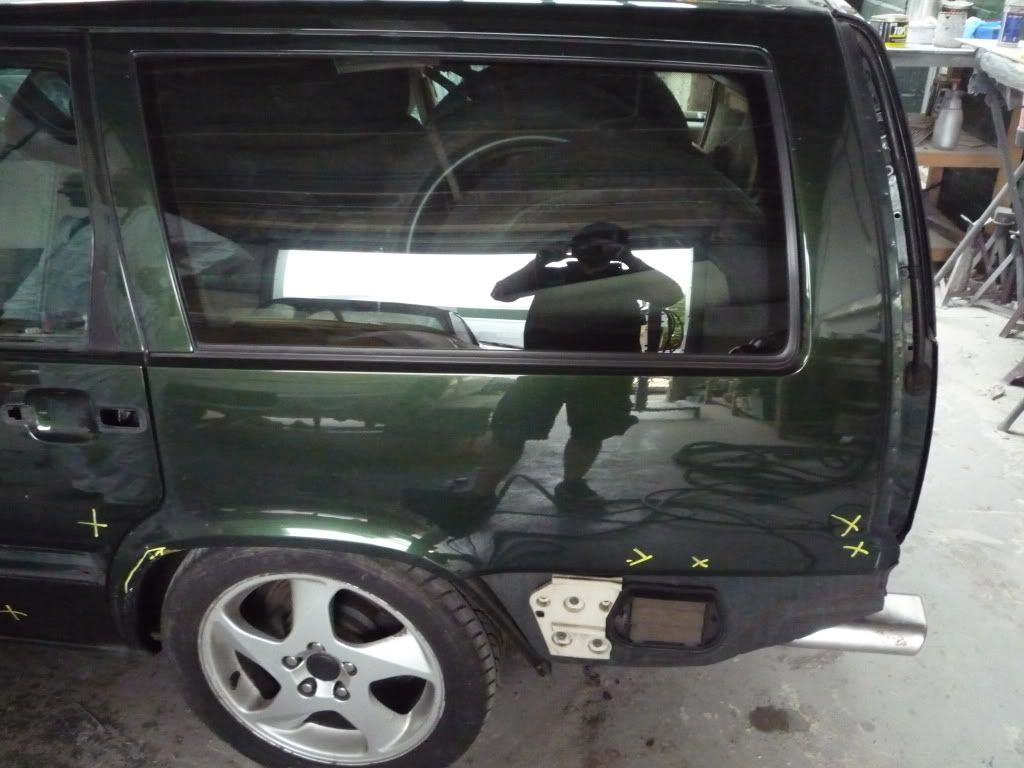
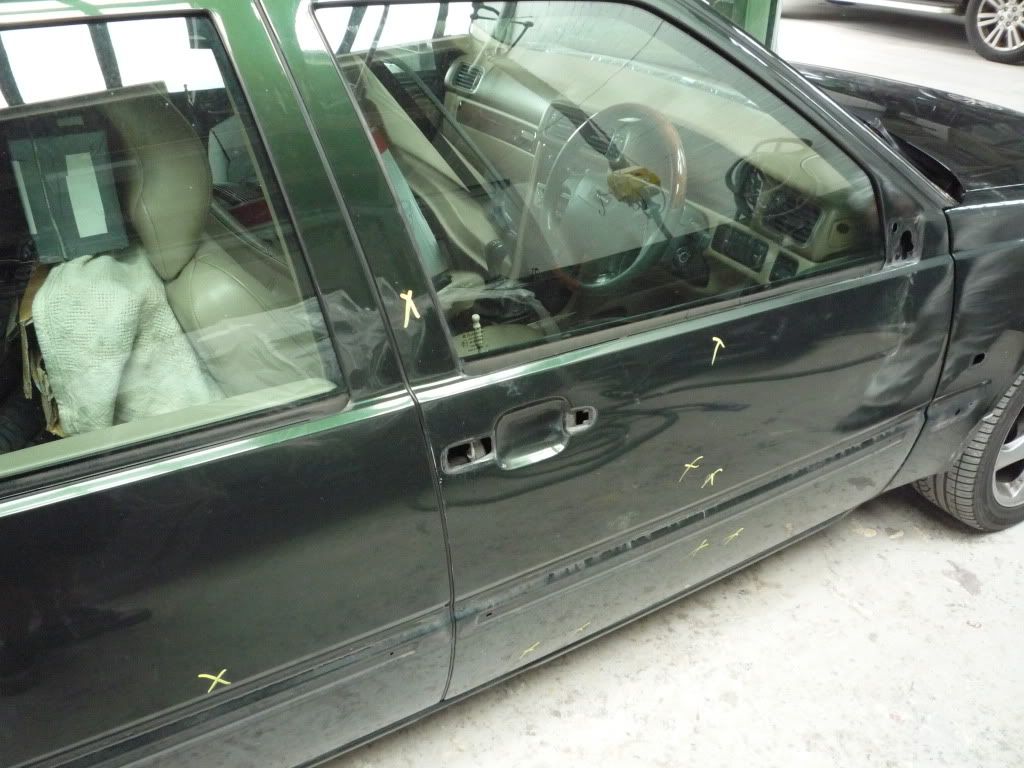
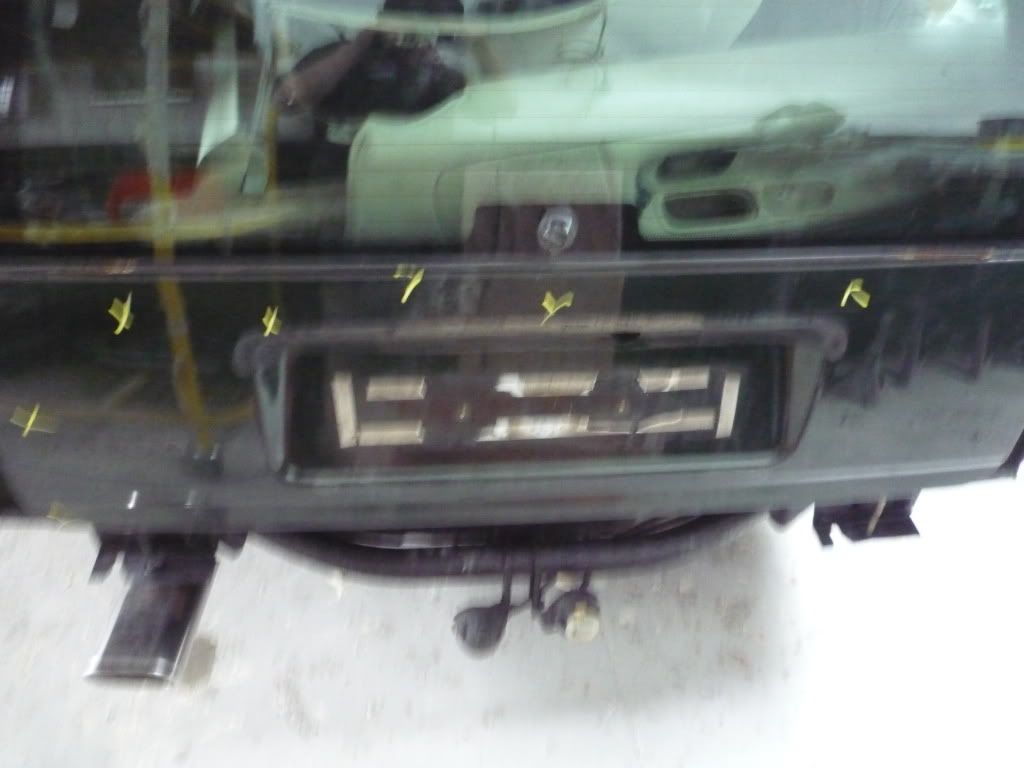
then i started the car, each yellow "x" is a dent lol
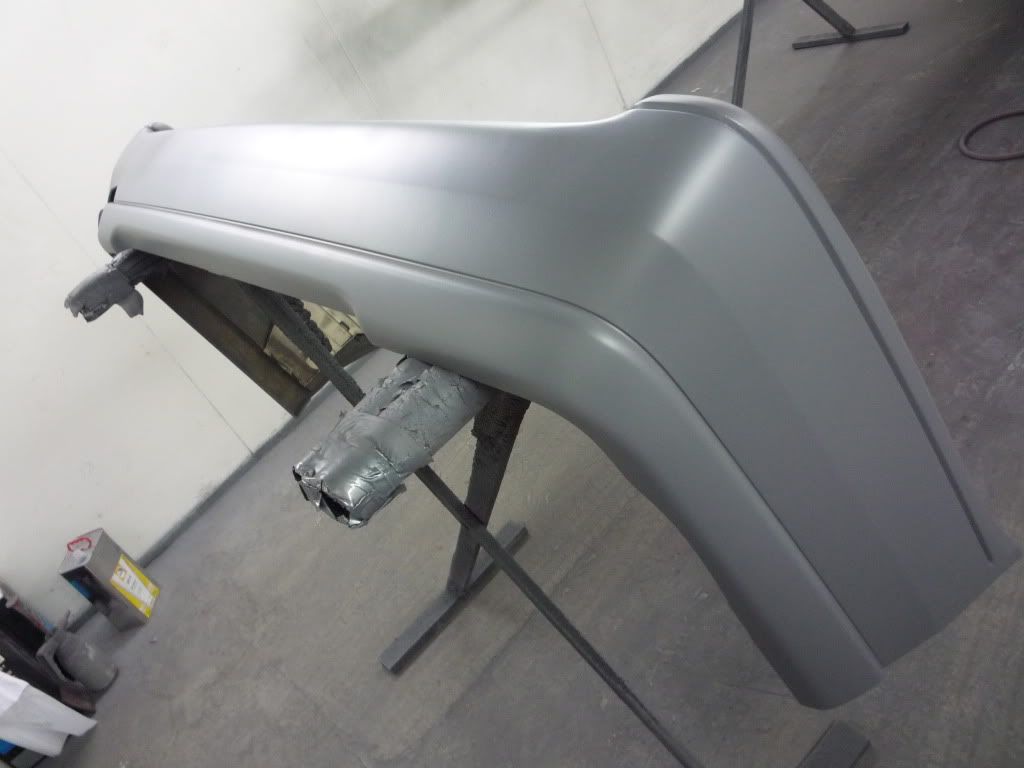
repaired (30 hours work later)
Results 1 to 20 of 122
Thread: gavt5's v70 t5
-
Monday 9th April 2012, 22:04 #1Senior Member
 This user has no status
- Join Date
- May 2011
- Posts
- 178
- Thanks
- 3
Thanked 25 Times in 19 Postsgavt5's v70 t5
Last edited by AndysR; Monday 9th April 2012 at 22:32.
-
Monday 9th April 2012, 22:05 #2Senior Member
This user has no status
- Join Date
- May 2011
- Posts
- 178
- Thanks
- 3
Thanked 25 Times in 19 Postsepoxying,priming and prepping
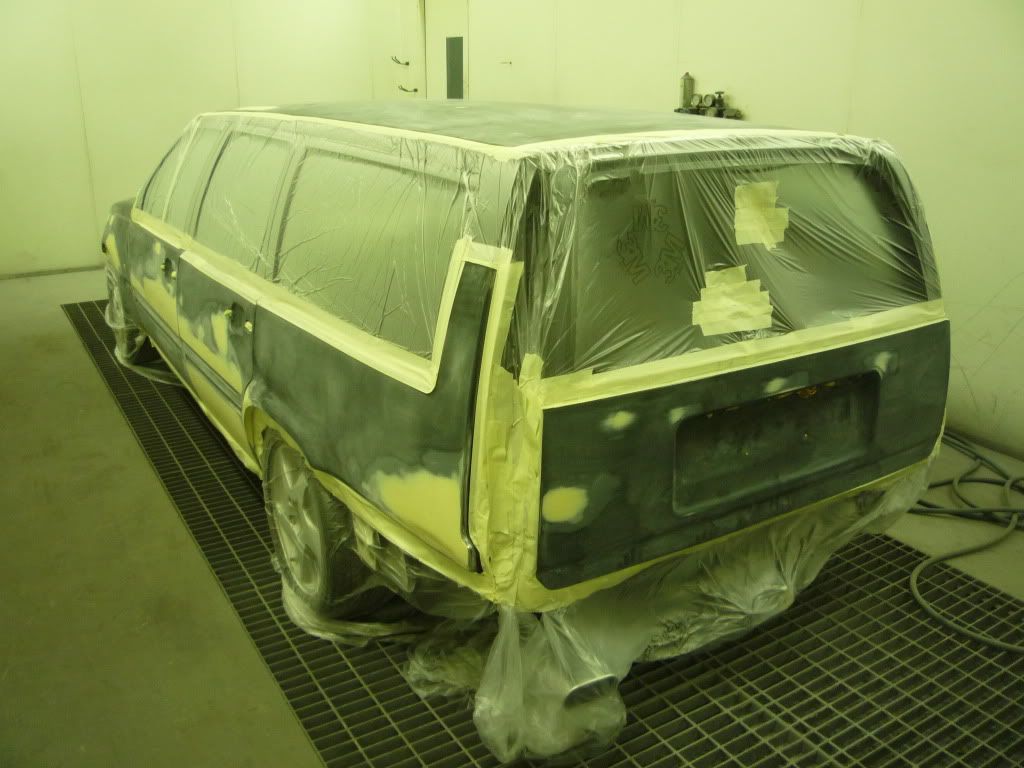
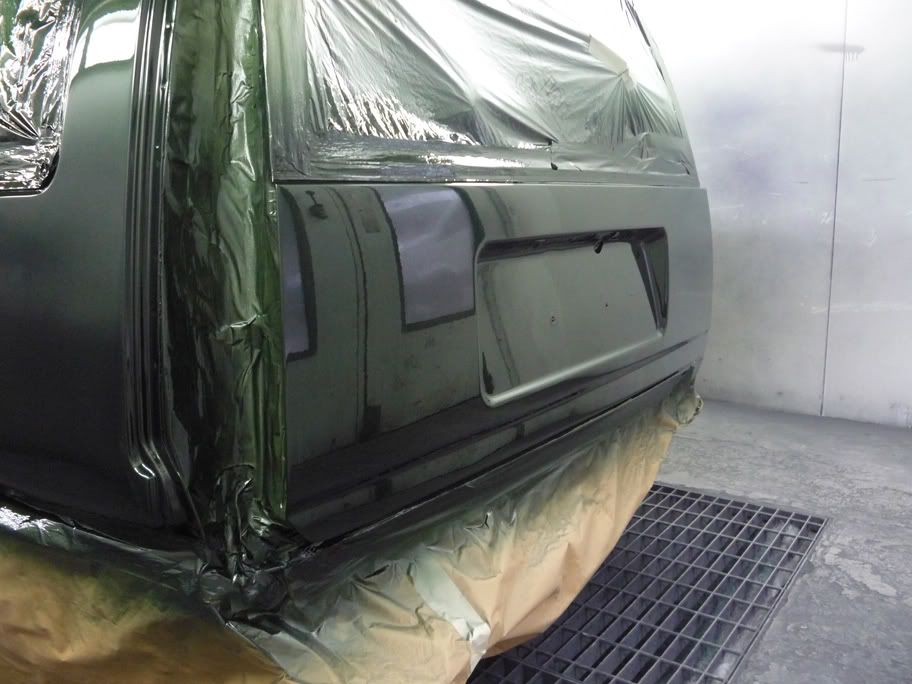
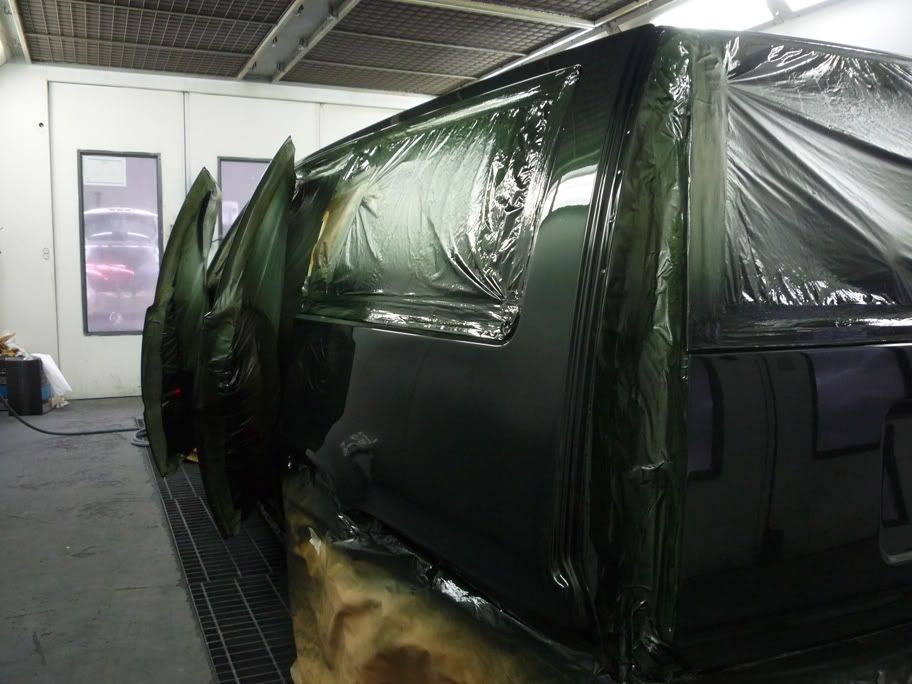
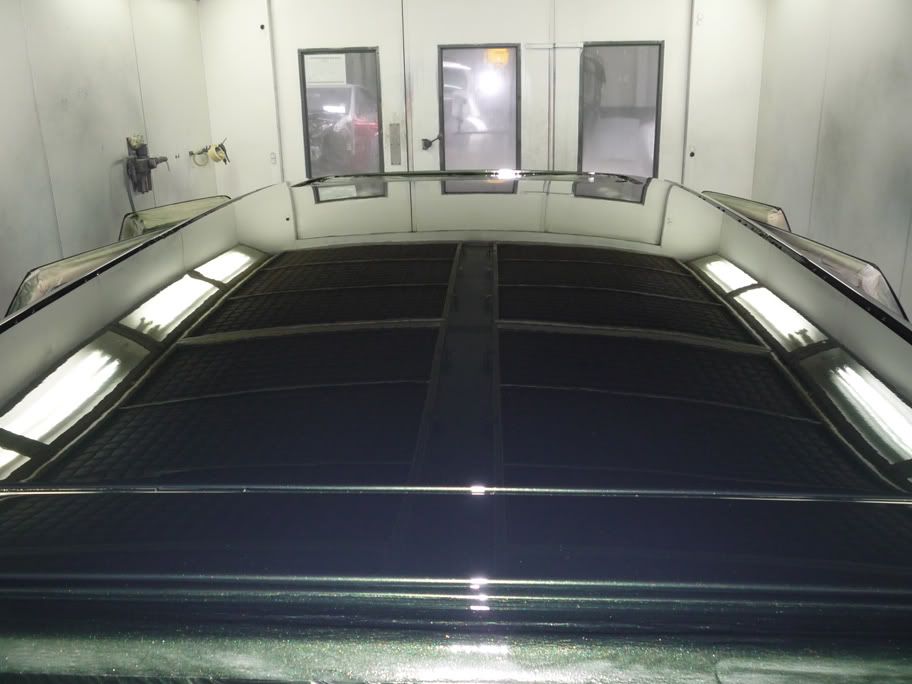
painting volvo 421 with a pearl twist and tinted clearcoat
-
Monday 9th April 2012, 22:05 #3Senior Member
This user has no status
- Join Date
- May 2011
- Posts
- 178
- Thanks
- 3
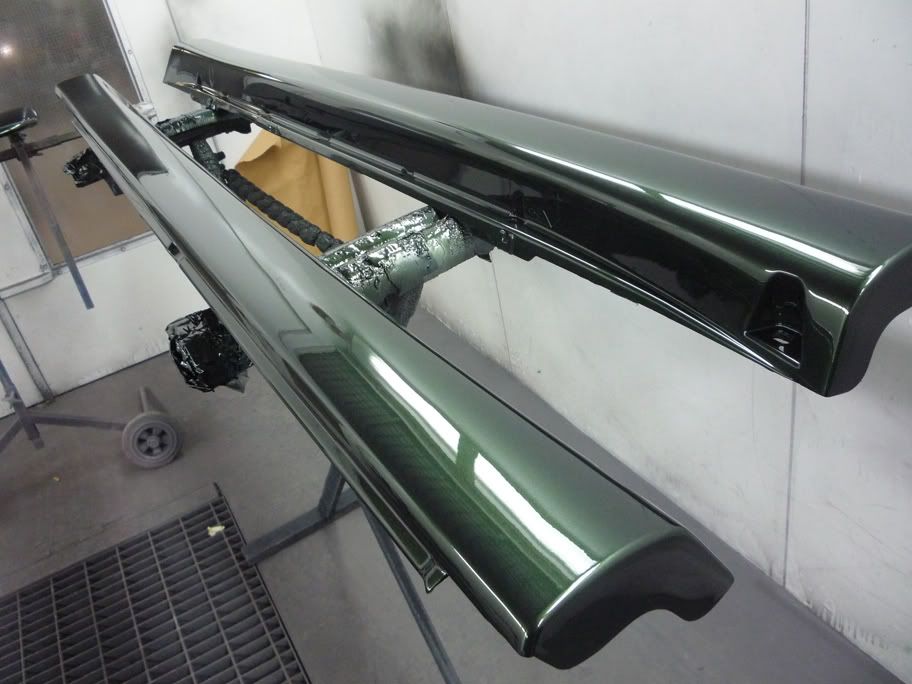
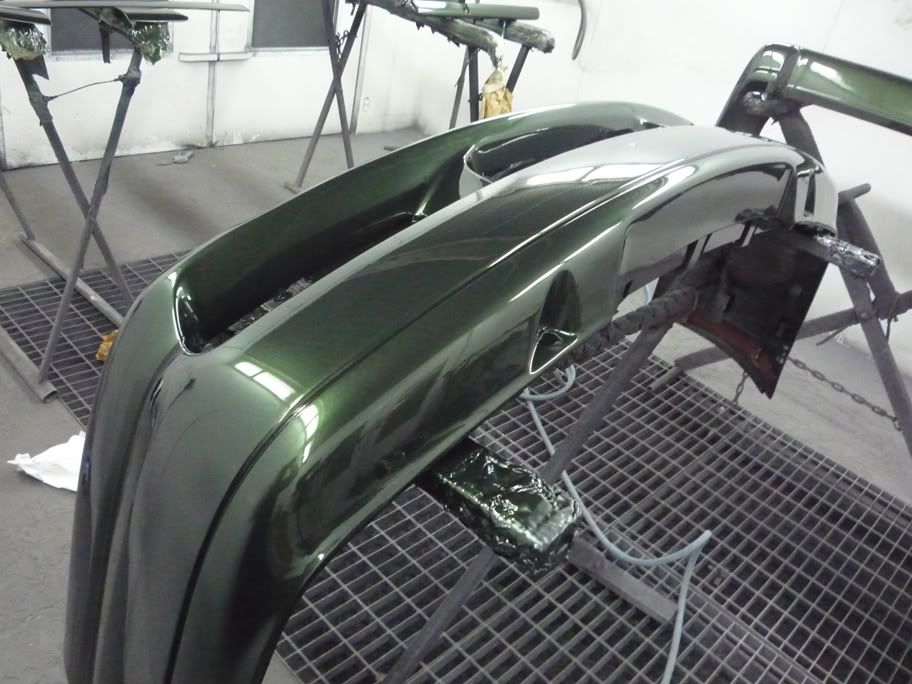
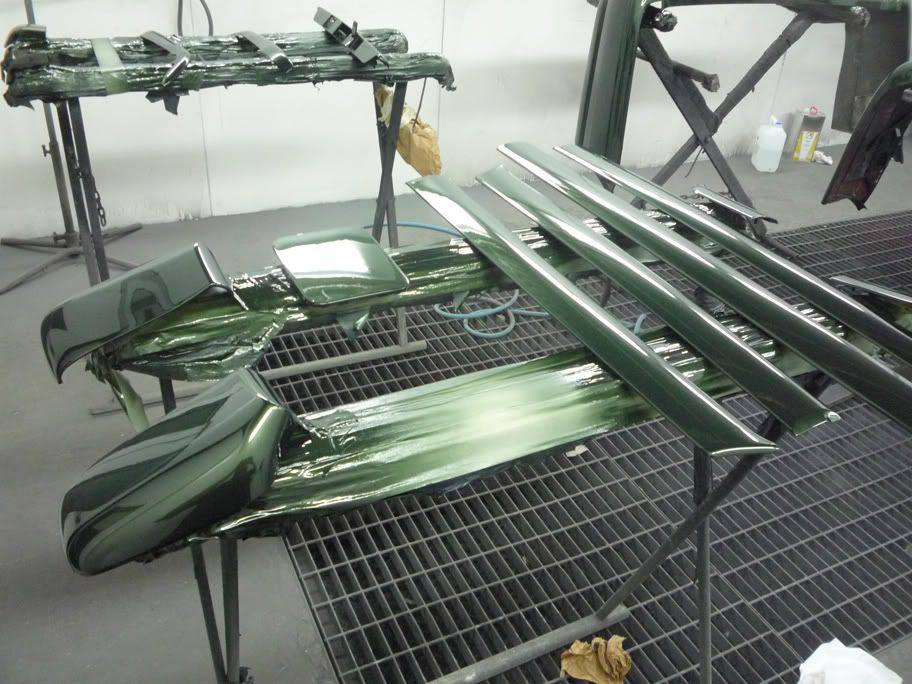
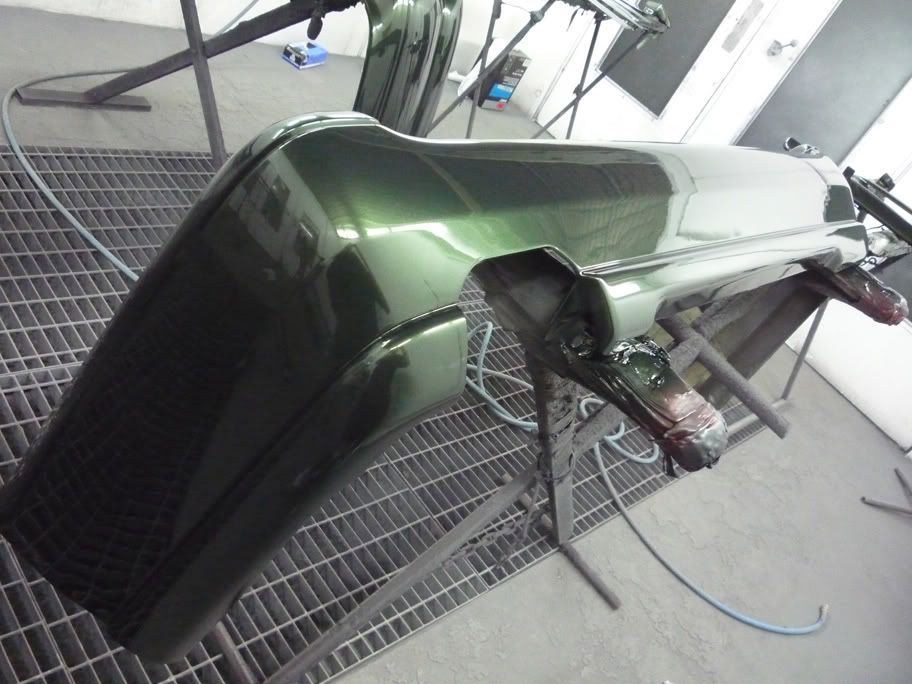
Thanked 25 Times in 19 Postsadding the pearl tvr laquer

now ill be putting her back together and fittin my new tuning parts, 19t, wi, rods, ths fmic, bosst controller, green giant 465cc, walbro 255 and remapped.
its taken 4 months of lunchbreaks, evenings and weekends but its now mint and arrow straight and will be corrosion protected for a very long time, thgose of you mid project, stay at it, although it seems you'll never get there, dont give up and you will!!!
Gav[/QUOTE]
-
Monday 9th April 2012, 22:07 #4Senior Member
This user has no status
- Join Date
- May 2011
- Posts
- 178
- Thanks
- 3
Thanked 25 Times in 19 Postsuppdate
 Originally Posted by gavT5

-
Monday 9th April 2012, 22:10 #5Senior Member
This user has no status
- Join Date
- May 2011
- Posts
- 178
- Thanks
- 3
Thanked 25 Times in 19 Postsupdate
Originally Posted by Geezer
hey mate, as many of the dents that i could get to the back of were dressed out with panel hammer and dolly, some others you make bare metal at the lowest point of the dent then use a sort of spear on a welder to spot weld it to the car and then pull it out, if the metal has high spots either side of gouge type creases u need to used a metal file surform to file off the high spots. on v70 front wings there are bulges from the pressing of the original panel and i got rid of these also. sure you can "lob up" dents with filler but in 5 years time it wont looks so gud. also noted is that the front doors have a natural bow in them, volvos arent arrow straight anyway but im fussy so skimmed up little bits here and there to get the car as straight as im physically capable of. bumpers and skirts were cracked on my car so were laminated up with fibreglass sheeting on the back and filled over the top. the trick with all panel beating is to block everything, just sandpaper in the hand is a big no no.Last edited by AndysR; Monday 9th April 2012 at 22:33.
-
Monday 9th April 2012, 22:11 #6Senior Member
OH DEAR
- Join Date
- Jul 2008
- Location
- barnsley s.yorkshire
- Posts
- 12,470
- Thanks
- 2,138
Thanked 3,711 Times in 2,752 PostsWOW thats some talant to get a finish like that really well done

-
Monday 9th April 2012, 22:12 #7Senior Member
This user has no status
- Join Date
- May 2011
- Posts
- 178
- Thanks
- 3
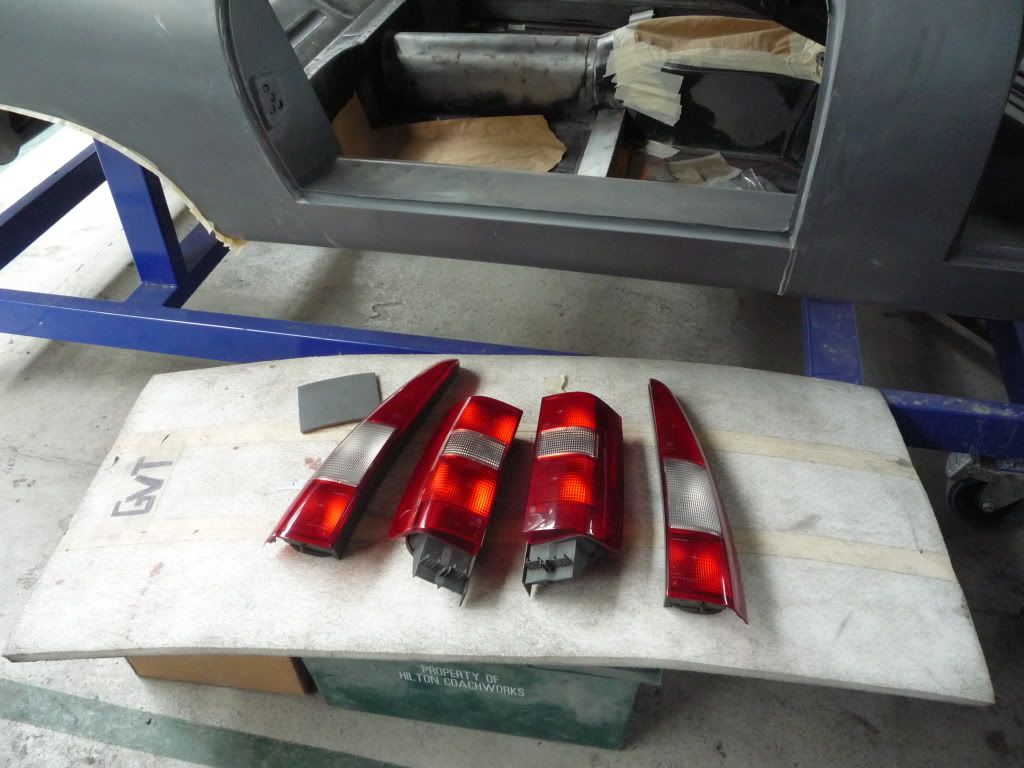
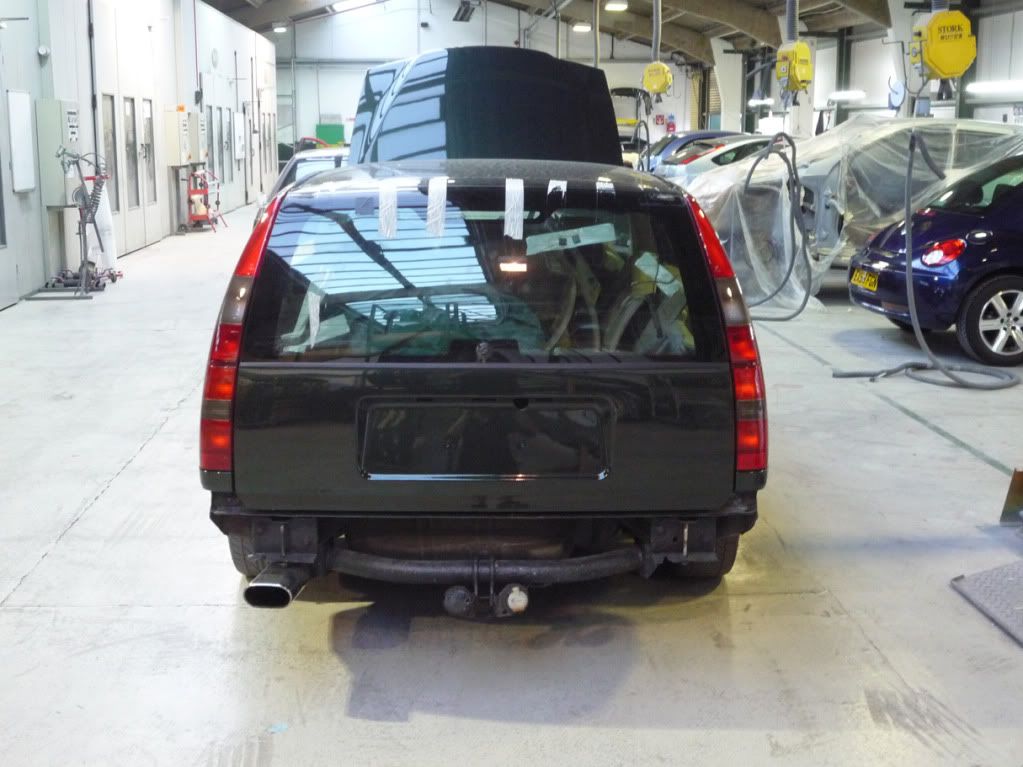
Thanked 25 Times in 19 Postsupdate
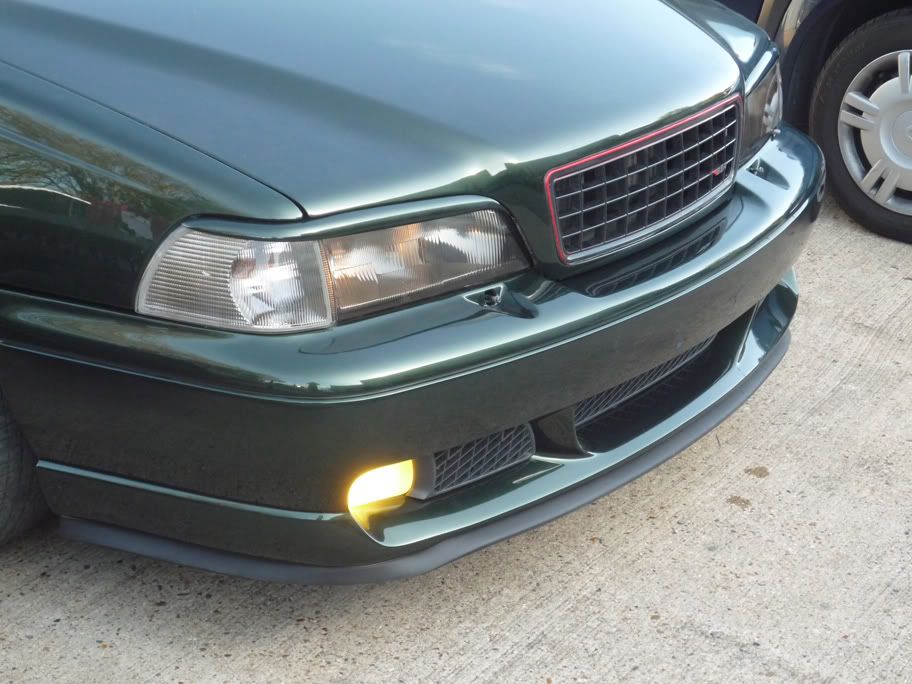
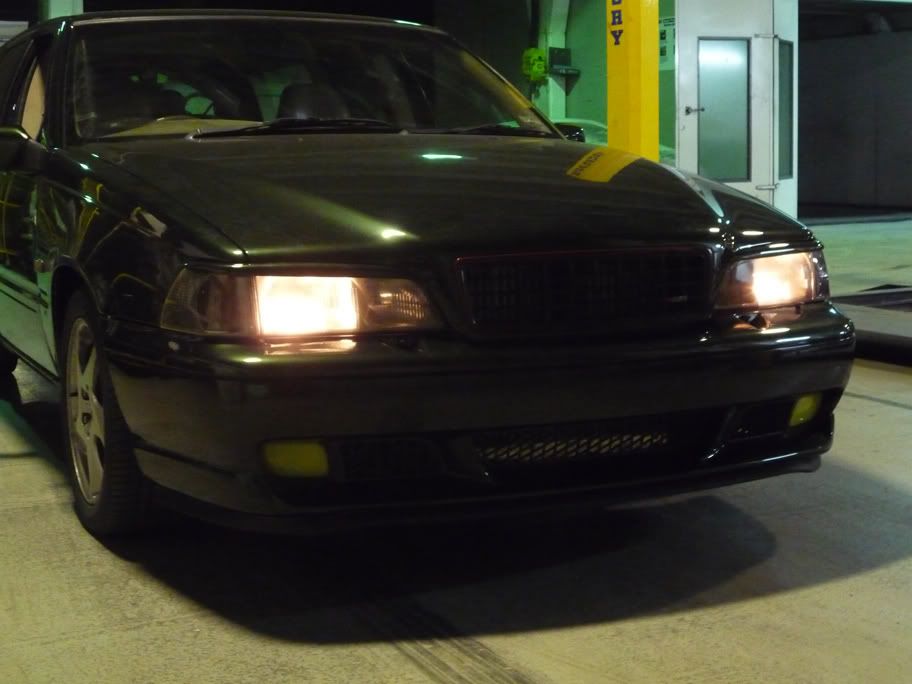
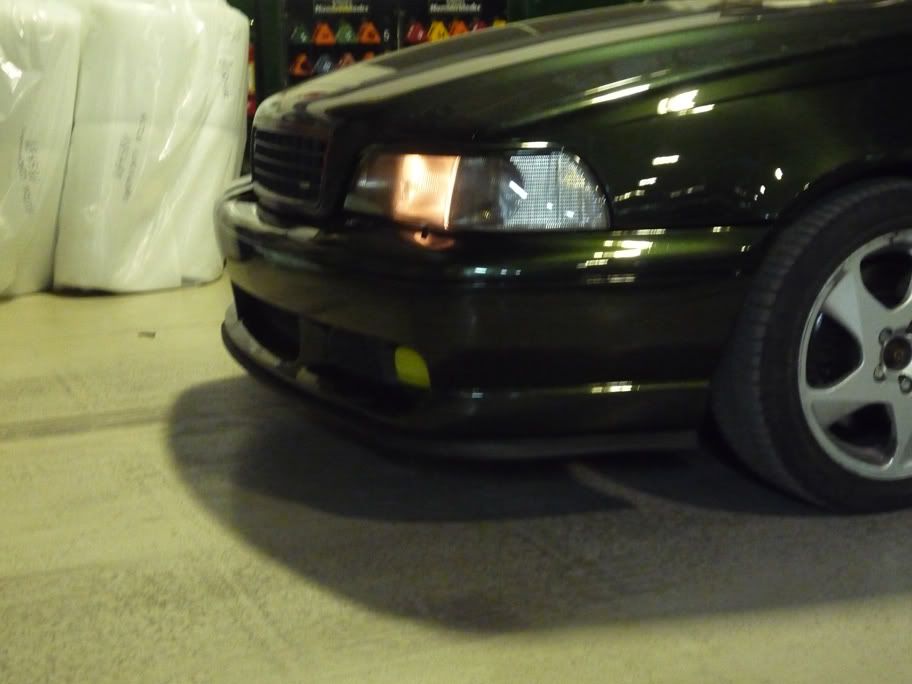
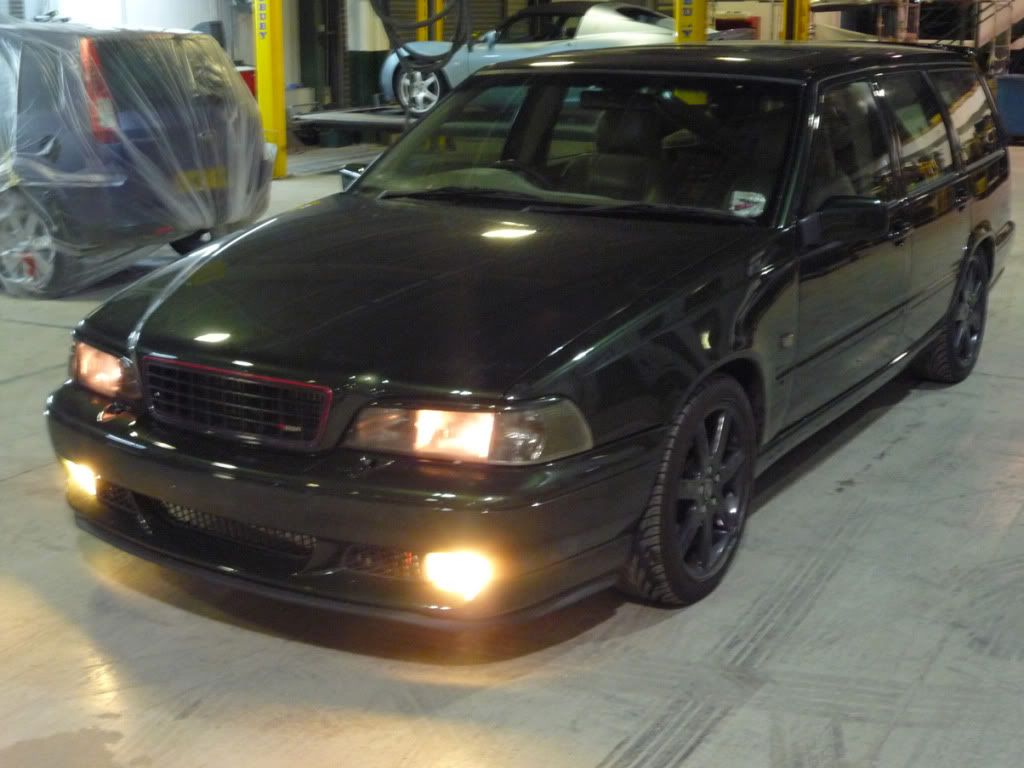
these were the custom lights i have made for my car. the headlight glass and indicators looked "too white" for my taste but i dont like any of the aftermarket parts i have seen to date. the rear lights also werent to my taste so set about making my own. you start by using a water based degreaser and a trizact pad ( a 3000 grade polishing disc/pad) and lightly rub this over the surface to give a key up.
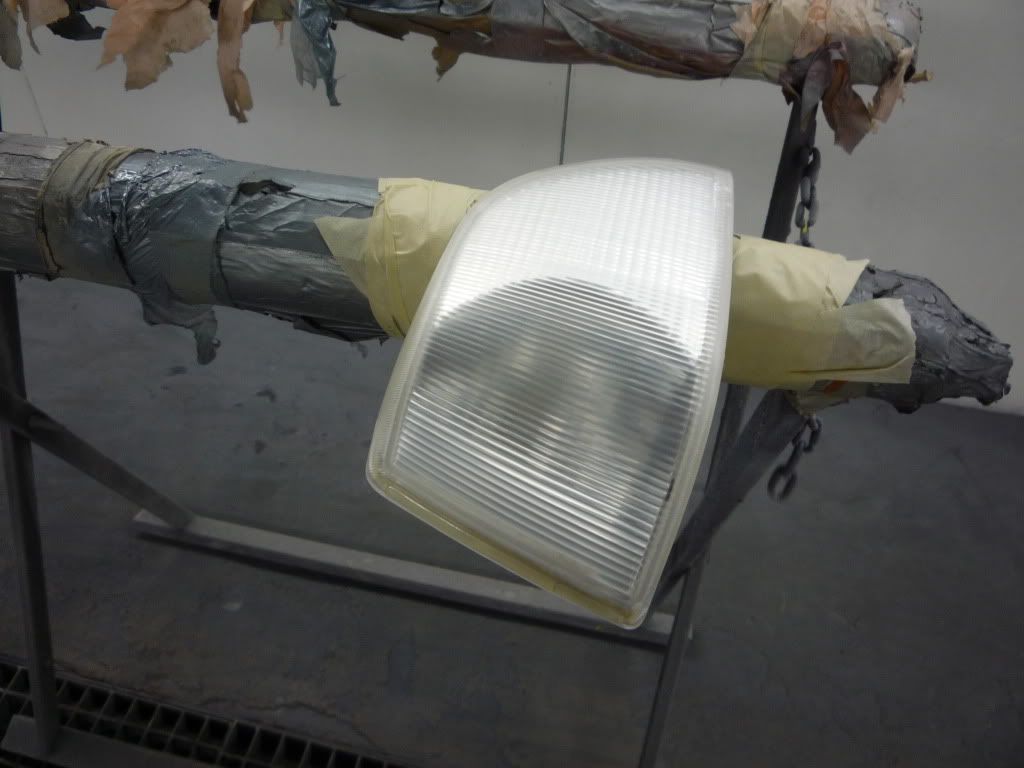
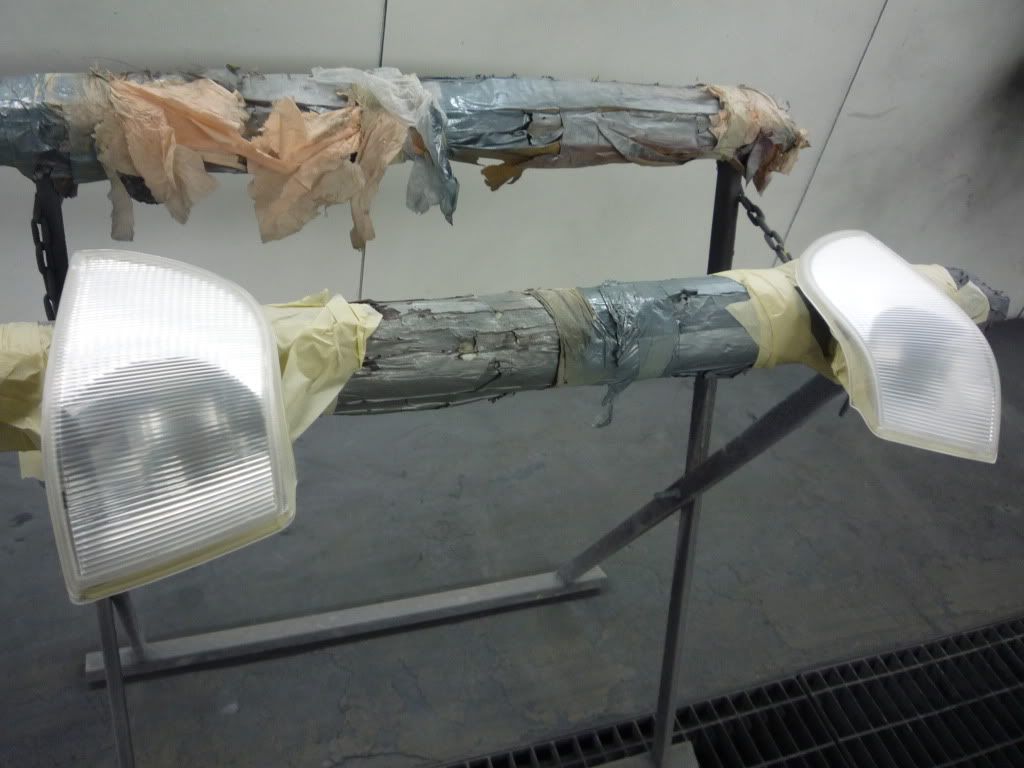
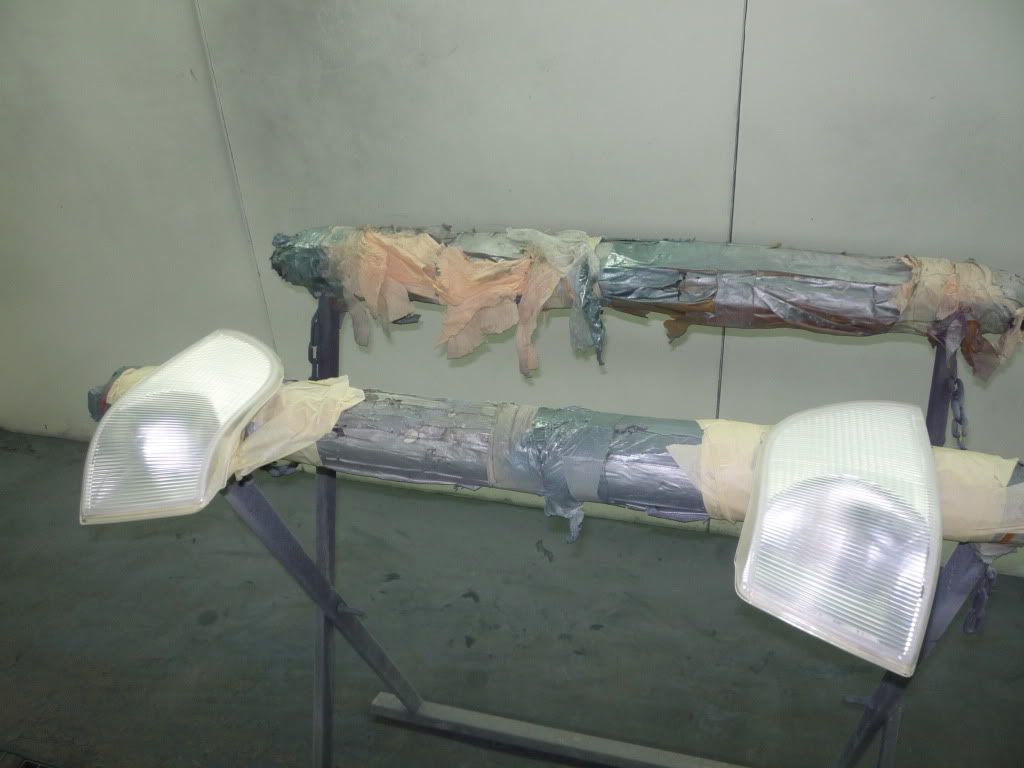
i also did this with the rears and then masked out the "clear" sections and papered over the rest of the lights.
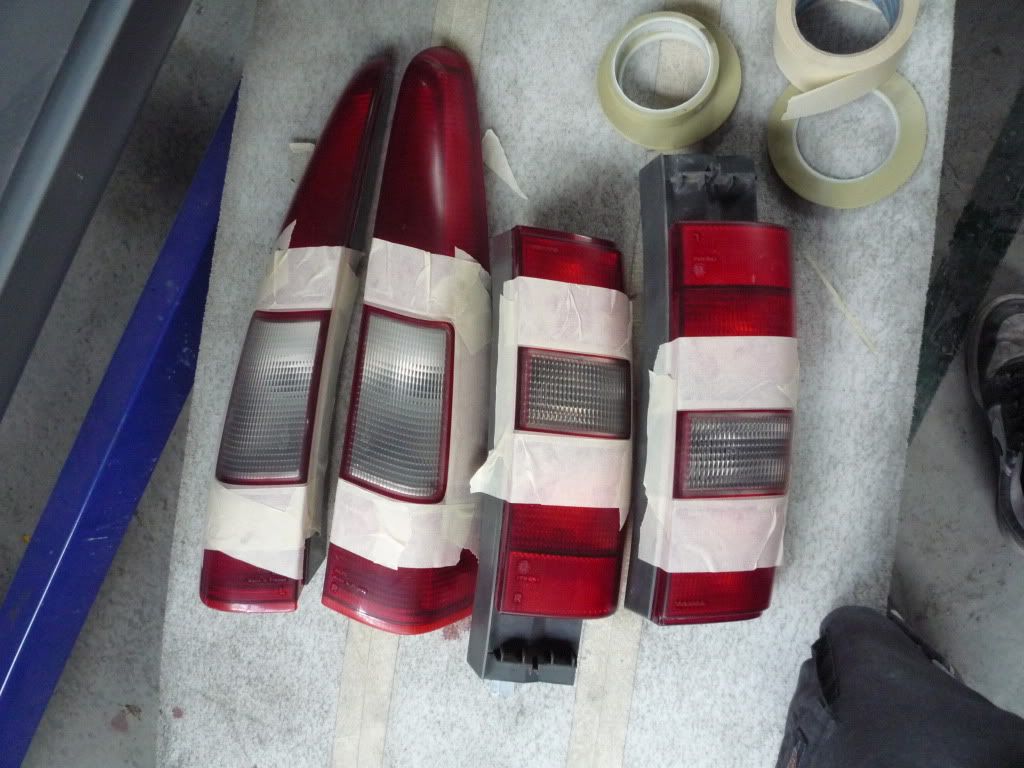
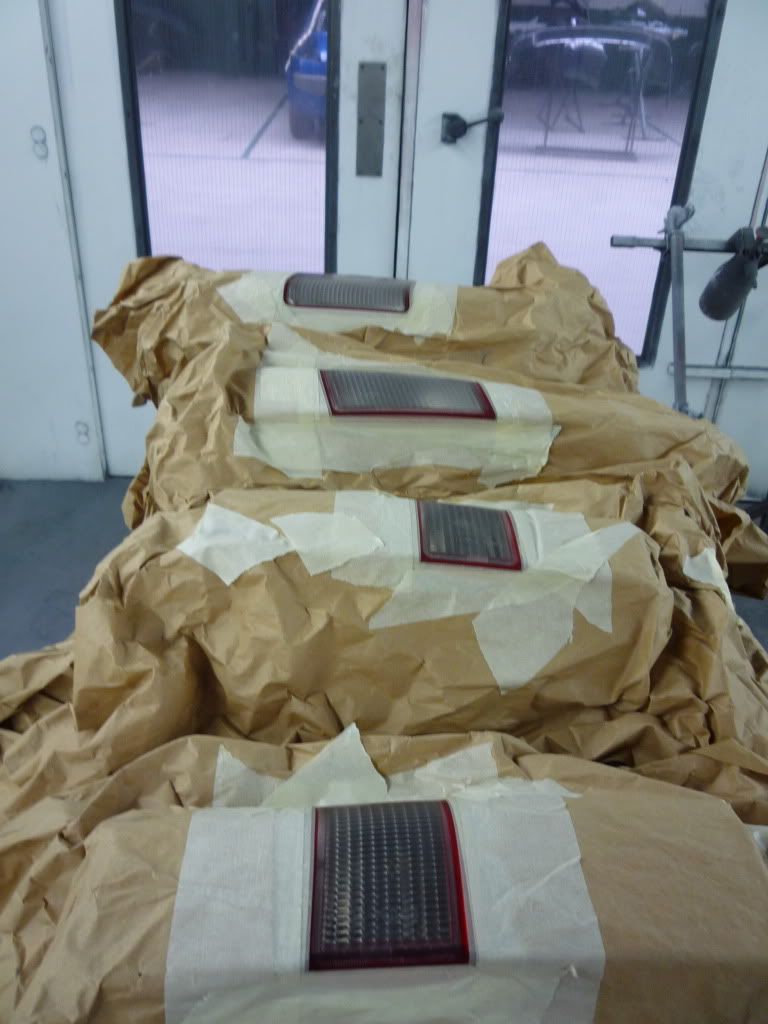
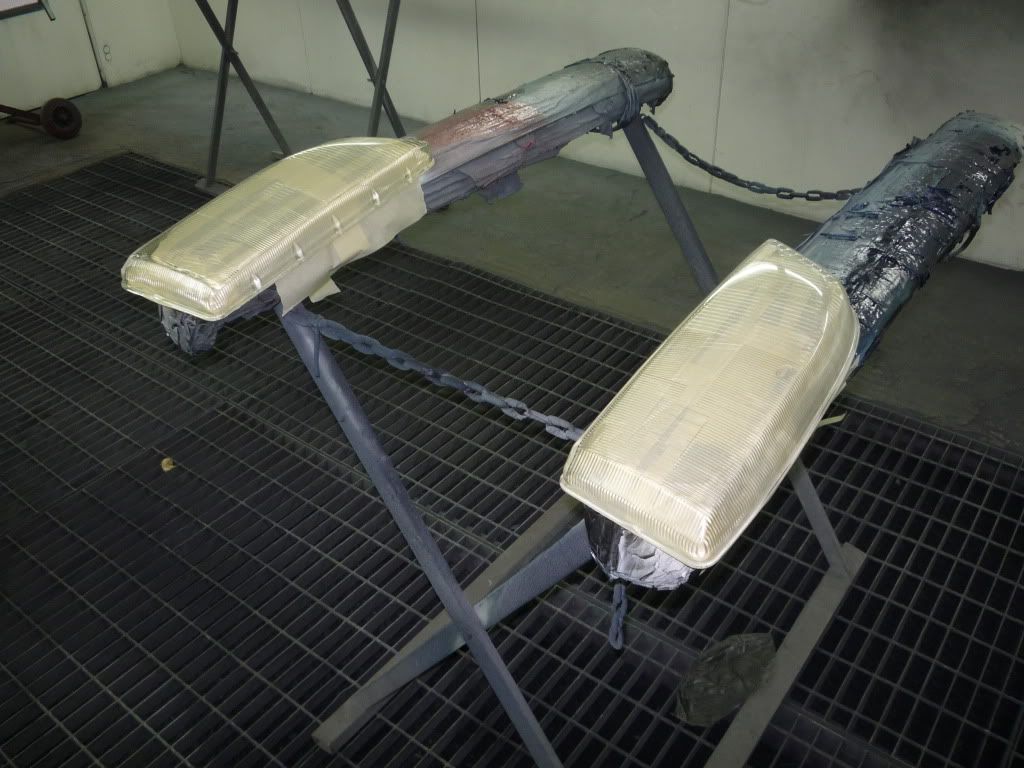
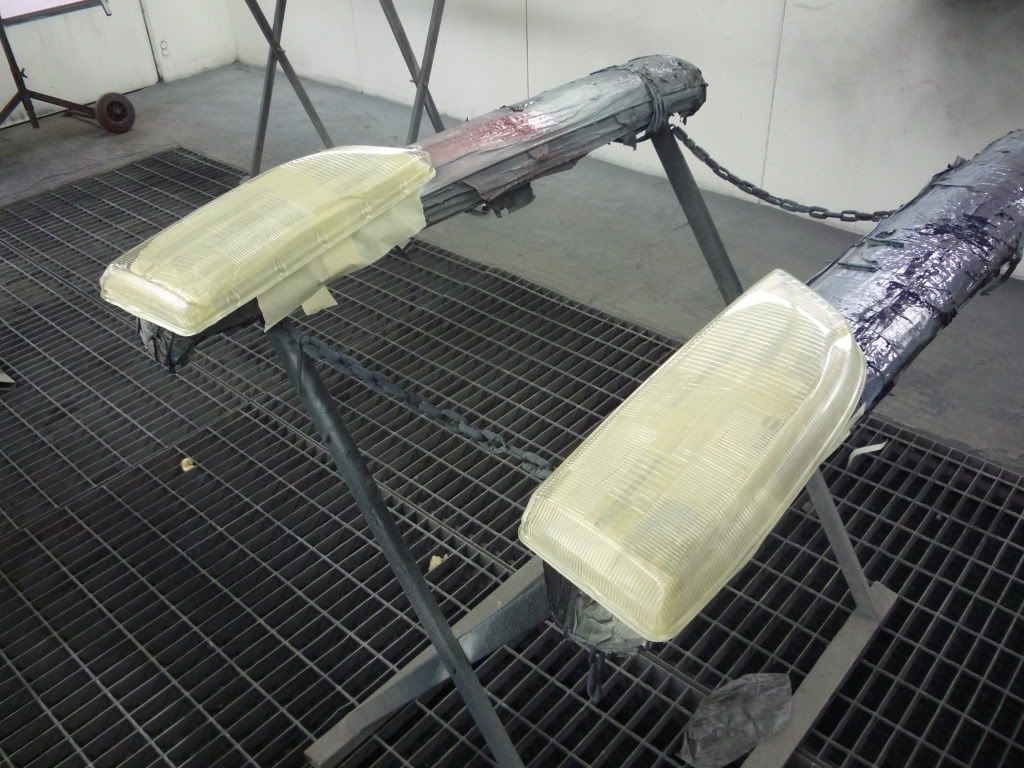
then you mix laquer with black base coat, i used bmw sapphire black 2008, at a rate of 50% before you add the hardener ( you can mix anything up to 50% to get the tint level you want. you can tint two pack laquer any colour you wish) lay two coats over the desired tinted areas
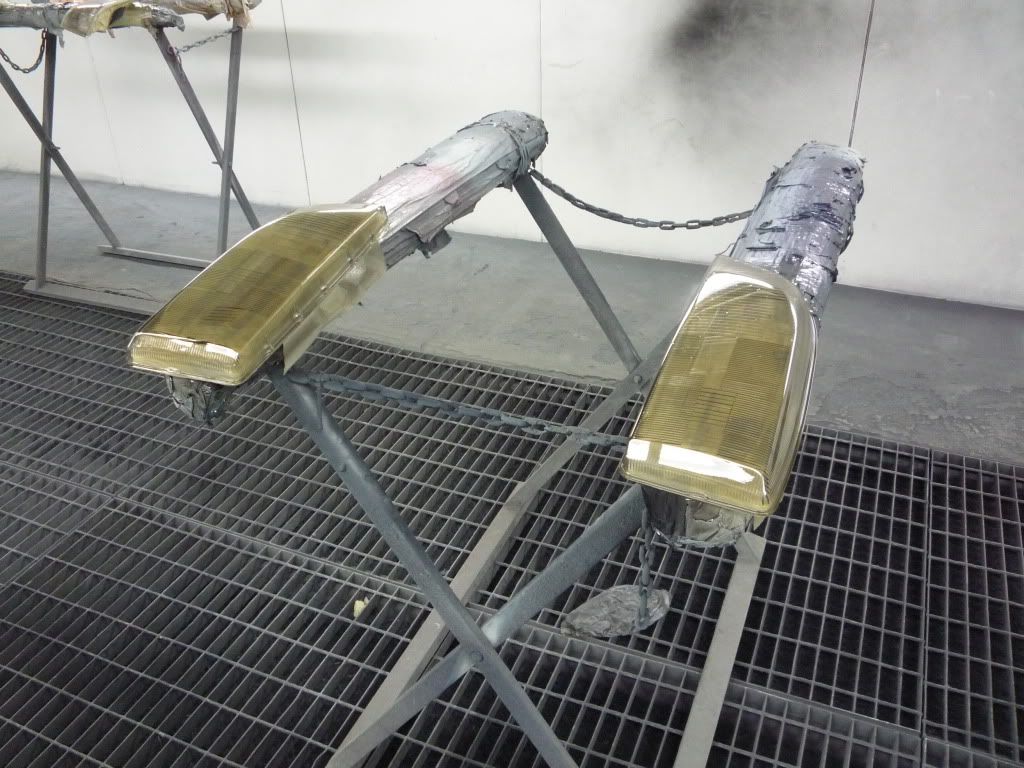
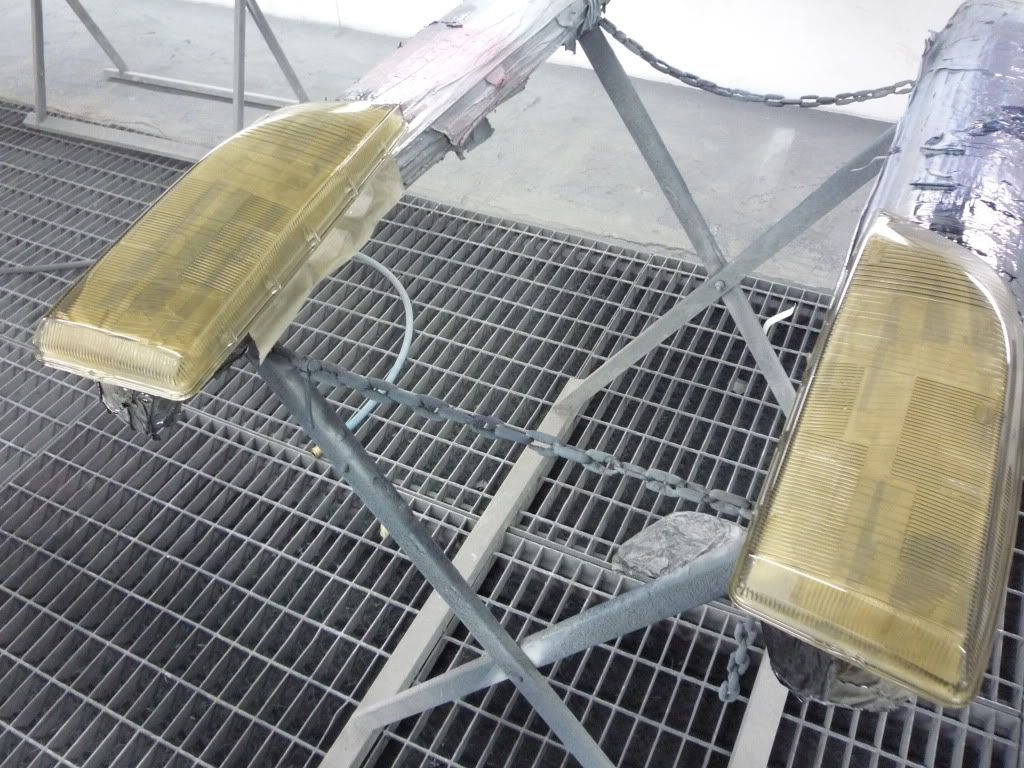

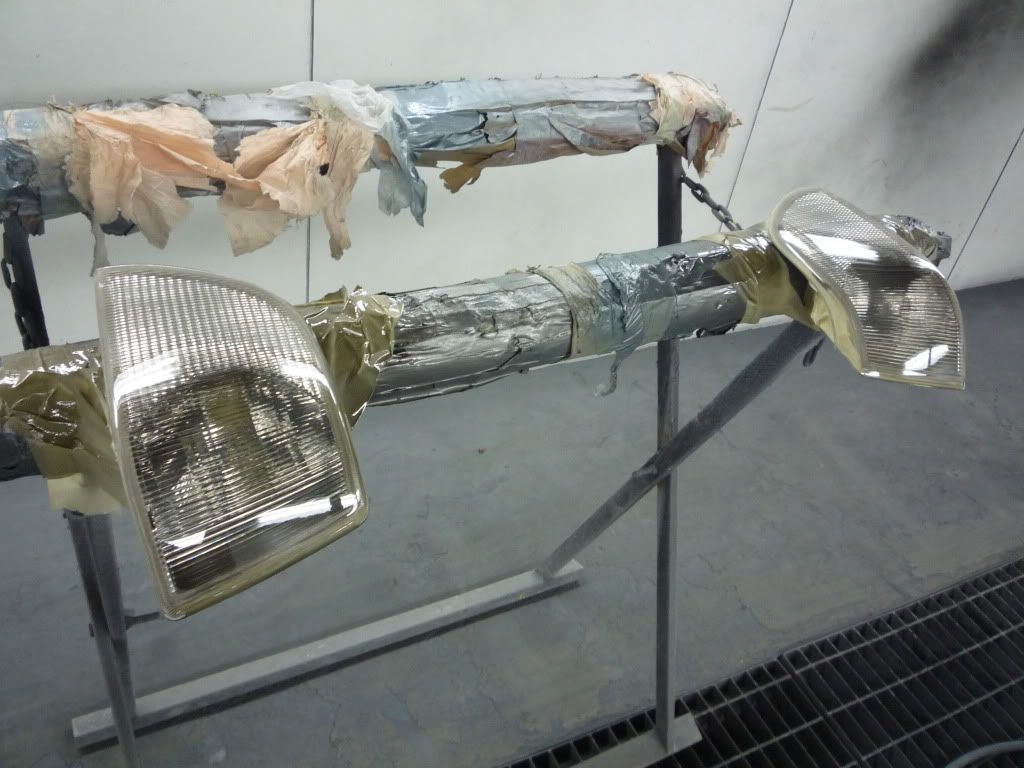
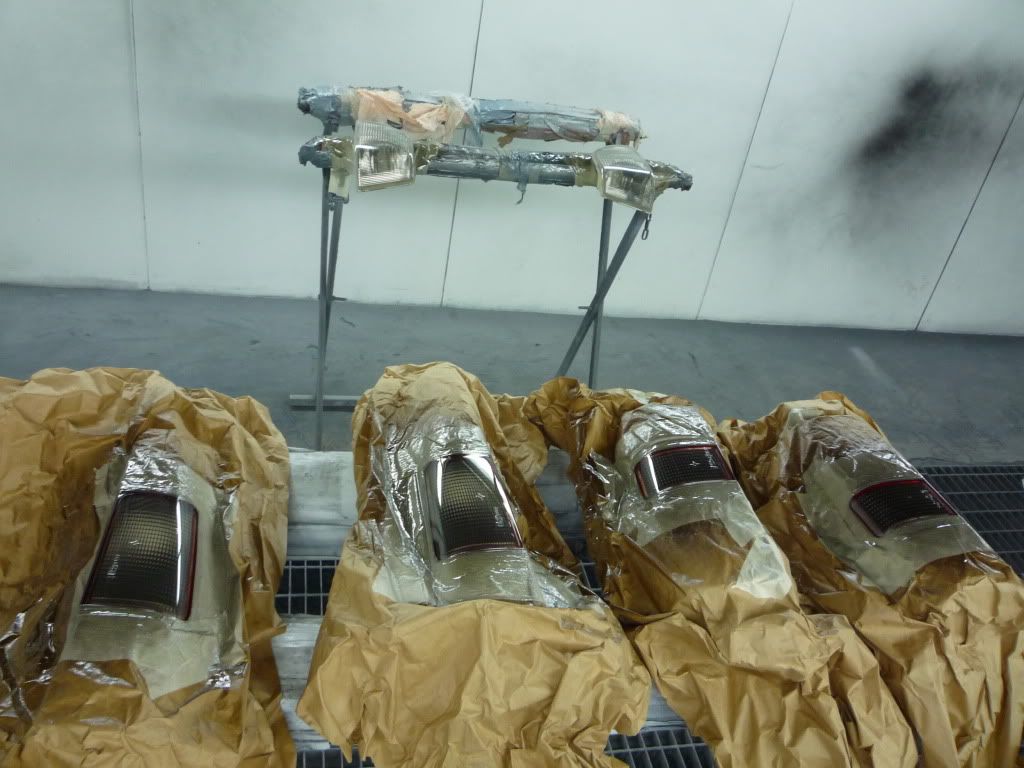
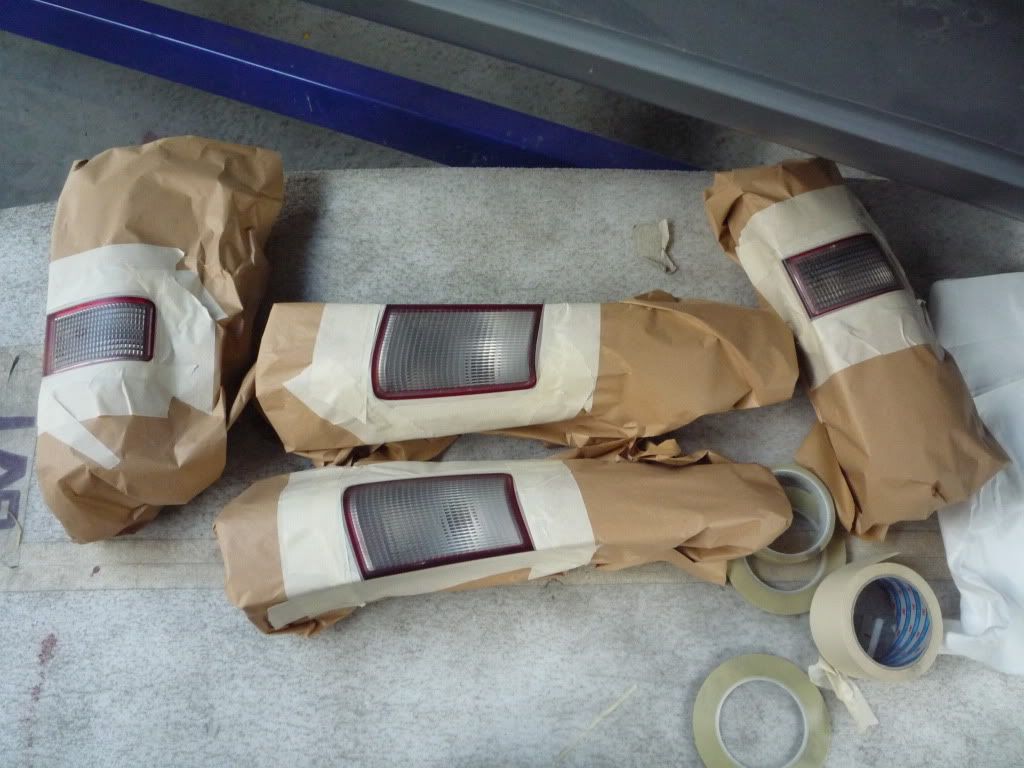
you then wait for that to flash off (partially dry but still soft) and spray over some clear laquer. in the case of rear lights care fully remove all surrounding masking from the lights but do not for christs sake touch the grey wet laquer. then as the unsprayed parts were already trizactd you spray over the top with clear coat.Last edited by AndysR; Monday 9th April 2012 at 22:32.
-
Monday 9th April 2012, 22:13 #8Senior Member
This user has no status
- Join Date
- May 2011
- Posts
- 178
- Thanks
- 3
Thanked 25 Times in 19 Postsupdate
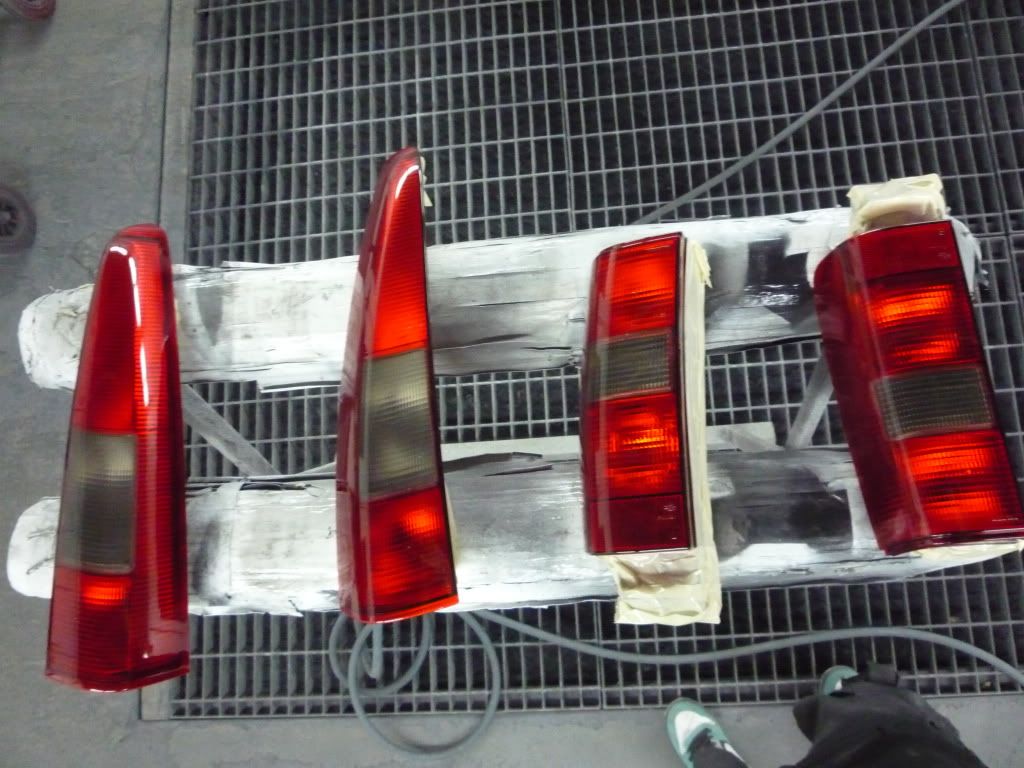
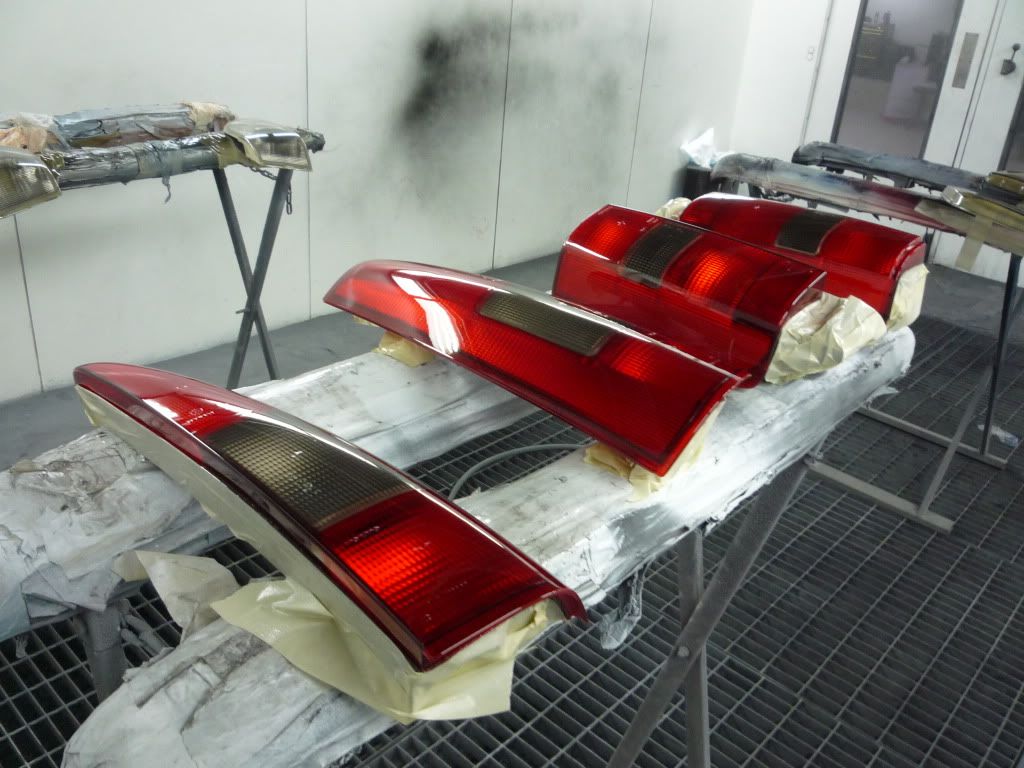
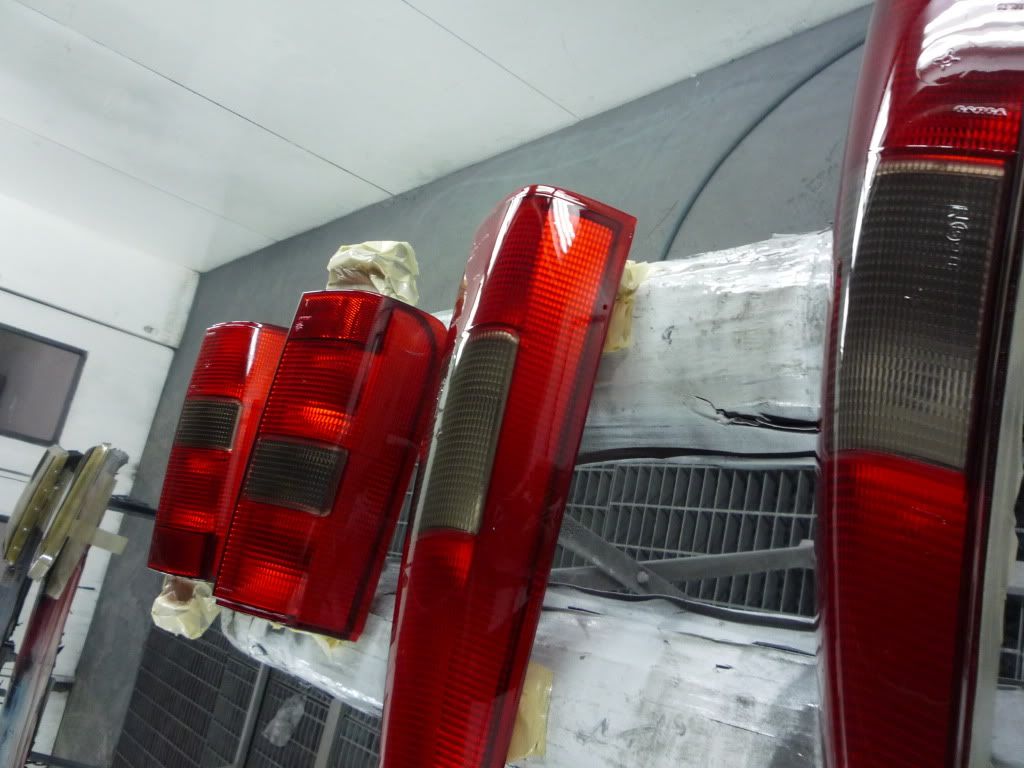
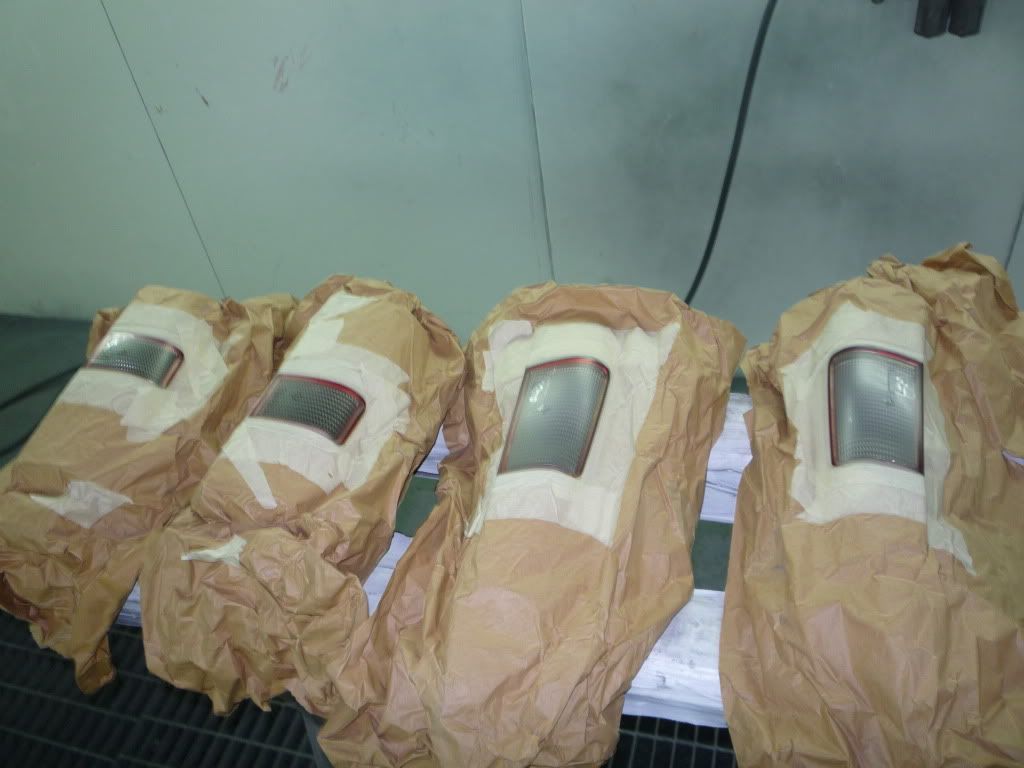
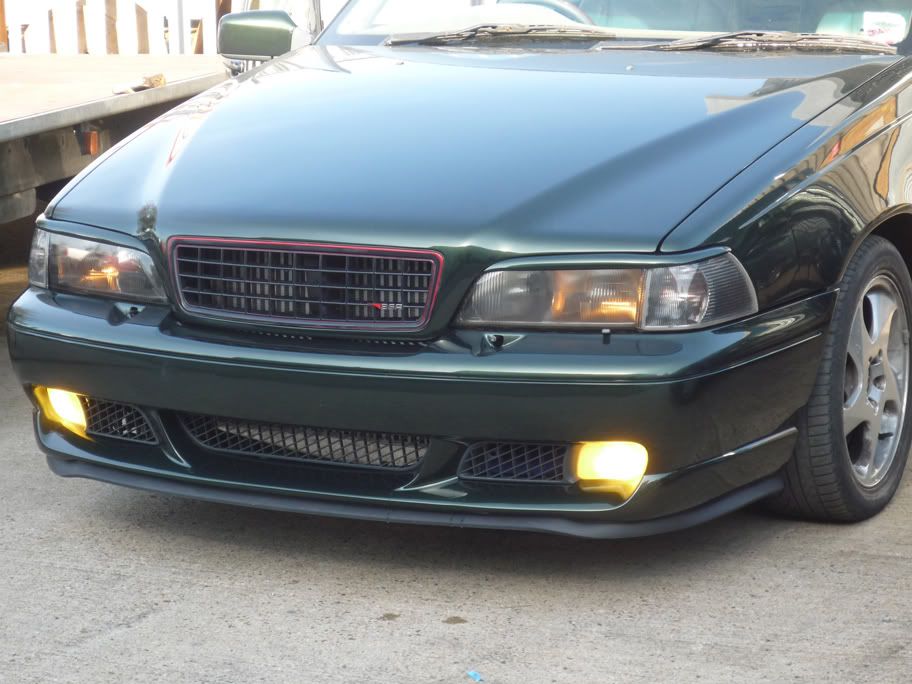
bake in the oven at 60'c then "voila".
simple, cheap, effective, different.
the headlights are being re-assembled with brighter beams (hid) and will have a look much like the new audi tt etc, grey tinted headlights. also as the lights only need to pass a brightness test when on, they are 100% legal.
more project updates to follow with custom splitter salvaged from the farbio scrap parts bin, re-worked rear spoiler and custom gauge pods.Last edited by AndysR; Monday 9th April 2012 at 22:33.
-
Monday 9th April 2012, 22:14 #9Senior Member
This user has no status
- Join Date
- May 2011
- Posts
- 178
- Thanks
- 3
Thanked 25 Times in 19 Postsupdate
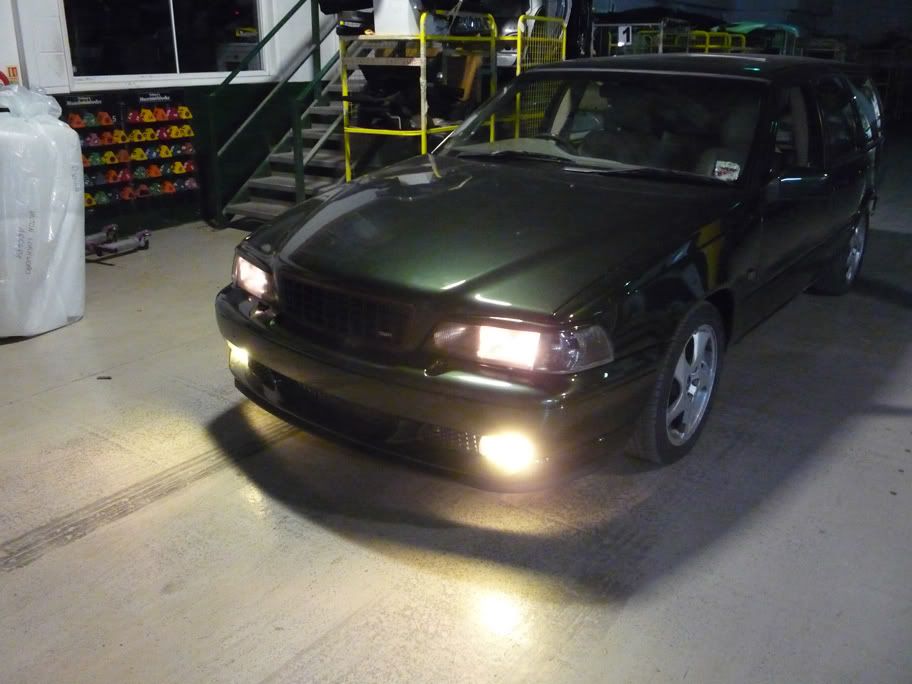
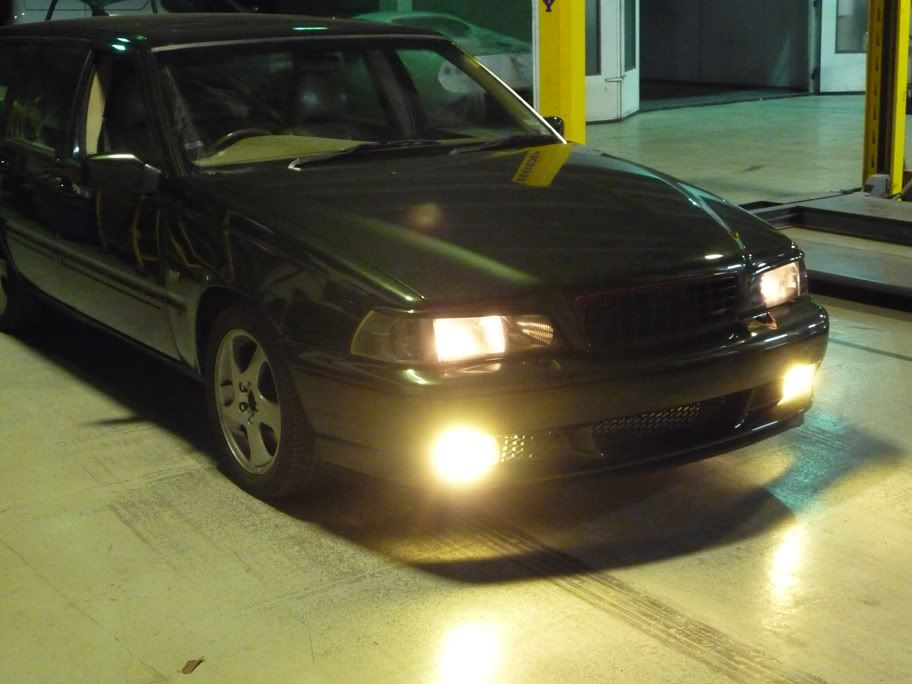
busy week of progress on the T5. some quick pictures of the tinted rear lights i made installed, what do you guys think?
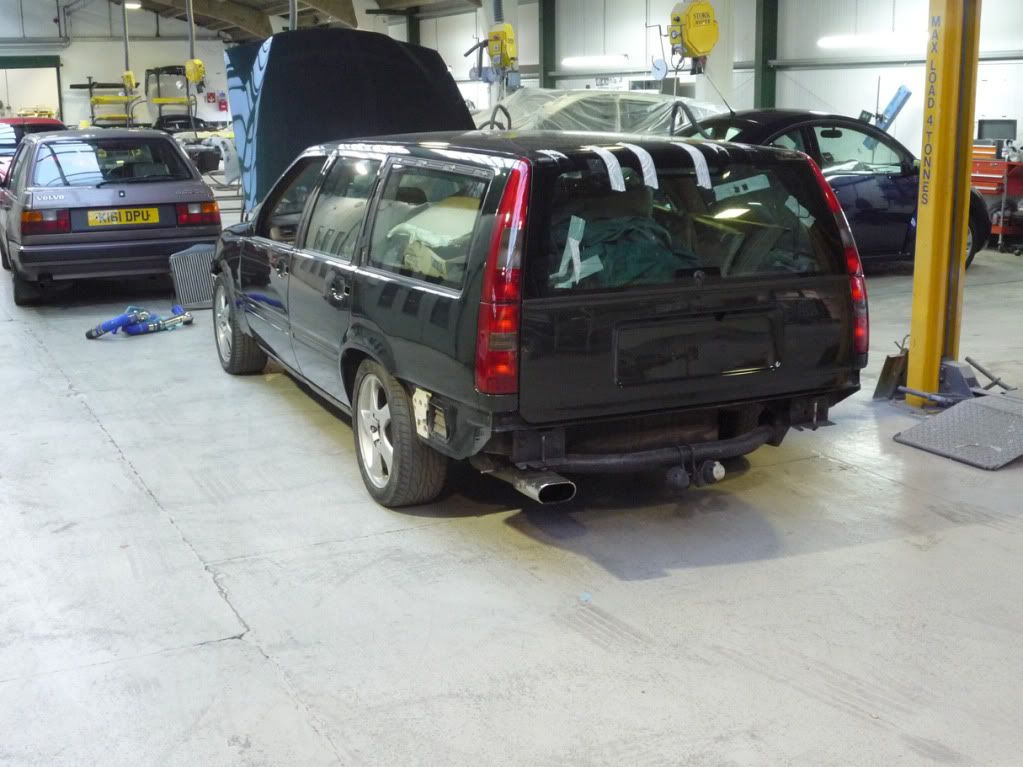
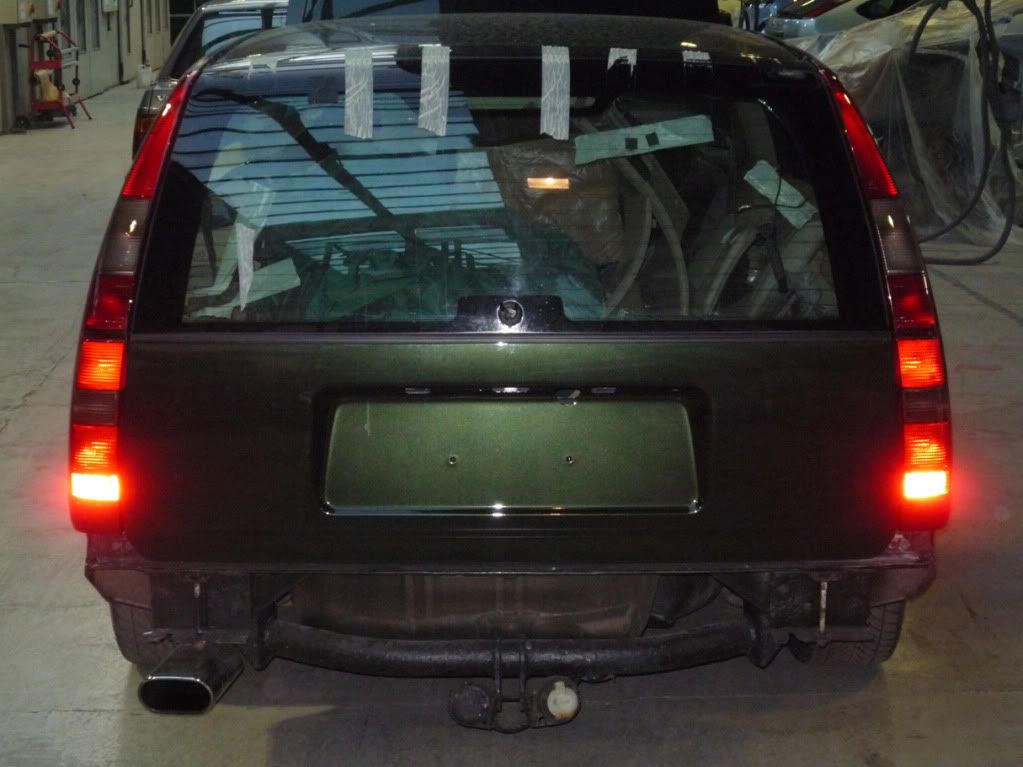
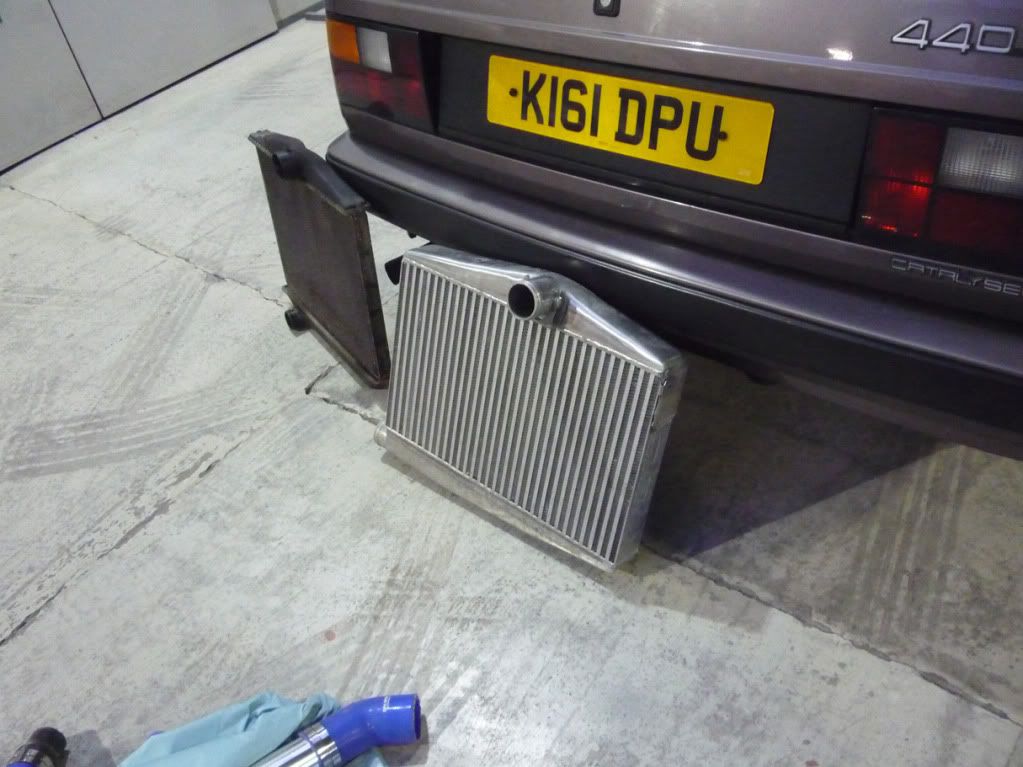
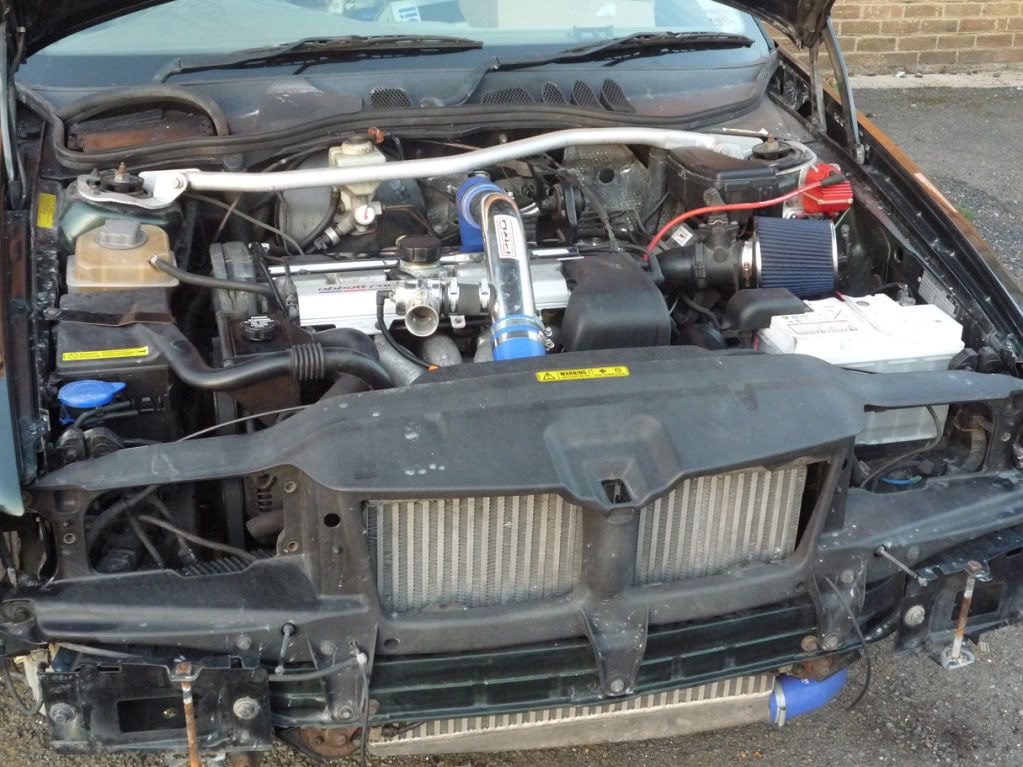
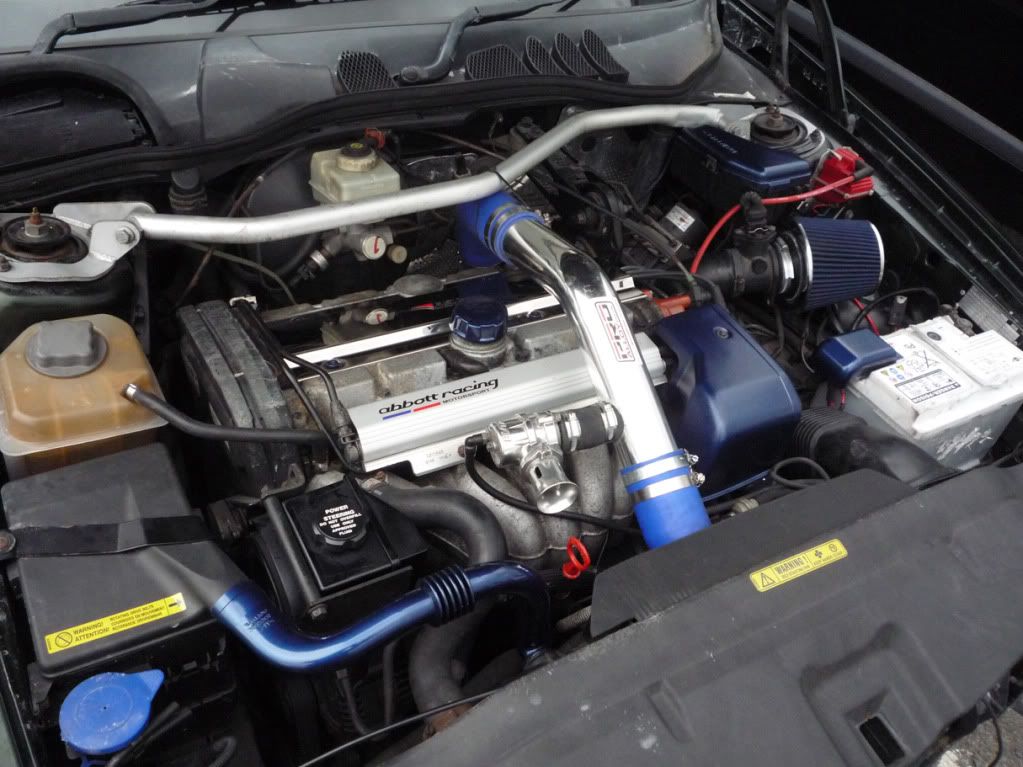
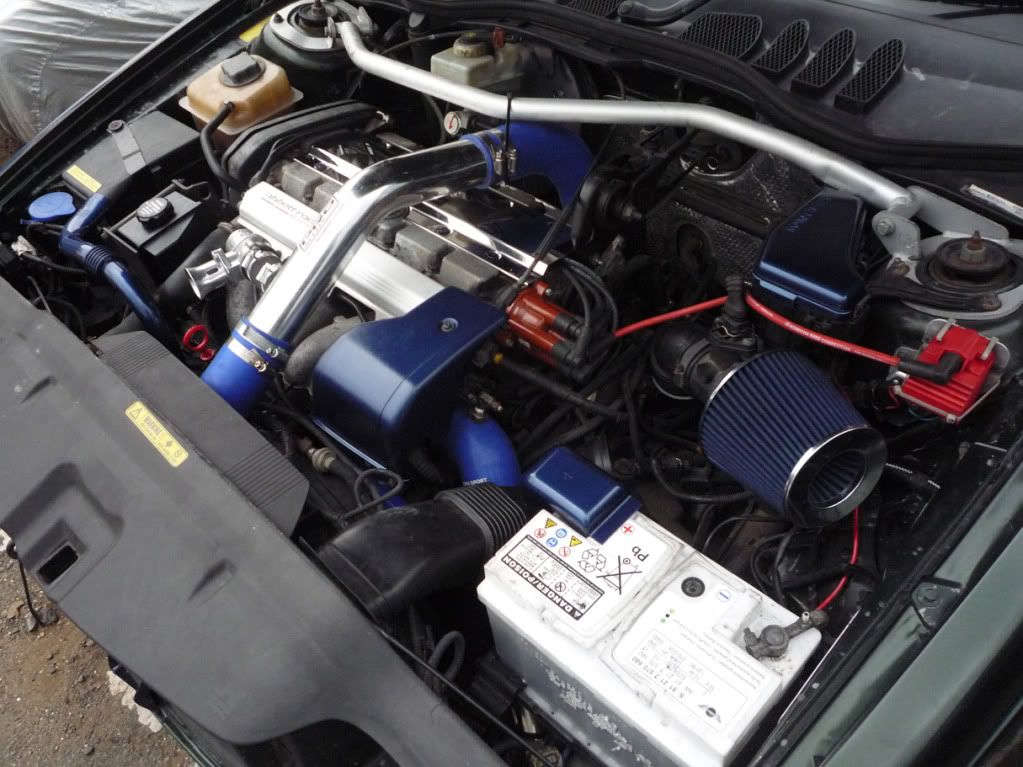
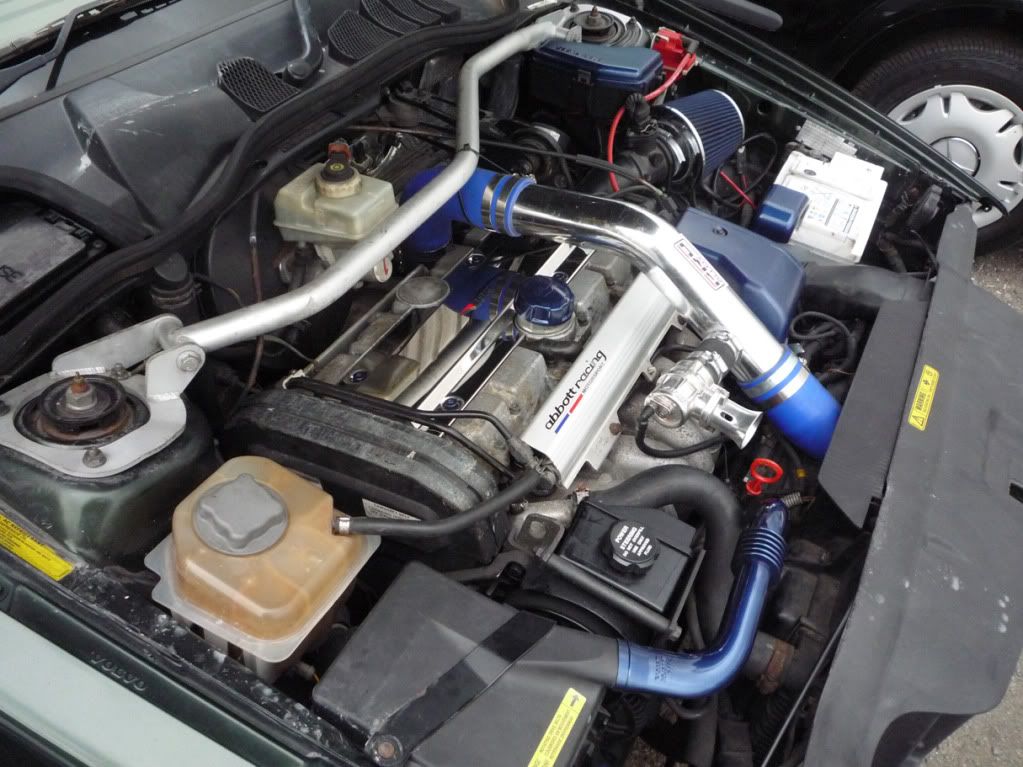
ive also taken the opportunity to fit a bigger intercooler whilst my car is dismantled. i got hold of a THS 3 inch core item from a senoir member on another volvo forum. as luck would have it, my air con condensers had it and the air con rad was accident damage so i removed the air-con system from my car and my god did it make installation simpler. secondly i now have uninterupted airflow to the intercooler which will be far better in the ACT stakes.
Old intercooler with aircon removed
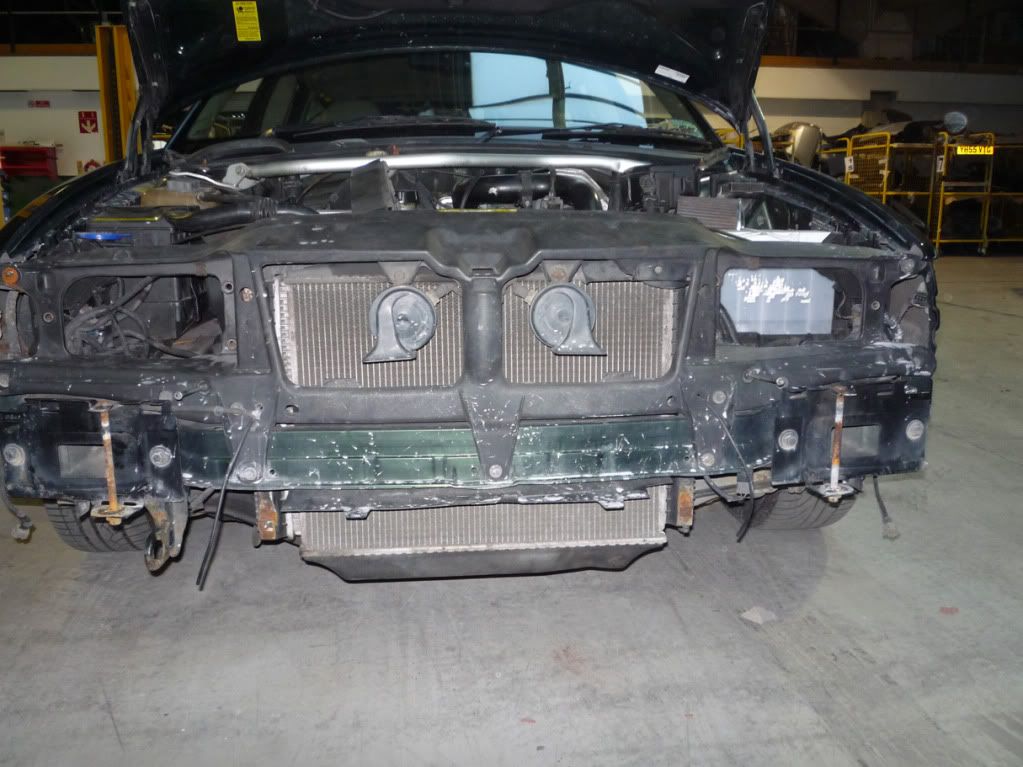
comparison between old and new
installed (horns relocated to lower crossmember)
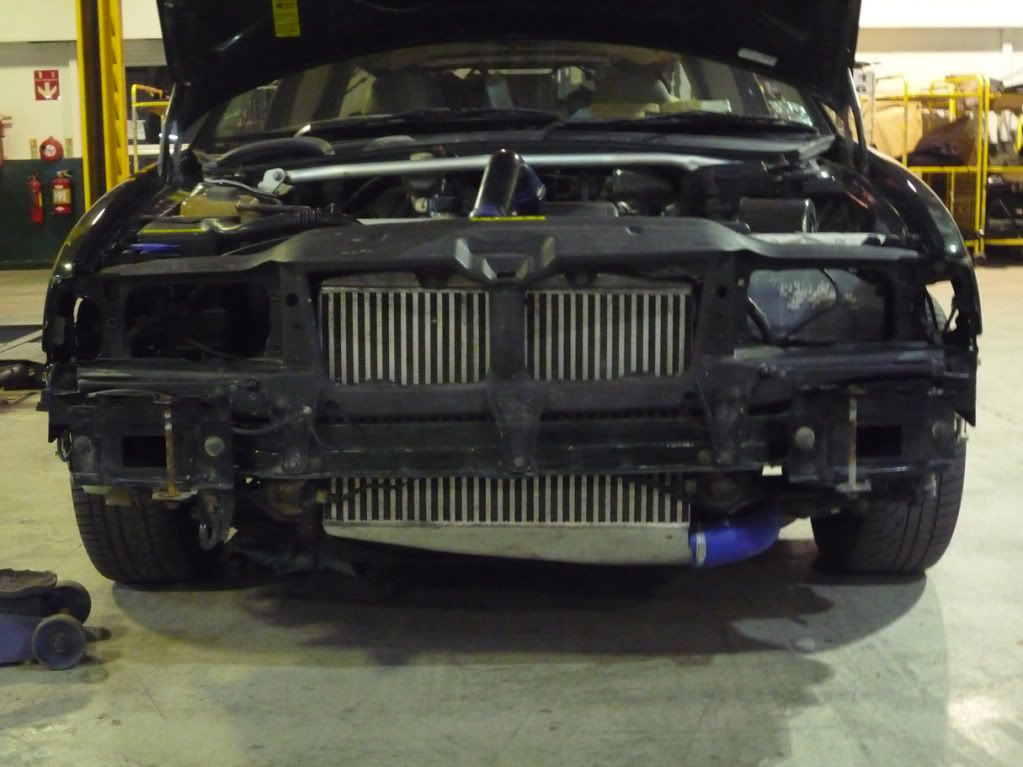
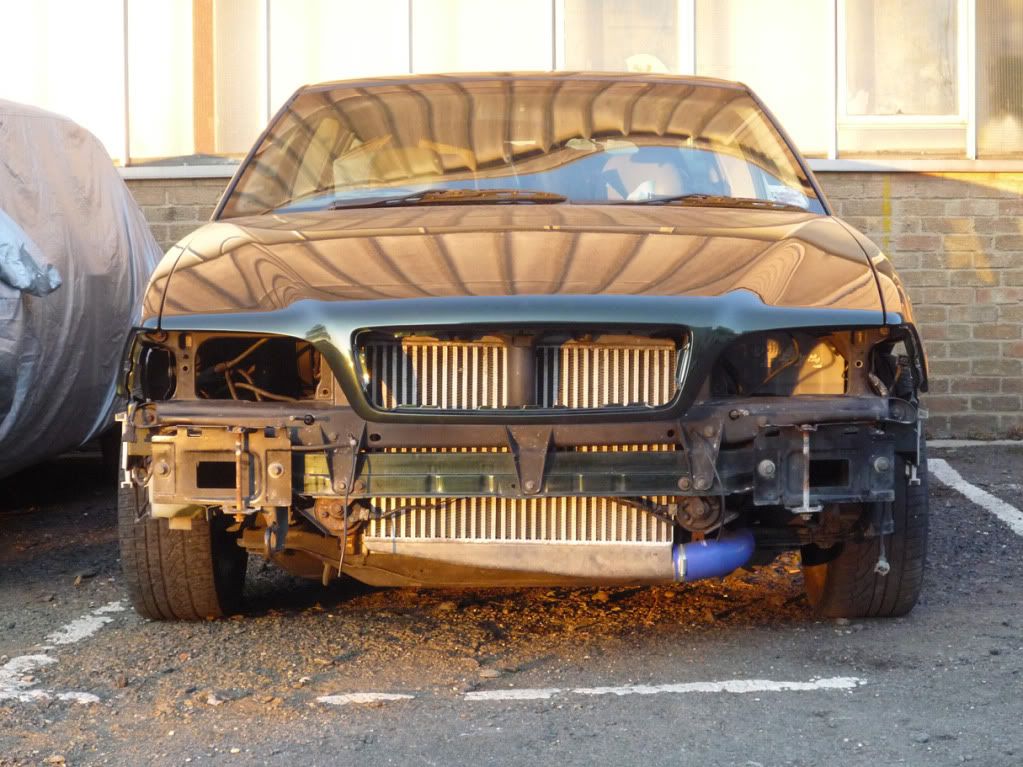
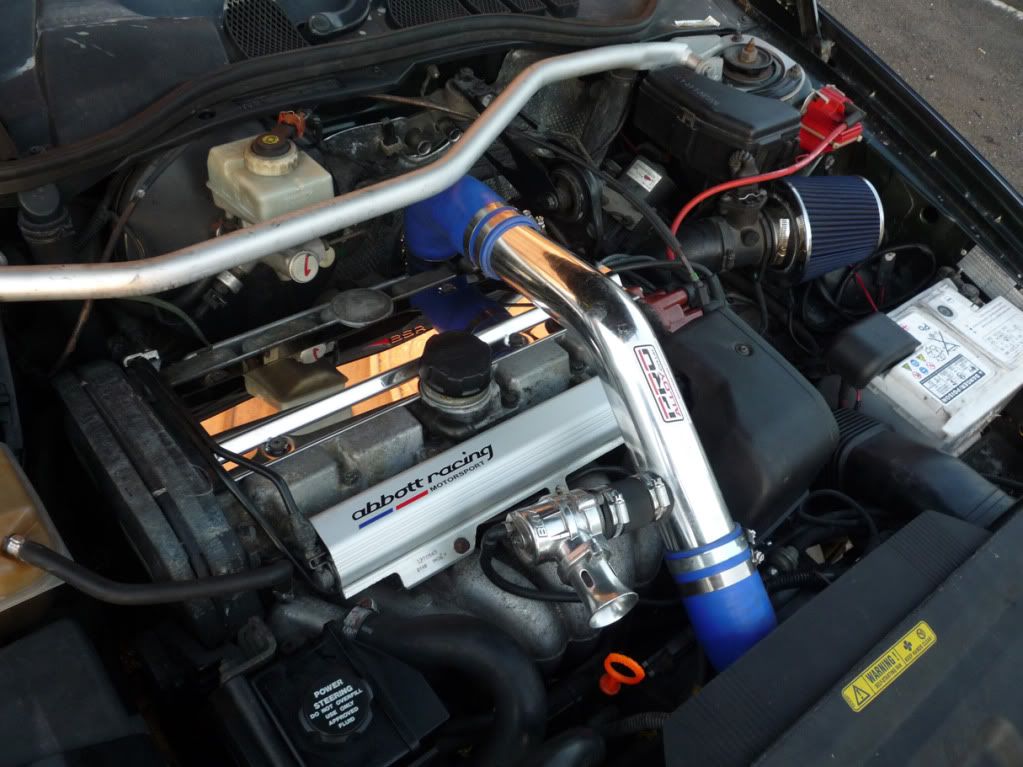
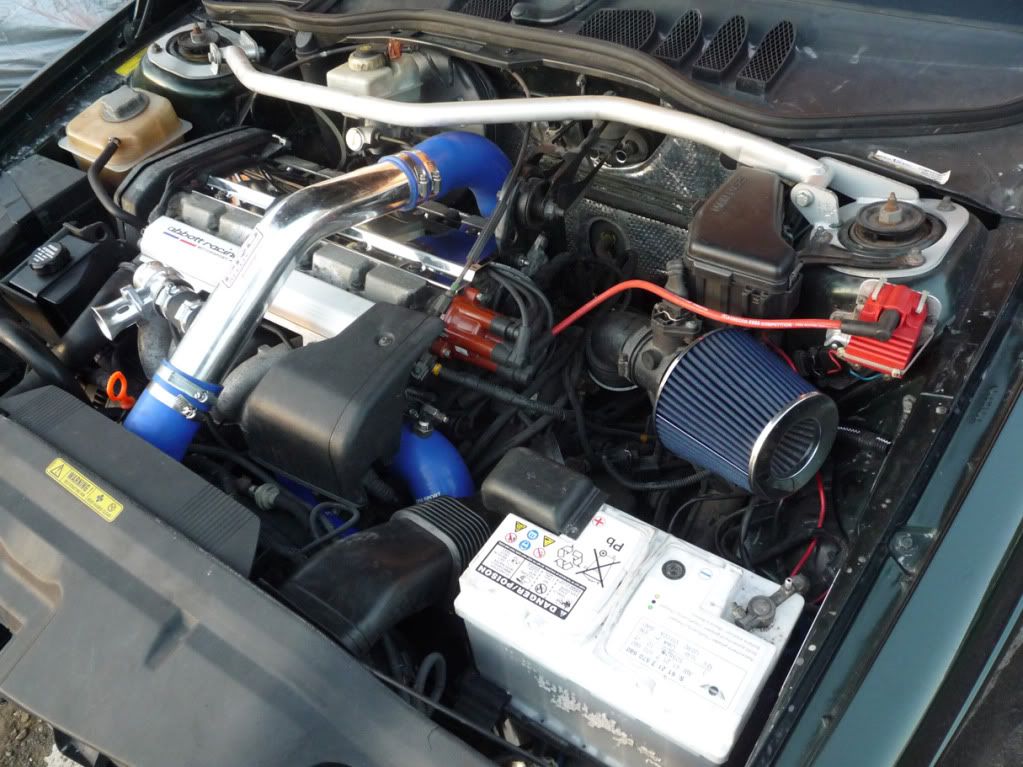
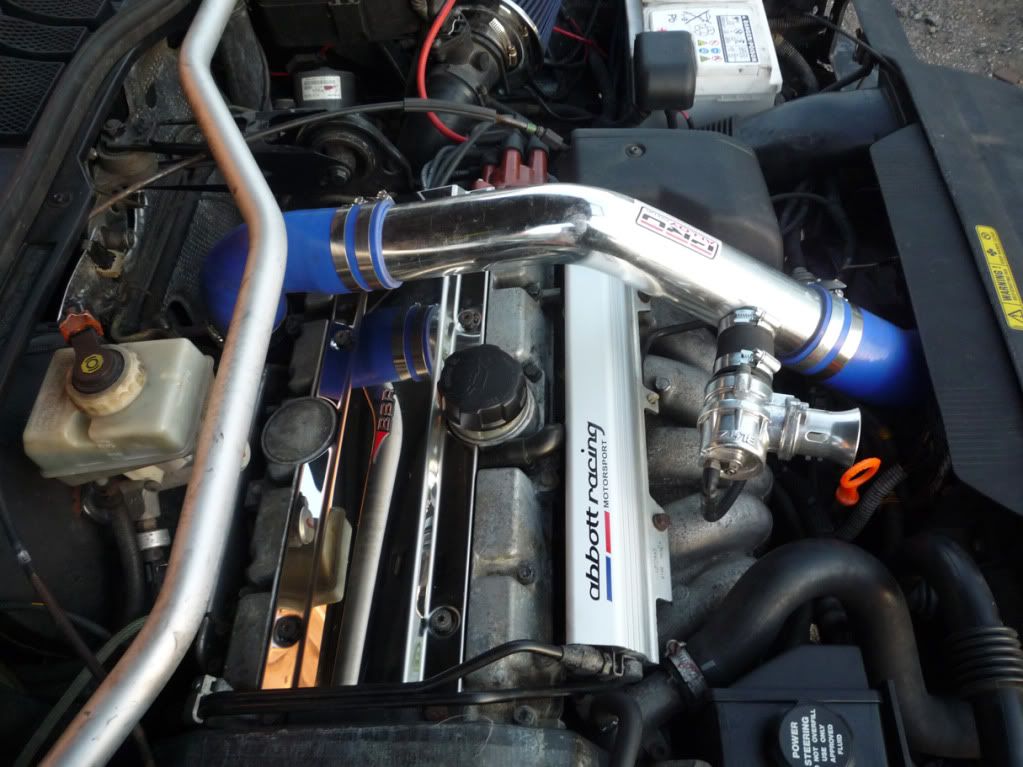
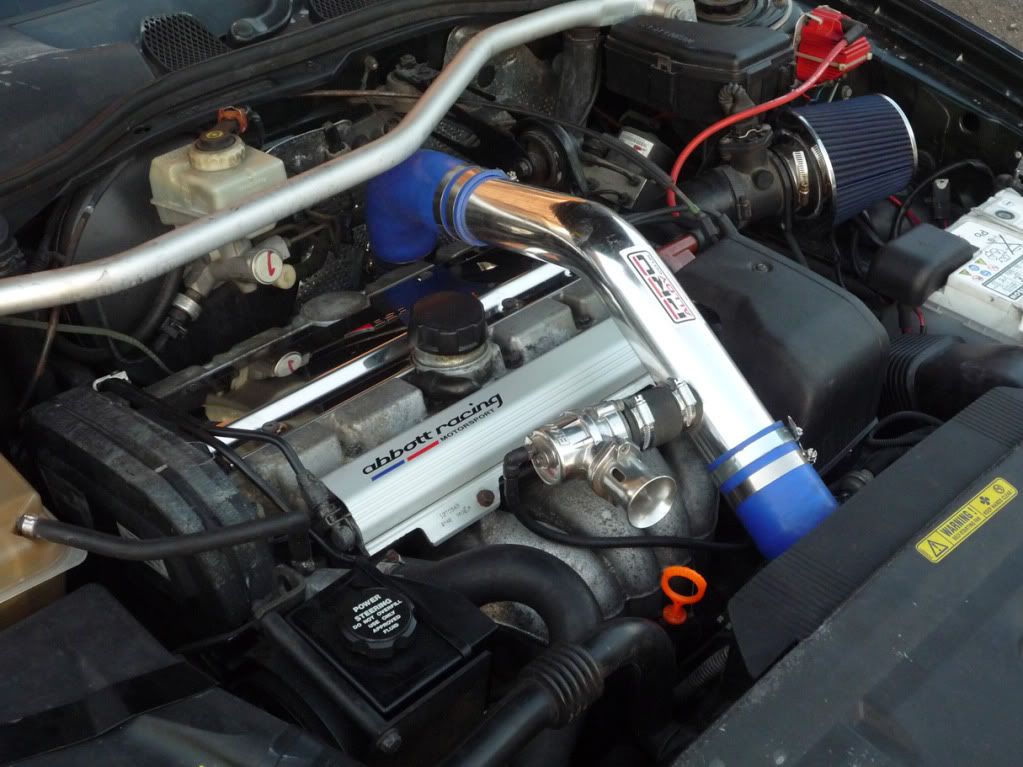
Now the intercooler is in i can put her back together next week. getting there peeps! GavLast edited by AndysR; Monday 9th April 2012 at 22:34.
-
Monday 9th April 2012, 22:14 #10New Identity
Back in an AWD....Oh the grip!
- Join Date
- Dec 2006
- Location
- West Midlands
- Posts
- 8,921
- Thanks
- 2,491
Thanked 2,582 Times in 2,051 PostsAwesome.
The best colour too!!!1996 Olive Green 850 AWD - Follow the Project - Forged rods, 19T, big blue injectors, 960 TB, 3.25" MAF, Ostrich, 608 binary, arduino data display, active exhaust control with Focus RS tips, 320mm front brake conversion.
1996 Nautic Blue 850 AWD - Failed its MOT, now it's a donor for the green thing.
2004 Sapphire Black S60 D5 - The new daily hack.
-
Monday 9th April 2012, 22:15 #11Senior Member
This user has no status
- Join Date
- May 2011
- Posts
- 178
- Thanks
- 3
Thanked 25 Times in 19 Postsupdate
thankyou for your comments, i am pleased with progress thus far but its nice that other people like your work too because it tends to be a unbiased opinion. i had a vision when i first saw the car of what it could be when done, and i drew a picture of what i had in my head. i find when doing a car like this where you can change your mind a million times, go back to ure original 'vision' and then you'll stay on track to achieving what you set out to do. many times i have seen projects that are finished and they dont turn out as originally invisaged.
cant wait to drive her, it taken far longer than originally thought, gone too far now to do anything else other than persevere with that image in my head i had at the start of the year when i first saw her.:car-smiley-031:Last edited by AndysR; Monday 9th April 2012 at 22:34.
-
Monday 9th April 2012, 22:17 #12Senior Member
This user has no status
- Join Date
- May 2011
- Posts
- 178
- Thanks
- 3
Thanked 25 Times in 19 Postsupdate
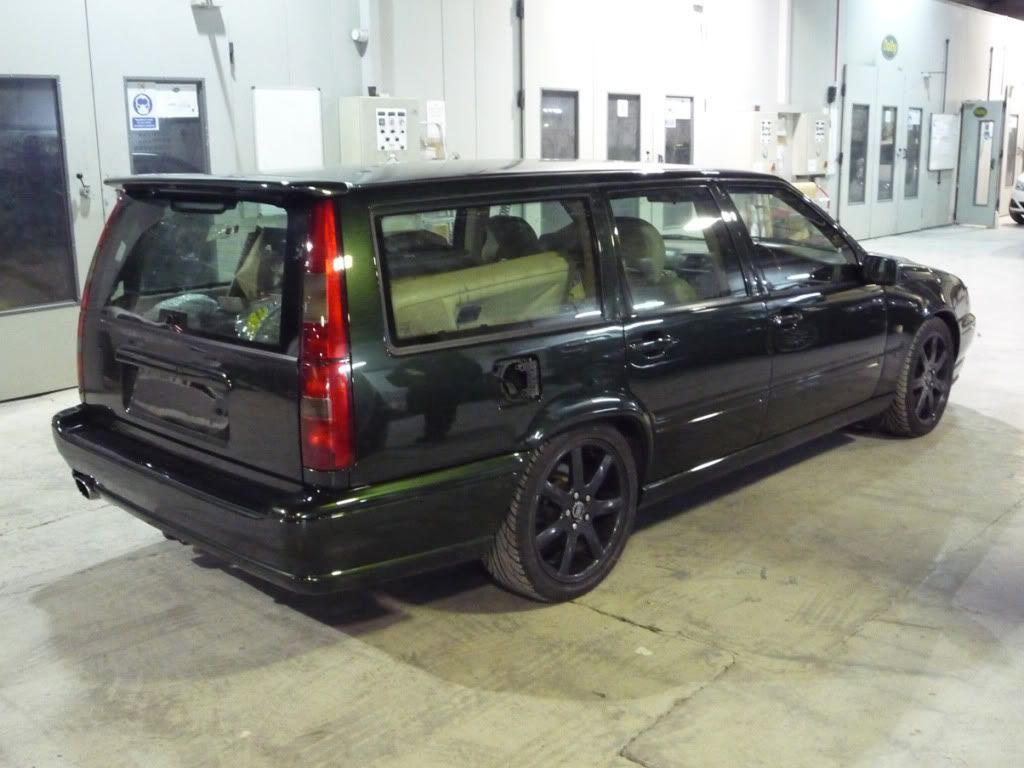
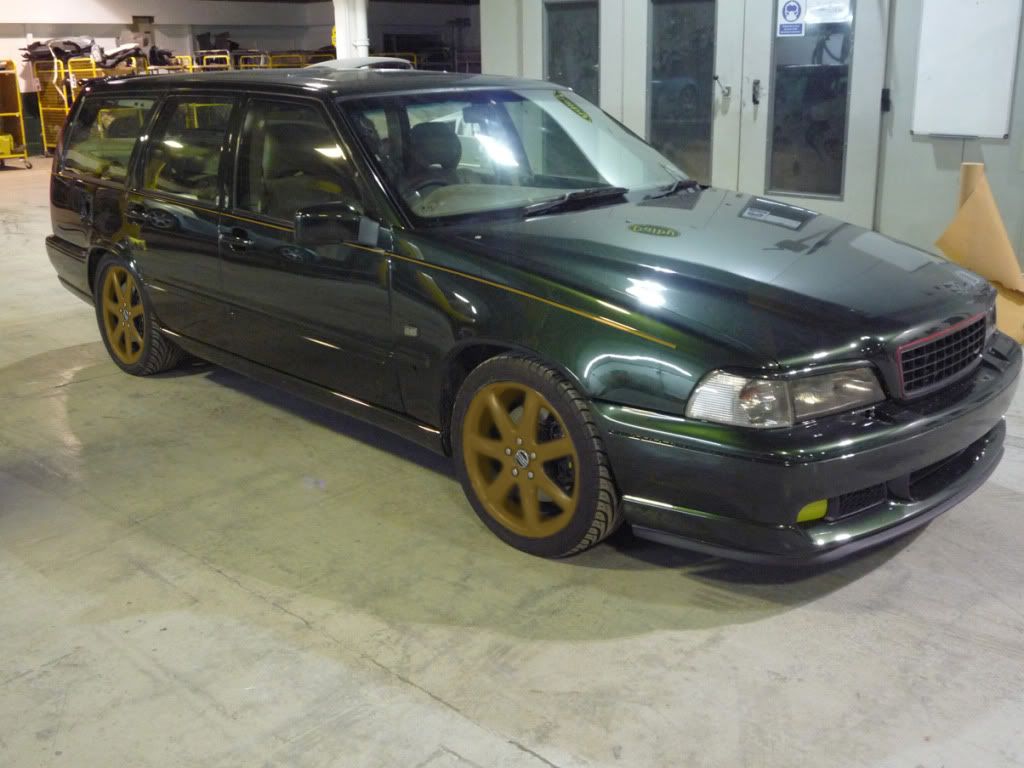
finally making some headway with the big green fuel drinking machine. it is now at the marmite stage of the build, youll love it or hate it. its how i want it and im likely to tweak the look as i go. heres some pics.......
engine bay starting to be dressed up, painted etc
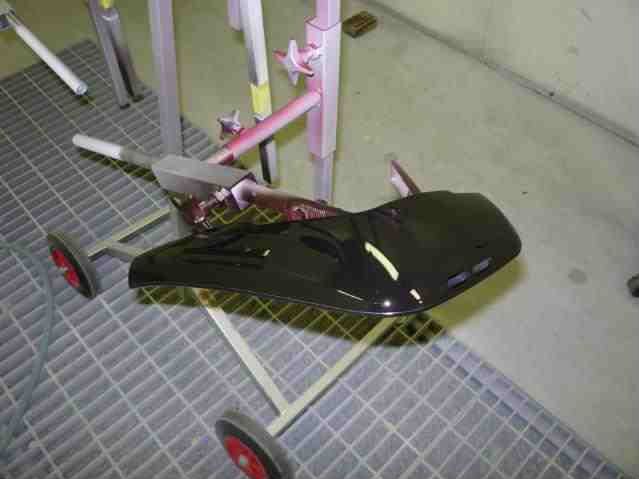
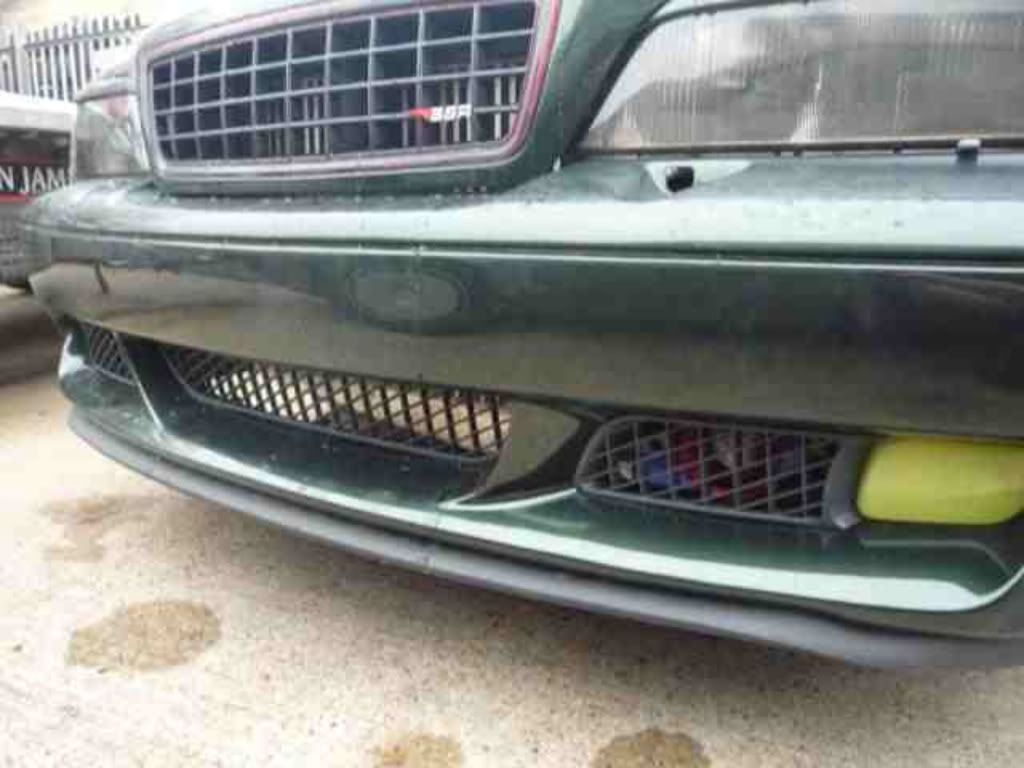
custom red pinstriped egg crate grill, masked up, painted mercedes 568 flame red then satin laquered
bumper on, splitter i made is on, tinted fogs, tinted headlights and indicators, eyebrows, and grill fitted.
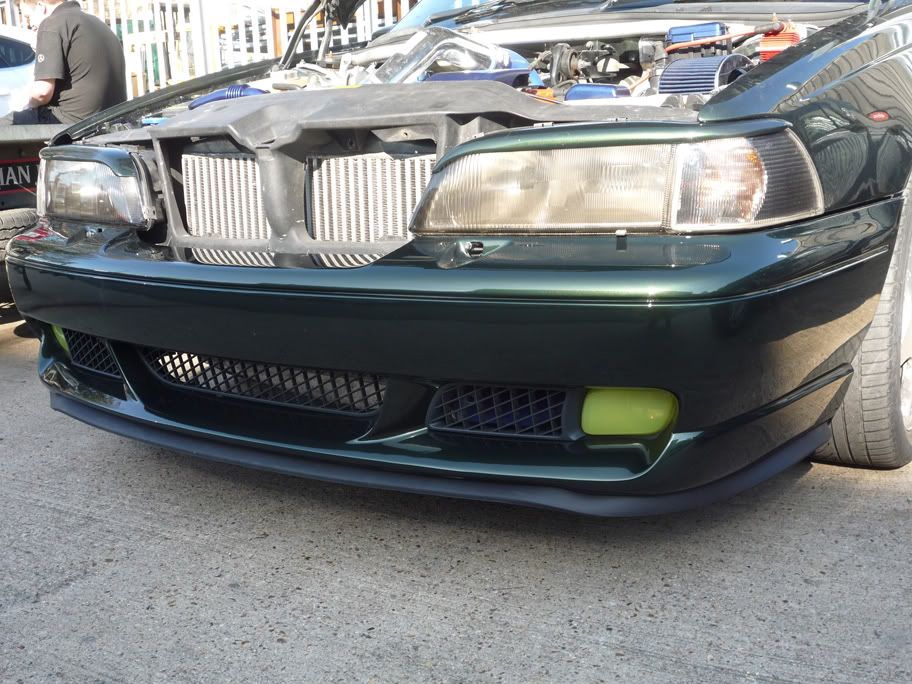
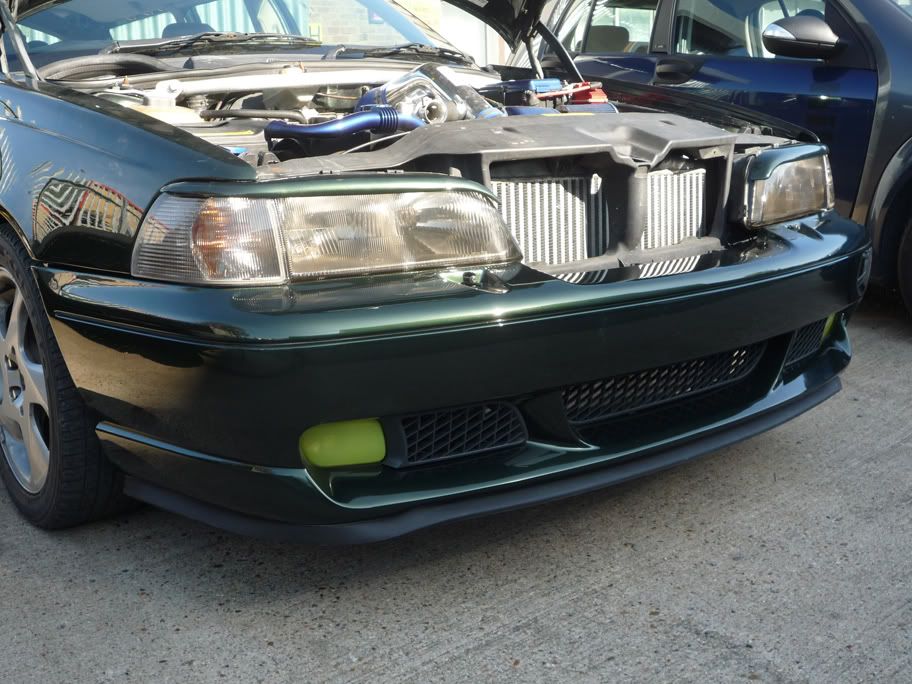
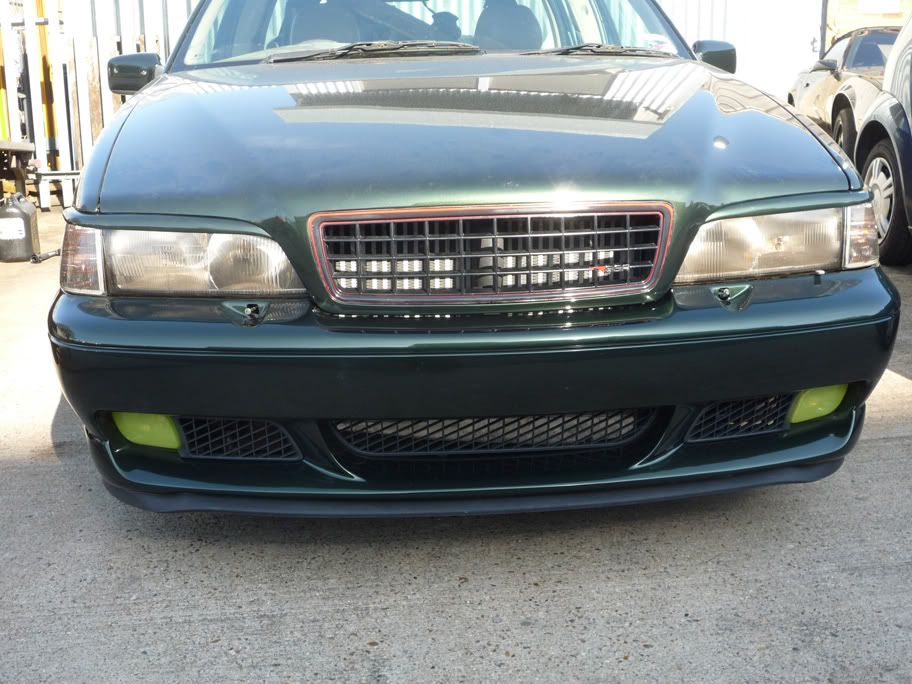

im happy with most of it, especially the splitter, i would say that the fogs look good switched on but not so great off. they were supposed to be yellow, not lime green lol so ill either redo them or how bout this for an idea, make a couple of covers using the glass as a mould and then vacuum form some acrylic over them. paint them body colour and theyll be stoneguards as well. i will play around with this, but overall happy with progress thus far. im on a week off now so can get some rest from her and look at her with fresh eyes next week. more updates soon. GavLast edited by AndysR; Monday 9th April 2012 at 22:35.
-
Monday 9th April 2012, 22:20 #13Senior Member
This user has no status
- Join Date
- May 2011
- Posts
- 178
- Thanks
- 3
Thanked 25 Times in 19 Postsupdate
Decided not to tint after seeing pictures of tinted 850/70 and think it suits light coloured cars. Instead i will concentrate on sorting the cream leather so it looks good through the glass rather than hide it away. I've picked up a rough volan and will try a dark gold finish with a fine red rim. Maybe it will be a bit fresher looking and give a different angle on a legendary wheel. Will keep you posted, keep the ideas and feedback coming guys....much apreciated. GavLast edited by AndysR; Monday 9th April 2012 at 22:35.
-
Monday 9th April 2012, 22:21 #14Senior Member
This user has no status
- Join Date
- May 2011
- Posts
- 178
- Thanks
- 3
Thanked 25 Times in 19 Postsupdate
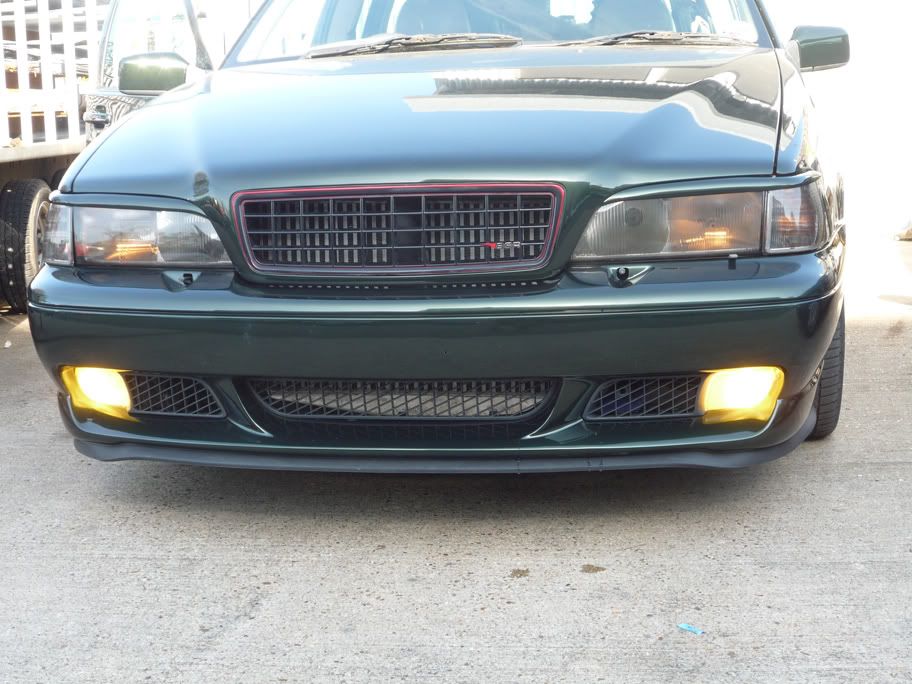
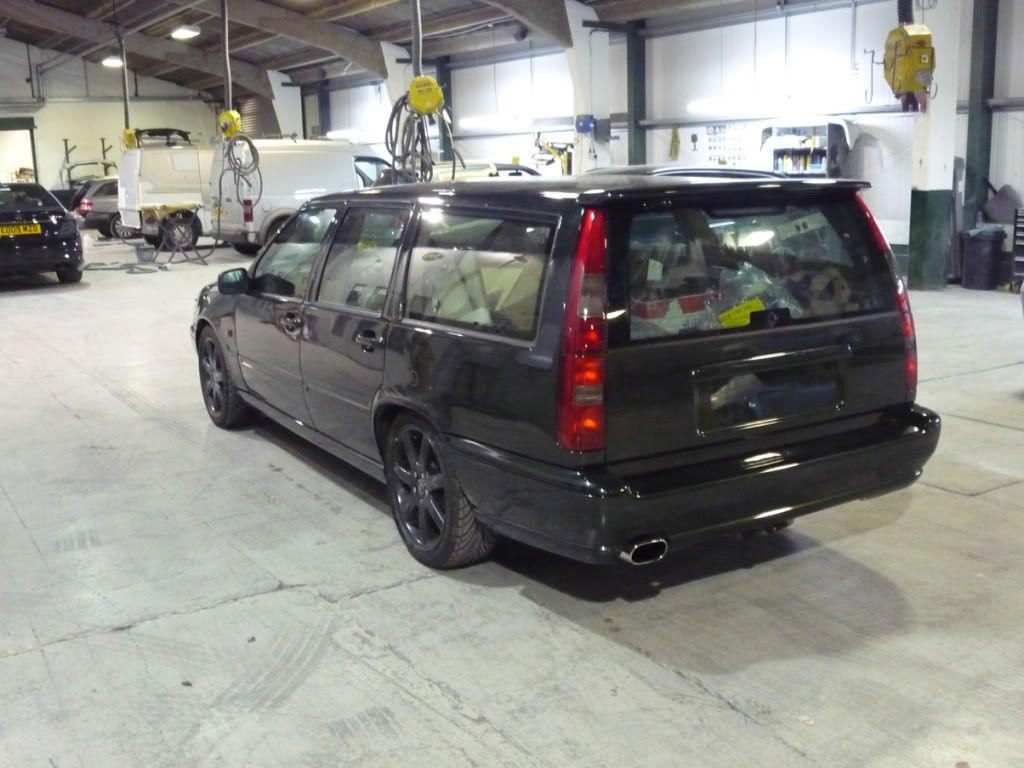
getting there guys, bumper properly bolted on, skirts on, tailgate, rear bumper and re-shaped rear spoiler.
got some toyo t1s tyres fitted to my volans and darkened them down to suit my cars mean and moody look.....


ive also mucked about with the idea thrown on here bout doing the volans gold with gold accents on the car, photoshopped some rough pics but im not sold on the look, what you think??????.....

with a gold coachline
with coachline and grill

as i said not sold on the idea but feedback is what id like guys, good bad or indifferent.
next on the fit up list is to fit my gloss black mudflaps all round, mouldings, roof gutter trims and rivet in the sh*tshields. then sort the interior out (still dismantled), customise interior, then fix a arb link that's knackered, fit the 6 pot brakes, fit the methanol inj, fit the new specced turbo and downpipe/race cat, fit the nitrous (oh yes!), new carbon induction box, rebored inlet and throttle body, bailey breather, blitz boost controller and 4bar fpr and 470cc injectors, then remap it and see what i end up with.
lots still to do, maybe on the road for new year??????
cheers guysLast edited by AndysR; Monday 9th April 2012 at 22:36.
-
Monday 9th April 2012, 22:22 #15Senior Member
228k and still not broke it!
- Join Date
- Jul 2011
- Location
- Poole, Dorset
- Posts
- 23,213
- Thanks
- 6,548
Thanked 7,752 Times in 5,648 PostsMarry me!
Seriously, that's some talent. can't wait to see it all together 19t, greens, 3" inlet, 3" downpipe with race cat, V70R catback, autotech map...
310.2bhp / 333ft/lb
2016 Swedish Day UK "Best Modified Swede"
SOLD
Got an old discovery now.
-
Monday 9th April 2012, 22:22 #16Senior Member
This user has no status
- Join Date
- May 2011
- Posts
- 178
- Thanks
- 3
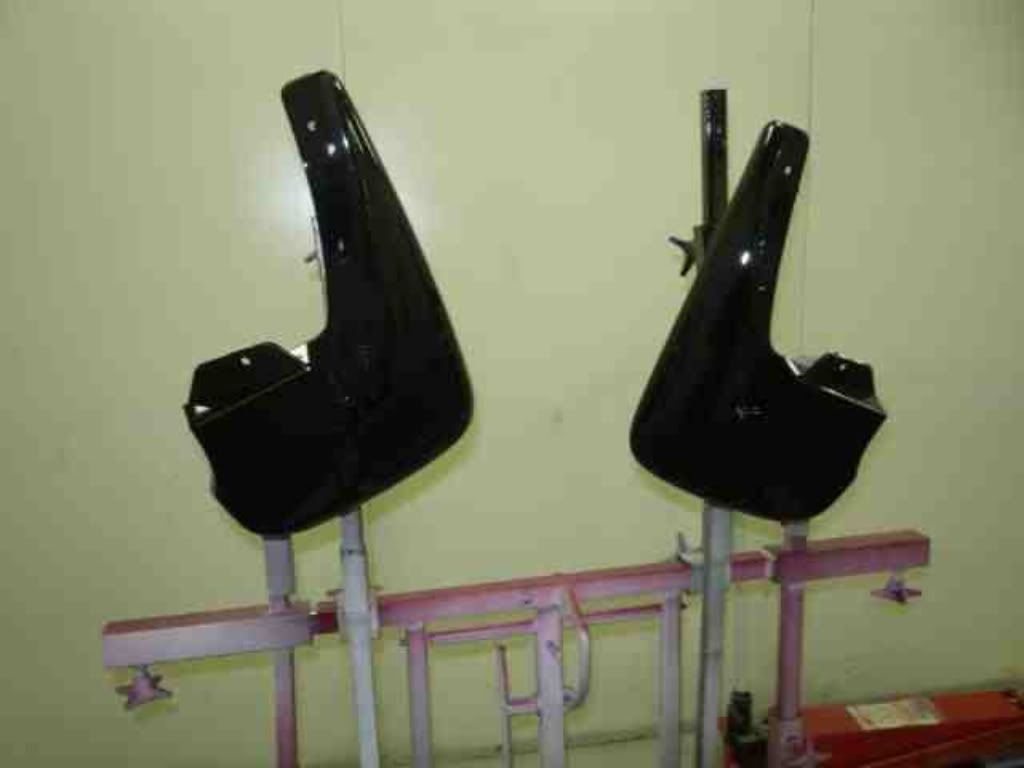
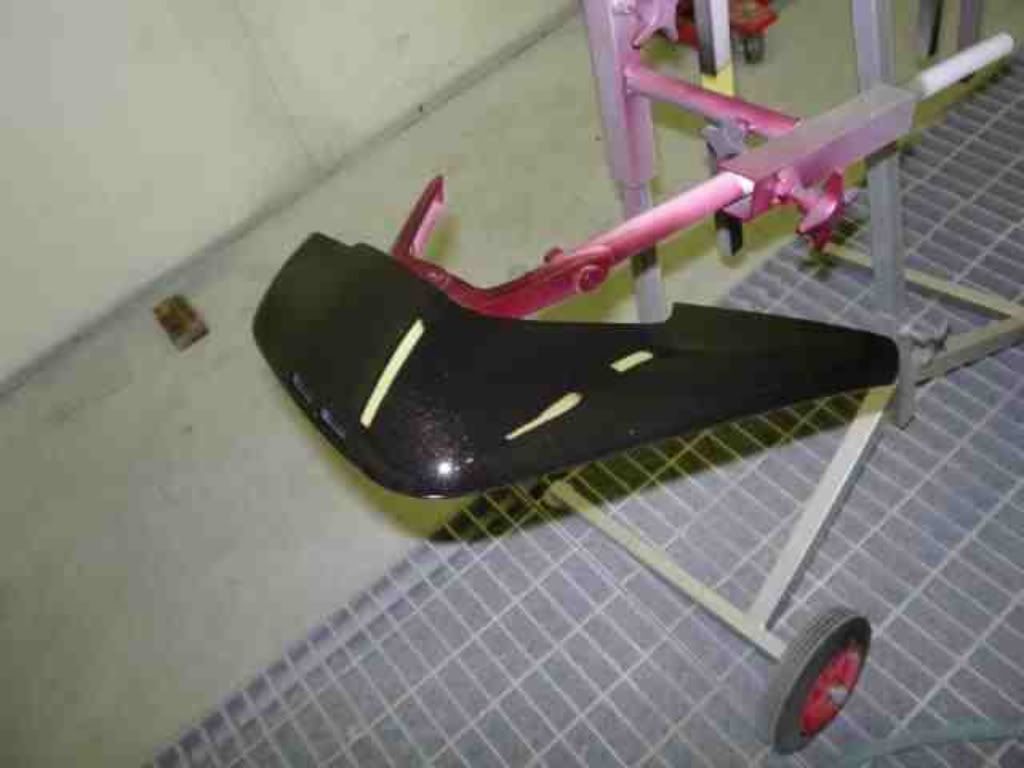
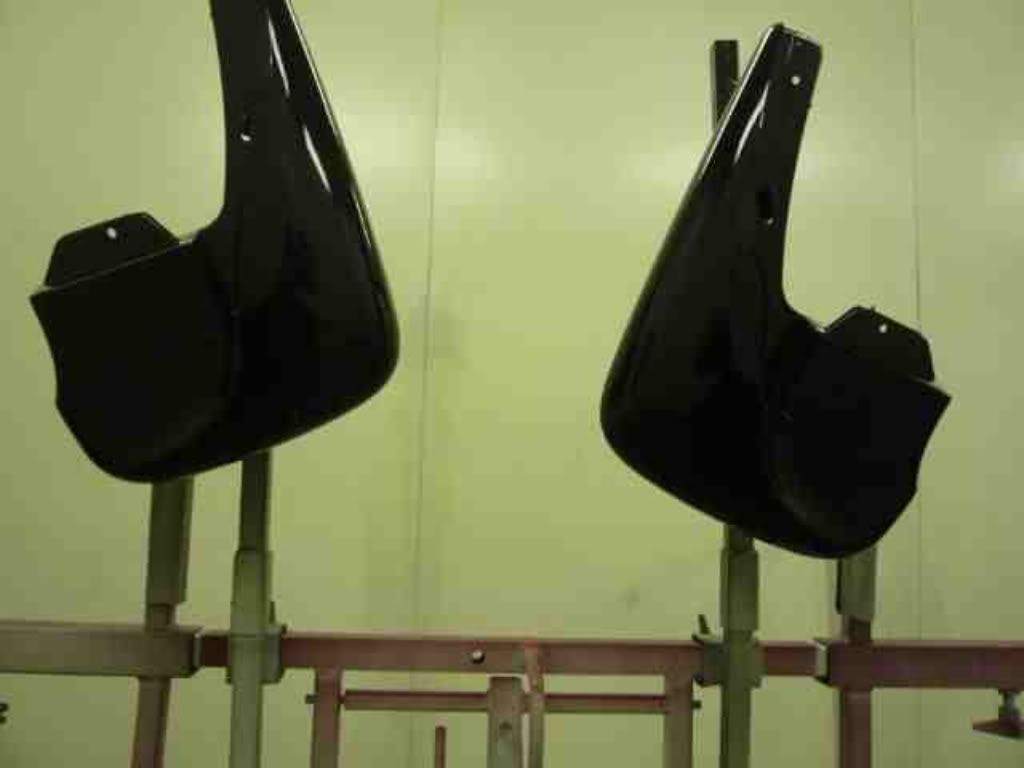
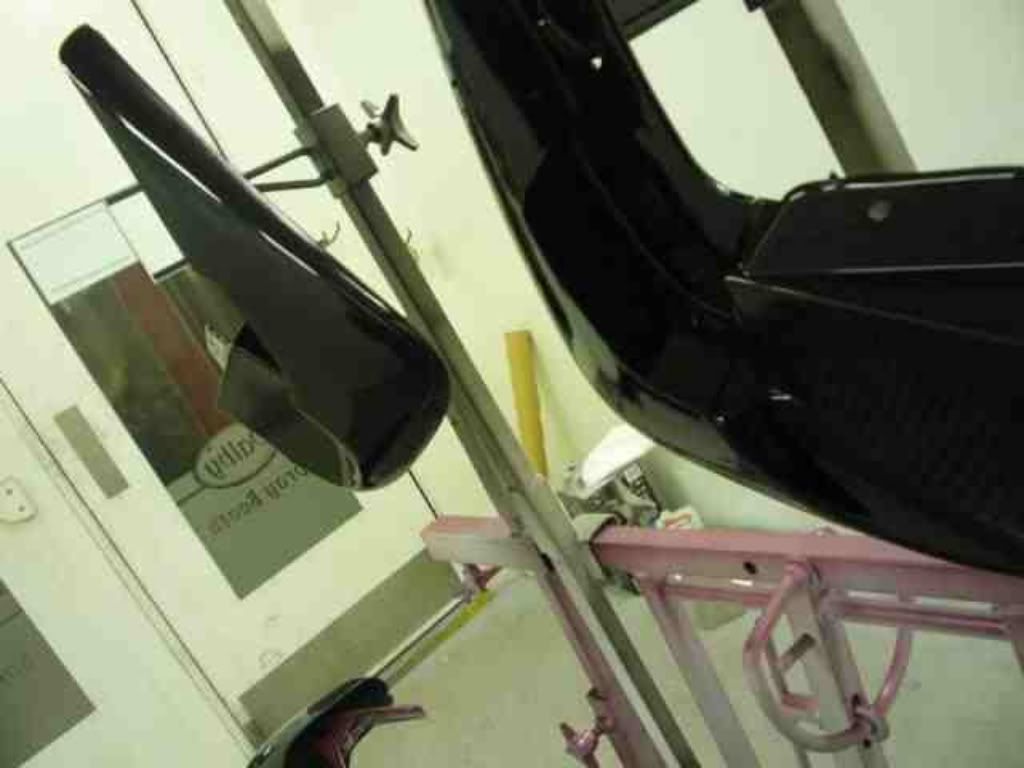
Thanked 25 Times in 19 Postsupdate
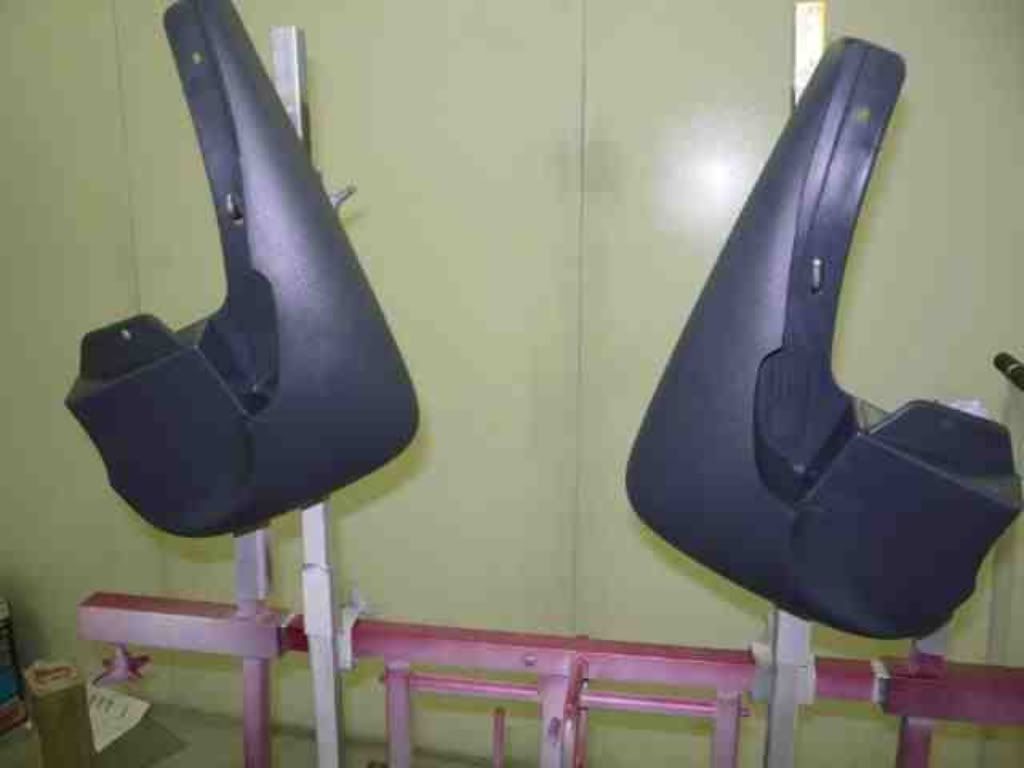
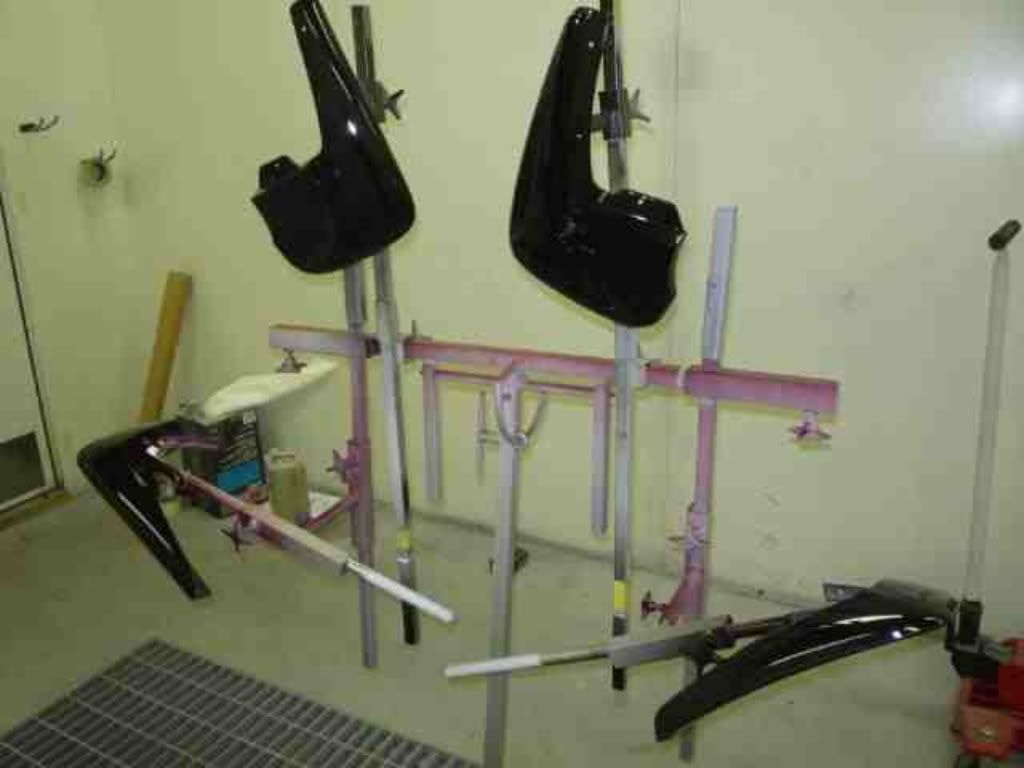
painted my mudflaps, went for a metallic black colour to match the dark moody looks of my car, a few quick pics of before,painted and fitted. excuse the cr*p pics, weather was grim. . . . . .
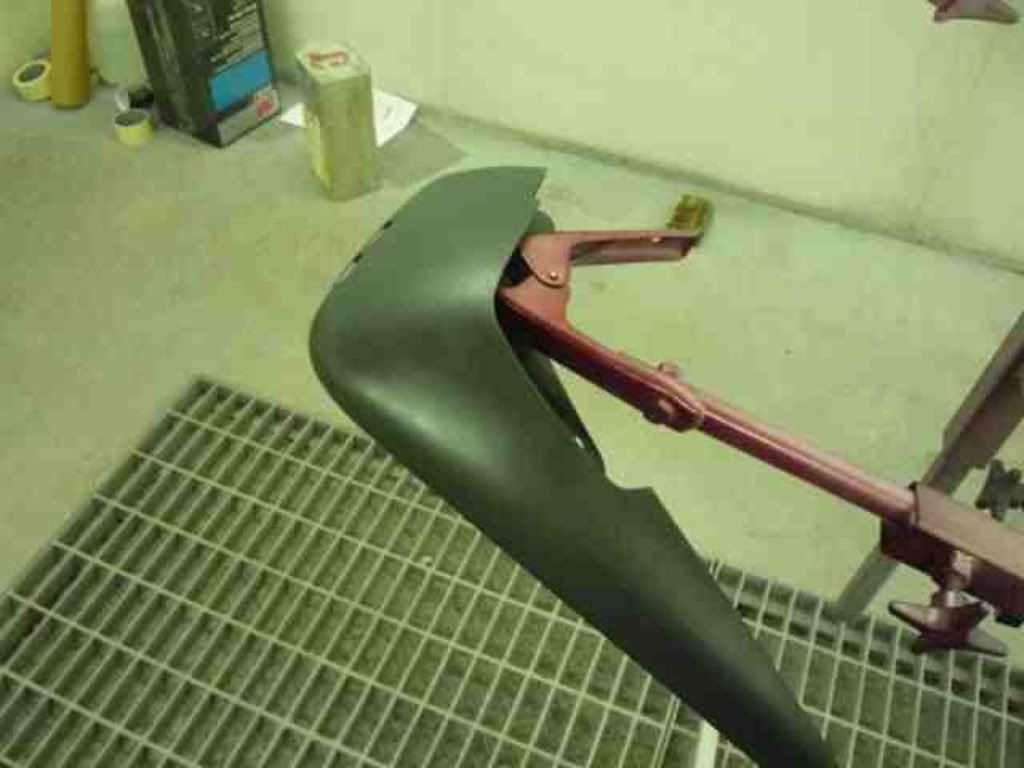

also fitted a cold air feed behind the nearside lower bumper grill, with a red ram pipe, to give a little red to match the grill. . . . .
more updates soon guys. . . . . . . .Last edited by AndysR; Monday 9th April 2012 at 22:36.
-
Monday 9th April 2012, 22:24 #17Senior Member
This user has no status
- Join Date
- May 2011
- Posts
- 178
- Thanks
- 3
Thanked 25 Times in 19 Postsupdate
hi toplights, had a busy few weeks work is manic so havent had much time on the old bus, however had a spending spree on her so sort of progress but just in the parts gathering stage. Decided that the 468cc injectors and 19t wont be man enough so have revised the spec. as we speak the head is off and will be ported and polished with bigger valves from mikael petterson racing, i have a twin scroll td05 big 16g going on and am hunting for 550cc high impedance injectors. got a deal going with mike quaife to get a nice slipper in the box and 400 crank bhp is the new target, the bottom end will get forged rods, new piston rings and of course the block will be honed. more than likely i wont get back on her until new year as we have to all be working flat out to get customers cars back to them before xmas, but im doing some r&d on compression ratio's and cam timing with my engine bloke to see where gains could be made, will keep this thread updated as the 2nd phase of the rebuild begins, POWER!!!!!!!!!!!!!!!!Last edited by AndysR; Monday 9th April 2012 at 22:36.
-
Monday 9th April 2012, 22:27 #18Senior Member
This user has no status
- Join Date
- May 2011
- Posts
- 178
- Thanks
- 3
Thanked 25 Times in 19 Postsupdate
yep, it hasnt been a terribly productive couple of months on this car. some of my other projects drew my attention (read money) for a while but now have the funds to make my visions a reality.
i watched as a boy the btcc 94/95 and always wanted a volvo estate from a young age (my dad always had them 1800es,245,240x3,740,940 and still got a mint 25k 240 torslanda) so maybe that helped. a family friend had a gul yellow 850t5r estate that i got taken home from school in a few times and back then aged 10ish i promised when i grew up id have 1. ok a olive v70 isnt the gul 855 but its still my baby and no matter how long it takes, it will not be given up on until its "finished to my satisfaction". Bloody cars eh, they frustrate and drain money but pay it back ten fold on that bright sunny summer afternoon on a terrific road, windows down hearing that 5-pot sing!
cant wait!!!!!!!!!Last edited by AndysR; Monday 9th April 2012 at 22:45.
-
Monday 9th April 2012, 22:29 #19Senior Member
This user has no status
- Join Date
- May 2011
- Posts
- 178
- Thanks
- 3
Thanked 25 Times in 19 Postsupdate
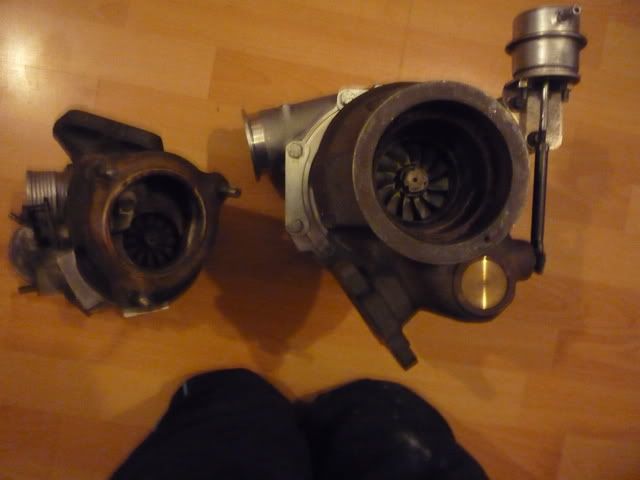
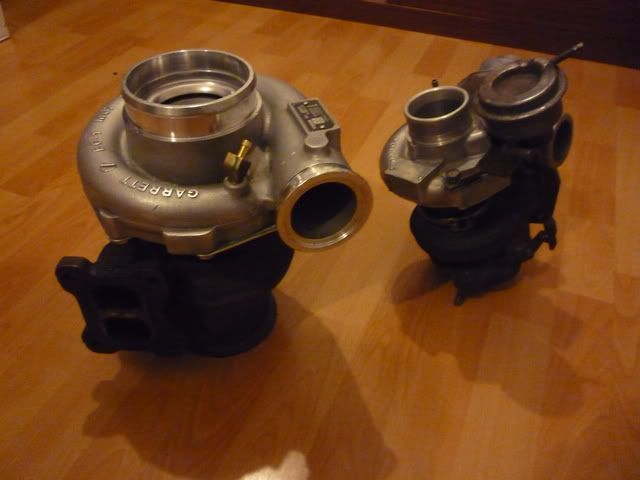
heres the new turbo i am fitting very soon to my engine build, garrett gt3782
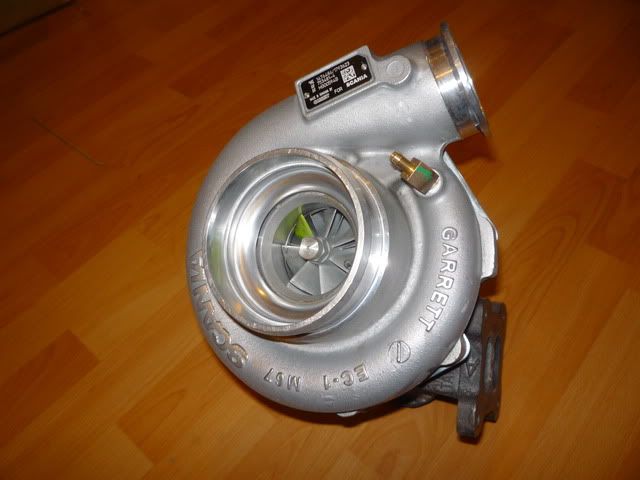
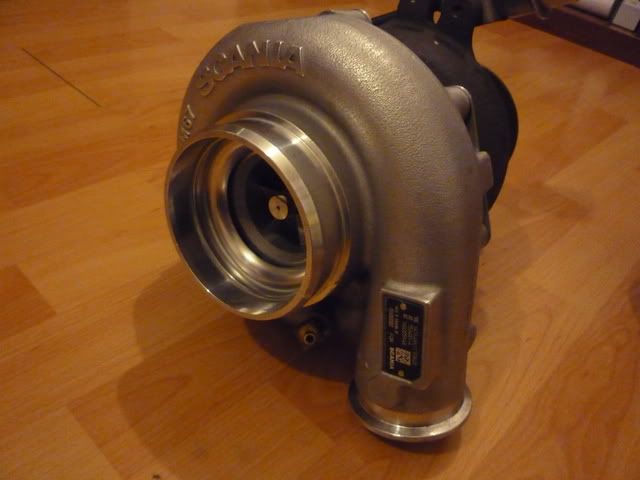
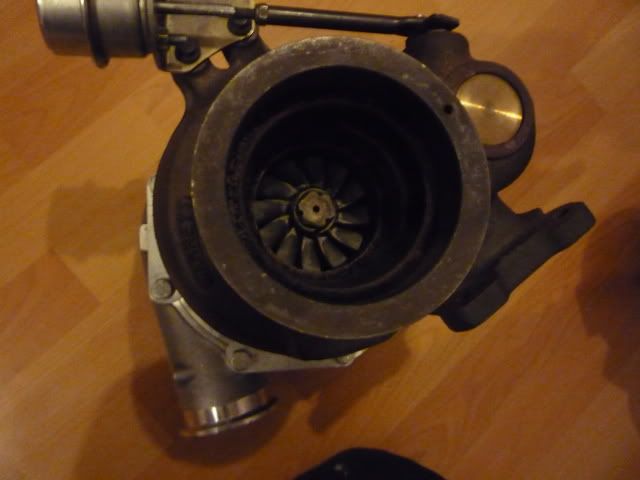
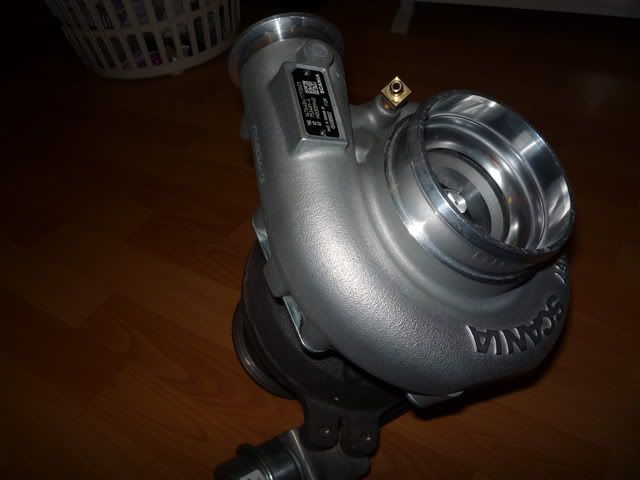
size comparison to the tdo4-19t (which is now up for sale)
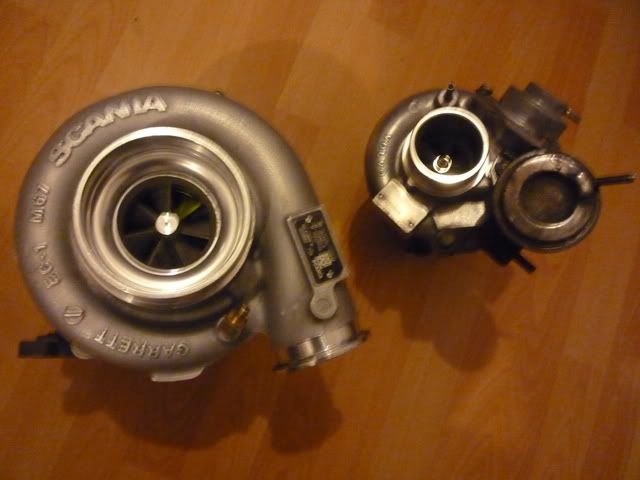

due to size constraints and boost controlling issues i will be running it externally wastgated using the bung in the back as the port for the outlet pipe. this means i can ditch the actuator and the supprorting lugs on the top of the turbo which would otherwise hit the bulkhead.
the turbos compressor housing also needs reclocking 180 degrees for the intercooler piping/plumbing. also this new turbo is oil cooled only and as such water piping will be re-routed back into itself bypassing the new turbo completely.
should make plenty of boost, then to deal with the plenty of lag!!!! lolLast edited by AndysR; Monday 9th April 2012 at 22:45.
-
Monday 9th April 2012, 22:29 #20Moderator
NOS
- Join Date
- Sep 2005
- Location
- hull
- Posts
- 5,090
- Thanks
- 2,573
Thanked 1,853 Times in 1,341 Postslot of hard work done there mate looks very nice well done
"WOODY T5 fastest volvo 850 since 2011/12/13/14 @ avon and york 13.3 112mph
854 t5 19t gripper mte bc loads more 311.6 whp 373 foot pound 342 @ clucth
toy cbr954

 Reply With Quote

 1996 Volvo 850 AWD
 "THE BIG SWEED"
 1996 Volvo 854R
 beast 2
Thread Information
Users Browsing this Thread
There are currently 1 users browsing this thread. (0 members and 1 guests)
 Posting Permissions

Bookmarks