


Hi All,
Right I now have the car disabled on the drive, Easter Saturday and I find for the second time I have the wrong bushes for the front wishbone bush... well I think it's wrong because the centre bar is a parallel shaft and the bush looks like it needs a "stepped" centre bar!!! arghhhh...
Someone tell where I can get some poly bushes that fit my 03 V70 T5
I have purple bushes ( from powerflex ) part number PFF88-601
Looked on partsforvolvo and no luck finding anything different!!
Any clues out there?? what do the right bushes look like?? any pictures anywhere
Results 1 to 20 of 21
-
Saturday 3rd April 2010, 17:35 #1Senior Member
 This user has no status
- Join Date
- Sep 2004
- Location
- Cambridge
- Posts
- 294
- Thanks
- 2
Thanked 4 Times in 3 Posts
 Help and correct advise!!! wishbone bushes.
-
Saturday 3rd April 2010, 19:51 #2Senior Member
No replacement for
displacement!
- Join Date
- Mar 2005
- Location
- Bristol
- Posts
- 1,537
- Thanks
- 35
Thanked 269 Times in 206 Posts
This might help:
http://www.volvoforums.org.uk/showth...rflex+wishbone
The bar is indeed straight.
Before you have a nightmare BH weekend be very very careful not to dislocate the inner CV joint on the drivers side drive shaft. I wasn't the first and I won't be the last...
-
Saturday 3rd April 2010, 20:33 #3Senior Member
This user has no status
- Join Date
- Sep 2004
- Location
- Cambridge
- Posts
- 294
- Thanks
- 2
Thanked 4 Times in 3 Posts
so if the bar is straight, thats good, mine is, everything is clean... the bush is stepped inside the hole!! looks like the shaft should have a smaller centre section...
I am tempted to cut the inner piece out so the shaft slides in... or maybe try putting the bar in as it is now, with a press I reckon it will fit!!!! can't be worse than it is now...
I think I will take some photos, cos those ones you pointed me too are the not the best I have seen....
Thanks anyways... I am amazed no one has answered my plee!!!
-
Saturday 3rd April 2010, 20:59 #4Senior Member
No replacement for
displacement!
- Join Date
- Mar 2005
- Location
- Bristol
- Posts
- 1,537
- Thanks
- 35
Thanked 269 Times in 206 Posts
They were taken on my old mobile, so best I could do at the time. Beggars can't be choosers IMHO.

From memory the shaft of the bar does have a smaller circumference, you have to burn the old bush off and then press it into the Powerflex bush before pressing it back into the wishbone.
Don't go chopping the Powerflex until you are 110% certain you need to. Personally can't see why you would need to do this.
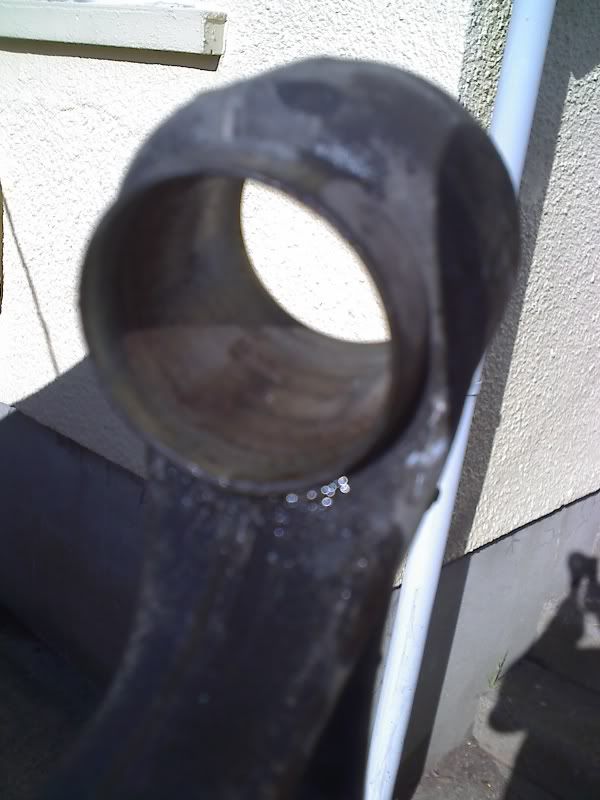
Are you sure you've got all the old bush out of the hole- it should look like this before you press the bush in:
-
Saturday 3rd April 2010, 21:02 #5Senior Member
This user has no status
- Join Date
- Jun 2005
- Location
- Glasgow area...
- Posts
- 2,206
- Thanks
- 226
Thanked 397 Times in 340 Posts 
PM J!
V70torsland, he specializes in the powerflexed bones!
Look him up in the search as he has pics onhis album of the bones with the powerflex bits fitted!
HTH
You think I know **** nothing! But let me tell you I know **** all!
-
Saturday 3rd April 2010, 21:04 #6Senior Member
This user has no status
- Join Date
- Jun 2005
- Location
- Glasgow area...
- Posts
- 2,206
- Thanks
- 226
Thanked 397 Times in 340 Posts
You think I know **** nothing! But let me tell you I know **** all!
-
Saturday 3rd April 2010, 21:14 #7Senior Member
This user has no status
- Join Date
- Sep 2004
- Location
- Cambridge
- Posts
- 294
- Thanks
- 2
Thanked 4 Times in 3 Posts
Not that I am complaining, can't as I haven't taken any at all!!! Originally Posted by Redbrick

As for cutting the bushes... well they look like they fit a shaft which has a reduced diameter for part of the length, to stop the bushe moving in the arm I reckon... my shafts from stock arms are parallel... I just need to know what others look like... I could turn the shaft down a bit to create the reduced diameter... or just fit the bushes as is..,,.,
Will try again tomorrow....
and yes, I agree, the tip with the clip is a good one!!! :-)
-
Saturday 3rd April 2010, 23:23 #8Senior Member
This user has no status
- Join Date
- Jul 2008
- Location
- Mancuniumshire
- Posts
- 1,107
- Thanks
- 28
Thanked 313 Times in 249 PostsIf it's any use I have a pair of refurbed wishbones ready to go. They just need their black coating
The bushes you have are 100% correct.
The steel pins from the original front bushes need all the rubber removing from them. I just chuck mine in the chimenea with some garden rubbish, quench them and buff them with a wire wheel.
Fitting them is a trade secret but a clue is you need a couple of mahoosive* sockets and a really big vice.
How desperate are you to get your car back on the road? Do you have alternative transport? If you can't get it sorted give me a call . . . I've PM'd you my mobile
'Who you gonna call? BushBusters!' <BAD PUN>
"Sgt. Butterman? Little hand says it's time to rock'n'roll!"
"Bring the noise!"
-
-
Sunday 4th April 2010, 17:28 #9Senior Member
This user has no status
- Join Date
- Sep 2004
- Location
- Cambridge
- Posts
- 294
- Thanks
- 2
Thanked 4 Times in 3 Posts
Turns out I have non-standard bushes fitted, which means the pin is not right for the bushes!!! needed a step turning into it... like the standard ones... Originally Posted by v70torslanda
Thanks for the chat and guidance v70torslanda, finally got me lathe working, broke the parting off tool!!! but managed with a turning tool, sweet as... all done and fitted, car now operational, drivers side left to do.... I will do that during the week, should be quicker now I know what to do and what to remove to make job easier!!!
-
Sunday 4th April 2010, 19:09 #10Senior Member
This user has no status
- Join Date
- Jul 2008
- Location
- Mancuniumshire
- Posts
- 1,107
- Thanks
- 28
Thanked 313 Times in 249 PostsSorry if this sounds like 'Ner ner ne nerr ner' . . .
Having the wishbone to hand with the bushes already fitted and ready to go is a Good Thing!
luv'n'stuff
J
"Sgt. Butterman? Little hand says it's time to rock'n'roll!"
"Bring the noise!"
-
The Following User Says Thank You to v70torslanda For This Useful Post:
cornclose (Monday 5th April 2010)
-
Monday 5th April 2010, 05:02 #11Senior Member
This user has no status
- Join Date
- Sep 2004
- Location
- Cambridge
- Posts
- 294
- Thanks
- 2
Thanked 4 Times in 3 Posts
all done, photos attached... http://www.vpcuk.org/forums/album.php?albumid=244
-
Monday 5th April 2010, 08:35 #12Senior Member
This user has no status
- Join Date
- Jul 2008
- Location
- Mancuniumshire
- Posts
- 1,107
- Thanks
- 28
Thanked 313 Times in 249 PostsAhah! I get what you mean about the pin being asymmetric.
When you dismantle the standard bush the pin looks like the rear of yours at both ends. That's why it fits both ways round and when correctly installed the pin is recessed into the front of the bush. I'll post a picture next time I refurb some.
Glad you got it sorted
luv'n'stuff
J
"Sgt. Butterman? Little hand says it's time to rock'n'roll!"
"Bring the noise!"
-
Monday 5th April 2010, 17:36 #13Senior Member
No replacement for
displacement!
- Join Date
- Mar 2005
- Location
- Bristol
- Posts
- 1,537
- Thanks
- 35
Thanked 269 Times in 206 Posts
Glad you got it sorted.
-
Monday 5th April 2010, 21:38 #14Senior Member
This user has no status
- Join Date
- Sep 2004
- Location
- Cambridge
- Posts
- 294
- Thanks
- 2
Thanked 4 Times in 3 Posts
Hi, Originally Posted by v70torslanda
Yeah, got me thinking for a while, but I have the drawing now, so if anyone gets stuck like I did, send me the pins and I can turn them down for you!!!
Glad I got "one" sorted, next one going to be attacked this week.. should be a bit quicker this time... now I have the tools and knowledge..
-
Monday 5th April 2010, 23:37 #15Senior Member
No replacement for
displacement!
- Join Date
- Mar 2005
- Location
- Bristol
- Posts
- 1,537
- Thanks
- 35
Thanked 269 Times in 206 Posts
So the Plod insisted on decent handling from the factory!!! Wonder why it wasn't carried over to the normal cars? I can't see any downsides to solid wishbone bushes- just better cornering.
-
Tuesday 6th April 2010, 15:24 #16Senior Member
This user has no status
- Join Date
- Sep 2004
- Location
- Cambridge
- Posts
- 294
- Thanks
- 2
Thanked 4 Times in 3 Posts
if I have plod fitted bushes, as far as I can see they are no different to standard ones, just the pin is different, when I do the drivers side this week I will post some pictures to show this, and show the problem it causes!!! of course all of you out there already know but I like to see pictuires.... they say soooo much.....
-
Tuesday 6th April 2010, 19:29 #17Senior Member
This user has no status
- Join Date
- Jul 2008
- Location
- Mancuniumshire
- Posts
- 1,107
- Thanks
- 28
Thanked 313 Times in 249 PostsBoth kinds of bush are broadly similar. The civilian version has a hydraulic element, the idea being that it operates in a compliant manner but 'locks up' in reaction to a 'shock load'.
The 'police' bush is also a feature of factory built taxis, it is still a 'compliant' bush, i.e. one with voids in to provide directional resistance to loads but without the 'comfort' of the hydraulic operation.
As I posted up-thread my theory is longevity over comfort. Stiffness? No comparison between standard and poly.
J
"Sgt. Butterman? Little hand says it's time to rock'n'roll!"
"Bring the noise!"
-
Tuesday 6th April 2010, 21:25 #18Senior Member
This user has no status
- Join Date
- Sep 2004
- Location
- Cambridge
- Posts
- 294
- Thanks
- 2
Thanked 4 Times in 3 Posts
Turns out I have different bushes both sides, the side I happen to sort was a standard arm with parallel pin, not standard by all accounts, hence extra work to get poly bush to fit...
Tonight I ripped the wheel off to find that actually the drivers side bush was in tact, and was a different spec to the other side, solid bush with a bigger diameter pin and thicker sleeve holding it all together, so the poly bush is not going to fit that without a lot of work I can't do because the sleeve needs boring out to receive the bush!!! and I have no doubt the pin would need to be turned down and stepped!!!
Nightmare...
-
Wednesday 7th April 2010, 13:20 #19Senior Member
This user has no status
- Join Date
- Jul 2008
- Location
- Mancuniumshire
- Posts
- 1,107
- Thanks
- 28
Thanked 313 Times in 249 PostsCall me tonight -> 23.00.
J
"Sgt. Butterman? Little hand says it's time to rock'n'roll!"
"Bring the noise!"
-
The Following User Says Thank You to v70torslanda For This Useful Post:
cornclose (Wednesday 7th April 2010)
-
Sunday 11th April 2010, 22:15 #20Junior Member
This user has no status
- Join Date
- Jan 2010
- Location
- Warwickshire
- Posts
- 22
- Thanks
- 17
Thanked 1 Time in 1 PostThanks all this is just the sort of thread I was looking for to sort out my clonking suspension.
So, just for the recap - who sells the complete kit and how much are they?
Cheers,
Ed

 Reply With Quote


 2003 Volvo V70 D5 SE

Thread Information
Users Browsing this Thread
There are currently 1 users browsing this thread. (0 members and 1 guests)
 Posting Permissions

Bookmarks