


Quick update.
I've just paid for the centres to be stripped back to bare metal, bloke used an acid bath that stripped them in about 5 minutes.
Shot blasting removed the paint but not the primer- think that's where my problem started we think.
Going to have one final go at painting them before I hand over my hard earned and get them done professionally.
Thanks to Tomcat for his words of wisdom- much appreciated mate
Would I try it again........ NEVER lol
Results 21 to 40 of 44
Thread: Nebula BBS split rim project
-
Thursday 4th September 2008, 00:33 #21Senior Member
 No replacement for
displacement!
- Join Date
- Mar 2005
- Location
- Bristol
- Posts
- 1,537
- Thanks
- 35
Thanked 269 Times in 206 Posts

-
Thursday 4th September 2008, 08:31 #22Senior Member
This user has no status
- Join Date
- Jul 2008
- Location
- Nottingham
- Posts
- 1,631
- Thanks
- 29
Thanked 413 Times in 297 Postshttp://www.vpcuk.org/forums/showthread.php?t=17202
Just don't let my wife anywhere near it once your Nebs are refurbed!
-
Thursday 4th September 2008, 12:57 #23Senior Member
No replacement for
displacement!
- Join Date
- Mar 2005
- Location
- Bristol
- Posts
- 1,537
- Thanks
- 35
Thanked 269 Times in 206 Posts
She ruined one of my mint Volans on my 855R many many years ago- I never let her forget it until I did one of her brand new BBS 17'' VW wheels and then she went to town on me... lol
Can't you just get the one refurbed- bloke down here charges £90 for a split rim. He knows his stuff as well, his name is XXXXXXXXXXXXXXXXXXXXXXXXXX. After seeing some finished wheels there is no way in hell I'm going to recommend this bloke now! Did talk a good refurb though! lolLast edited by Redbrick; Thursday 25th September 2008 at 15:39. Reason: Protecting my good name!! lol
-
Thursday 4th September 2008, 16:08 #24Senior Member
This user has no status
- Join Date
- Jul 2008
- Location
- Nottingham
- Posts
- 1,631
- Thanks
- 29
Thanked 413 Times in 297 PostsI'm going to be a professional minge bag and do it myself. As the wheels were split and then repainted inside a couple of months ago, I don't think corrosion will be a problem. Plus, as this is the only car we have - it won't be the last time she whacks them either!
-
Tuesday 23rd September 2008, 21:45 #25Senior Member
No replacement for
displacement!
- Join Date
- Mar 2005
- Location
- Bristol
- Posts
- 1,537
- Thanks
- 35
Thanked 269 Times in 206 Posts
WE DID IT!

This has taken weeks and has been a massive learning process. Huge thanks to Tomcat for help and advice.
First thing we did wrong was thinking grit blasting the wheels and then filling and sanding the imperfections would be a good basis to start from. What I thought was as low as I could go was in fact the original undercoat- the paint I used reacted to this undercoat and we were doomed to failure.
I paid a pro to acid strip them- he did one while I waited, only took five minutes to remove the paint I had put on and take them back to silver base metal. That was a bit soul destroying as I had spent a few hours trying to strip one with paint stripper.
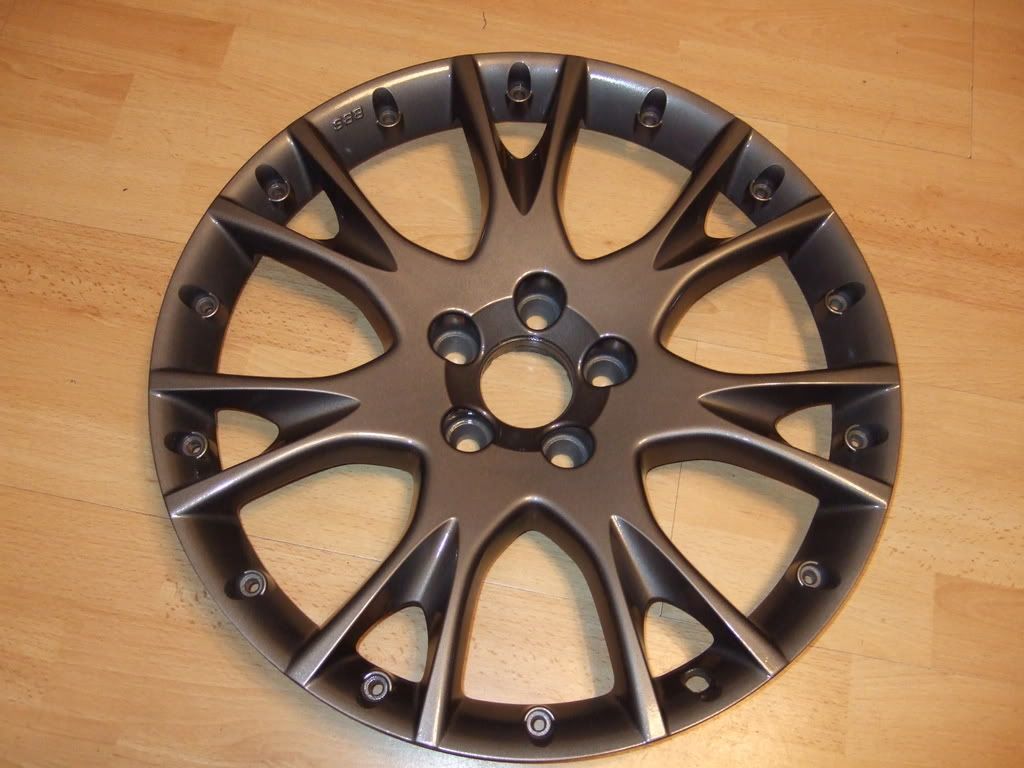
Once we had the bare metal we sanded them down with wire wool and filled any blemishes. Two layers of undercoat were then sprayed on and sanded back each time- all coats of paint have to be very slight and not piled on. The undercoat was a 2k product and required a hardener, four parts paint to one part hardener.
Two costs of basecoat were then applied and allowed to go off. This was another 2K product, two parts paint mixed with one part 2K thinner.
Once we were happy with the basecoat we applied the clearcoat lacquer. Two parts clearcoat to one part hardener. Two coats were applied and the wheels left in the sun to dry.
Products used are in the links below:
Wheel Paints Lacquer pack This is enough product to probably do twelve wheels!
VF Silver (Solvent) 0.5L will do four wheels easily.
Anthracite Silver (Solvent)
Ended up using 1L of this as we have ended up doing them all twice.
2K 4 1 Primer A very quick drying primer that sands back very smooth. The Pre-Clean (Solvent) was a good product for removing greasy finger prints.
Superfine Pads Pack of 10
These were very good for sanding, not too abrasive.
You may be thinking the above adds up to a lot of money and it probably does but saving money wasn't my main reason for going DIY. I'd previously paid a lot of money for a refurb that lasted six months before the paint started peeling off. I just wanted the job done properly and I knew my Dad and I could do it if we tried hard enough.
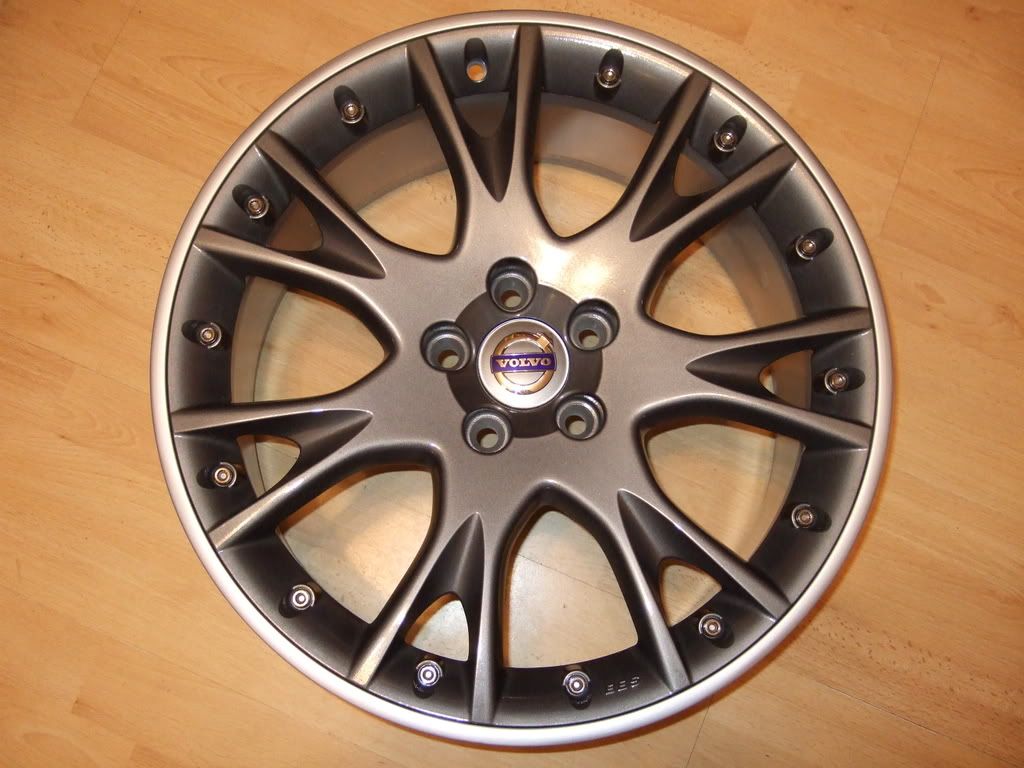
I re-used the BBS bolts after cleaning them up and polishing them- not a mark on them. No I don't Xray vision and can't see the internal fractures or molecules separating. Seriously do you think refurbers replace the bolts or re-use the originals? lol Torqued them up to 18ftlbs- thanks Pangster for your help there.
Here are the finished results- to say I am chuffed would be an understatement!
I am confident that once a set of wheels were acid stripped we could get them finished and dry in two days- not that I am looking to do another set anytime soon.
Andy
-
Tuesday 23rd September 2008, 22:01 #26Senior Member
This user has no status
- Join Date
- Jul 2008
- Location
- Edinburgh
- Posts
- 1,352
- Thanks
- 411
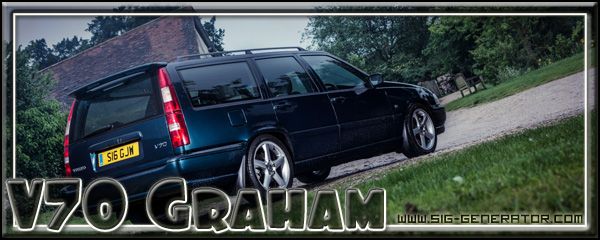
Thanked 194 Times in 163 Postslooks mint!! - get some pics up with them on the car! Originally Posted by Redbrick


1998 BMW Z3 2.8 Roadster
-
Tuesday 23rd September 2008, 22:34 #27Senior Member
This user has no status
- Join Date
- Jun 2005
- Location
- Glasgow area...
- Posts
- 2,206
- Thanks
- 226
Thanked 397 Times in 340 Posts 
Stunning stuff! I'm truly jealous!
My pegs need a good strip & re paint, the edges are going & one has peeling on the lovely, lovely R!
tsk!
Nice tho, good project to cover!
roll on the tiebars!
You think I know **** nothing! But let me tell you I know **** all!
-
Wednesday 24th September 2008, 00:15 #28Trader
No Longer a trader.
- Join Date
- Aug 2004
- Location
- Sunning it up in Chorley
- Posts
- 12,660
- Thanks
- 2,980
Thanked 2,222 Times in 1,791 PostsGlad to see you got them finished, they look great. In the end it's not about how much it's cost, it's the fact that you've learned a new skill that you can use again if the need arrises.
http://www.airbrushartists.org/Gal72..._s_Gallery.asp
Currently rocking Volvo's finest V70R 2WD Manual
Previous cars:
1996 855 T5 (Ex Police),1996 854 T5,1996 855 T5,1995 855 Black T-5R,1996 960,1997 855 R
-
Thursday 25th September 2008, 15:42 #29Senior Member
No replacement for
displacement!
- Join Date
- Mar 2005
- Location
- Bristol
- Posts
- 1,537
- Thanks
- 35
Thanked 269 Times in 206 Posts
Posted some piccies on this thread:<CLICK>
Hope my write up will be useful to someone in the future.
Nebula refurb... DONE.
-
Thursday 25th September 2008, 16:06 #30Senior Member
Casual poster 15 years on!
- Join Date
- Oct 2004
- Location
- Derbyshire
- Posts
- 3,573
- Thanks
- 100
Thanked 192 Times in 160 PostsThe wheels look fantastic, and look even better on!
My TWITTER username
-
Thursday 25th September 2008, 16:38 #31Senior Member
This user has no status
- Join Date
- Jul 2008
- Location
- Edinburgh
- Posts
- 1,352
- Thanks
- 411
Thanked 194 Times in 163 Postswhat murphy said!! - they look very nice and really suit your car!! - you should be very proud! - job well done! Originally Posted by Murphy
1998 BMW Z3 2.8 Roadster
-
Thursday 25th September 2008, 19:20 #32Senior Member
This user has no status
- Join Date
- Aug 2004
- Location
- Midlands UK
- Posts
- 3,706
- Thanks
- 374
Thanked 678 Times in 255 PostsHave been silently following this, top job with class help.
Nice work lads
-
Thursday 25th September 2008, 20:38 #33Senior Member
This user has no status
- Join Date
- Jun 2005
- Location
- Glasgow area...
- Posts
- 2,206
- Thanks
- 226
Thanked 397 Times in 340 Posts
Man, they look Awesome on!
I'm even more jealous now!
Yeah, I'm trying to get some Orestes to replace my pegs. 17's would be the better choice for handling/ride.
You think I know **** nothing! But let me tell you I know **** all!
-
Friday 19th July 2013, 07:24 #34Trader
This user has no status
- Join Date
- Nov 2010
- Location
- chester le street
- Posts
- 6,128
- Thanks
- 969
Thanked 1,398 Times in 1,121 Postsnice job.
s60 2.4 t5 eibach springs,up rated rear anti roll bar, poly bushed wishbones, poly lower engine mount, fmic, bmc air filter, 3" decat, 2.5" stainless exhaust,hlm remap 328bhp,
-
Friday 19th July 2013, 10:09 #35Driving Miss Daisy
This user has no status
- Join Date
- Feb 2012
- Location
- West London
- Posts
- 10,942
- Thanks
- 2,909
Thanked 4,171 Times in 2,943 PostsYou must be bored, looking through 5 year old threads lol Originally Posted by graemewelch
The Relentless Pursuit Of Perfection
-
Friday 19th July 2013, 10:51 #36Trader
This user has no status
- Join Date
- Nov 2010
- Location
- chester le street
- Posts
- 6,128
- Thanks
- 969
Thanked 1,398 Times in 1,121 Postsim very bord. but theres a good reason why i found this. im going to get some genuine nevs and refurb them. tell me this isnt volvo porn at its best Originally Posted by V70 Graham

going to paint them in volvo 177 grey with polished lips60 2.4 t5 eibach springs,up rated rear anti roll bar, poly bushed wishbones, poly lower engine mount, fmic, bmc air filter, 3" decat, 2.5" stainless exhaust,hlm remap 328bhp,
-
The Following User Says Thank You to graemewelch For This Useful Post:
Tomcat (Friday 19th July 2013)
-
Friday 19th July 2013, 10:55 #37Driving Miss Daisy
This user has no status
- Join Date
- Feb 2012
- Location
- West London
- Posts
- 10,942
- Thanks
- 2,909
Thanked 4,171 Times in 2,943 PostsVery nice, always been a fan of the Nebs, just didn't fancy cleaning them !
The Relentless Pursuit Of Perfection
-
Friday 19th July 2013, 11:01 #38Trader
This user has no status
- Join Date
- Nov 2010
- Location
- chester le street
- Posts
- 6,128
- Thanks
- 969
Thanked 1,398 Times in 1,121 Postswolf decon gel. its amazing stuff. £10 a ltr delivered. makes cleaning so easy
s60 2.4 t5 eibach springs,up rated rear anti roll bar, poly bushed wishbones, poly lower engine mount, fmic, bmc air filter, 3" decat, 2.5" stainless exhaust,hlm remap 328bhp,
-
Friday 19th July 2013, 16:54 #39Cookie Monster
its getting there
- Join Date
- Jun 2011
- Location
- east london
- Posts
- 2,602
- Thanks
- 1,820
Thanked 813 Times in 601 Poststhey look top draw mate well done
full respray..plenty of body mods..comets..ray cat back noise pipe..decat and wrapped downpipe..me7 exhaust manifold..3" throttle body with ported inlet manifold..blue injectors..adjustable fuel reg..reverse intercooler pipework..19t..open cone air filter..255 fuel pump..m-r-p short shift..boost gauge..unknown remap..adjustable suspension..lightweight crank pulley..n/a cams..stripped out interior..and a heavy right foot
-
Friday 19th July 2013, 18:38 #40Senior Member
This user has no status
- Join Date
- Jul 2012
- Location
- stonehaven
- Posts
- 102
- Thanks
- 0
Thanked 4 Times in 4 PostsI got the same wheels on my s60 t5 and I am going for a graphite gray with red flakes throught it

 Reply With Quote


 2011 Volvo 850R
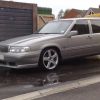 My 960
 2008 Suzuki GS500f
 Jurgen

 1995 Volvo 850 T5R
 1998 Volvo V70 T5 SE


Thread Information
Users Browsing this Thread
There are currently 1 users browsing this thread. (0 members and 1 guests)
 Posting Permissions

Bookmarks